English
13
Trigger Finger • User Guide
Setting Up a Combination Spread
While spreading locked velocities across all of the pads provides a way to program and play with exact velocities, sometimes it is unnecessary to use all 16 pads for
this. After all, you may only be using 4 of the 16 velocities in your song, so why not use the unused pads for other sounds? The fact that each pad in the Trigger Finger
can be programmed individually allows you to create any sort of mapping you want, even something more complex like Preset 4, whose map is shown below.
Here, each pad has individual note and Velocity Lock assignments. This allows you to play with the precision of the spread mode while having access to
more than one sound. You can, of course, assign any sound to a pad—this is merely an example.
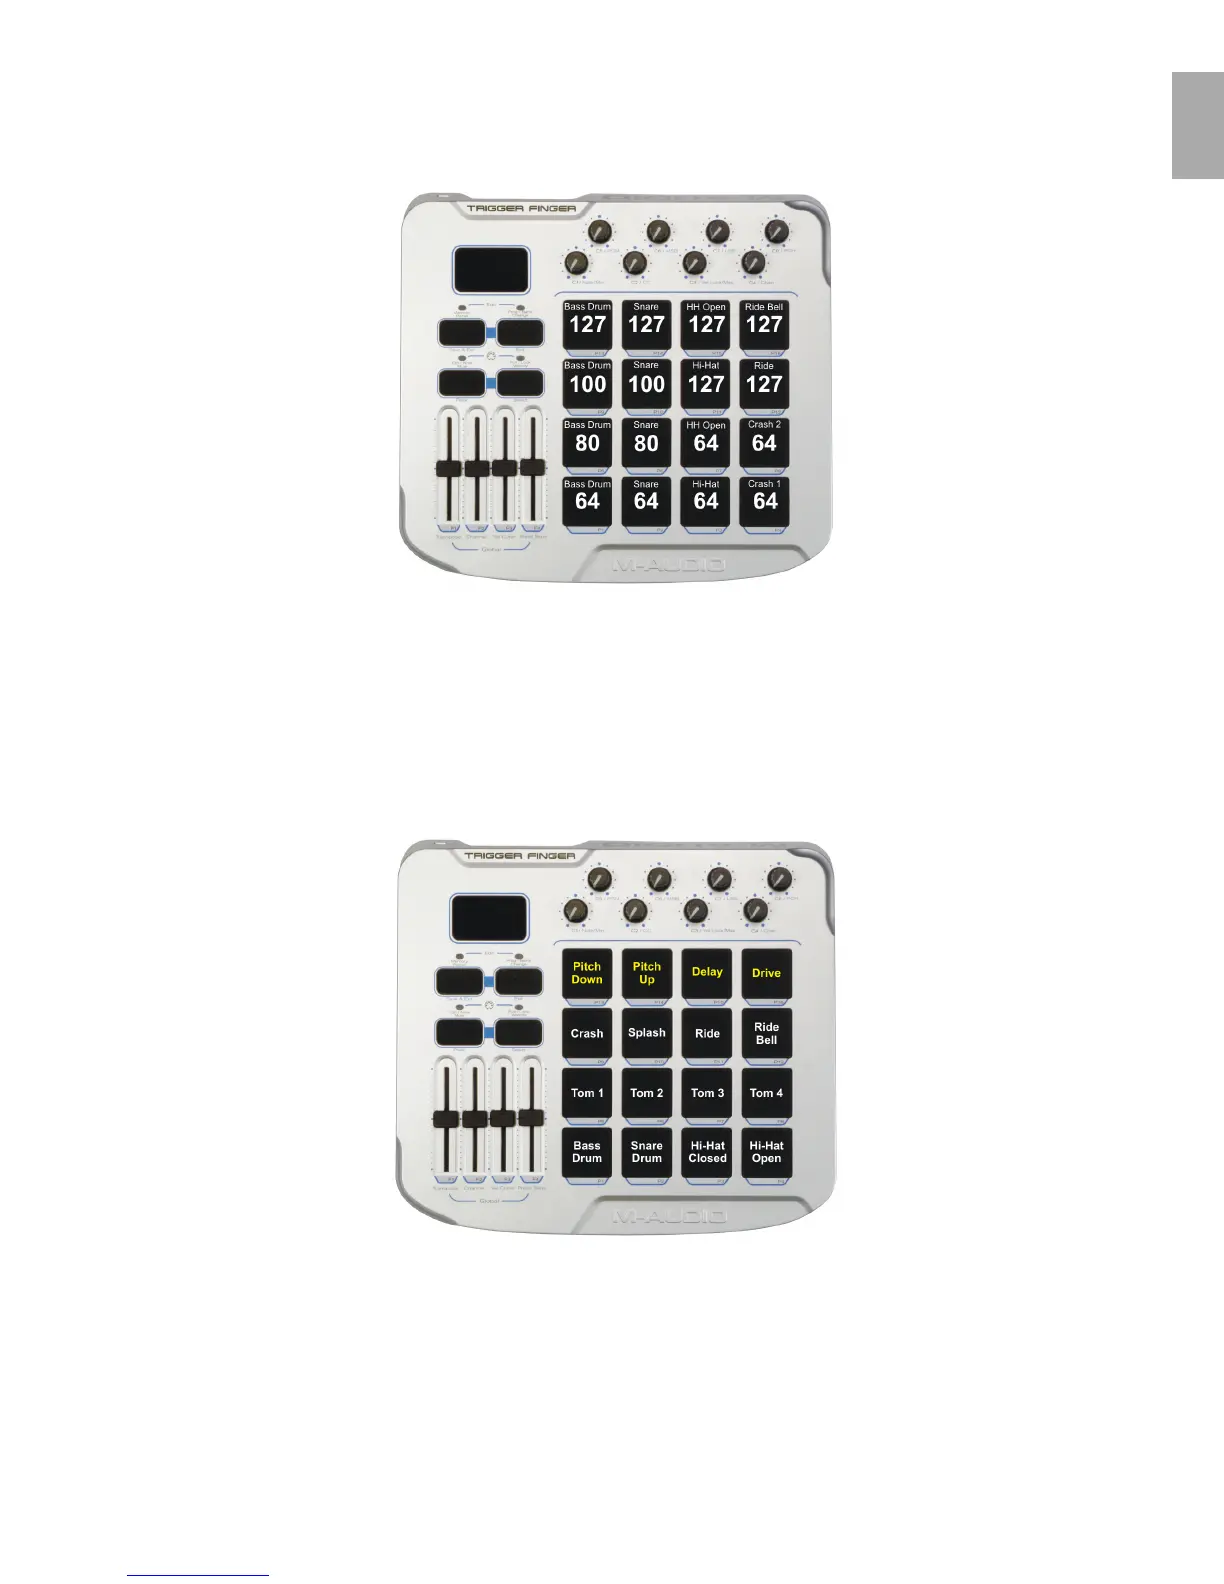
Using the Note Off Assignment
When using Enigma to program the Trigger Finger, you will have access to more features than you would if you just used Edit Mode on the unit itself. One trick that
will be available to you is the ability to assign no MIDI note to a pad, just leaving its pressure control active. In the example map below, the top 4 pads do not transmit
MIDI notes. These pads only output MIDI control values based on pressure. Using this setup, you can play the drums as normal on the bottom 12 pads. However,
applying pressure to pad 13 or 14 will perform a pitch bend up or down, respectively (the harder the pad is pressed, the more the pitch is bent). Pressing on pad 15
will control the reverb send for the instrument. The whole drum kit can also be fed through an effect in some music applications—in this case, pad 16 increases the
drive of a distortion effect. Pressing on the pad will destroy the sound of the other pads, which can be a great performance trick.
The yellow labels indicate pads that are not transmitting MIDI note data—they’re only sending MIDI controller messages. These messages are being use
to control the pitch of the kit, the reverb send, and the drive of a distortion plug-in.