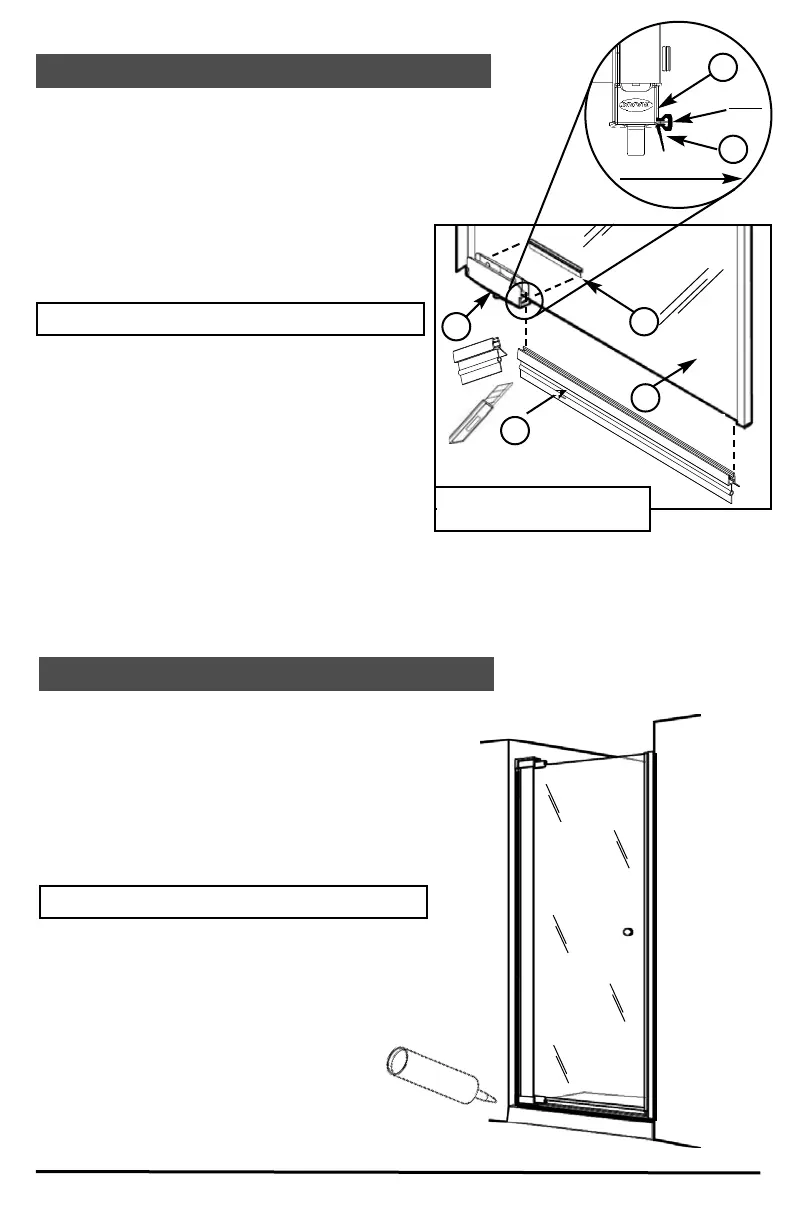
ÉTAPE 11 - APPLICATION DU SILICONE
I. Ajoutez du silicone à l’extérieur de la douche.
Enlevez l’excédant.
(Fig. U)
II. Laissez sécher le silicone 24 heures avant utilisation.
STEP 11 - SILICONE APPLICATION
I. Add a thin bead of silicone on the outside of the
shower door. Remove excess silicone. (Fig.U)
II. Let silicone dry for 24 hours before using.
Fig. U
SILICONE
SILICONE
ÉTAPE 11 - INSTALLATION DES JOINTS D’ÉTANCHÉITÉ
I. Insérez le déflecteur (M) sur le bas de la porte (A).
Coupez l’excédent.
(Fig. T)
II. Insérez la garde d’éclaboussure (CC) sur la
charnière inférieure (H ou I). (Fig. S)
STEP 11 - GASKETS INSTALLATION
I. Insert drip shield (M) onto bottom of door panel (A).
Cut excess if necessary. (Fig. T)
II. Insert the glass clamp splash guard (CC) onto the
bottom glass clamp (H or I). (Fig. S)
10049321-060301(kleara 6mm single pivot).qxp 7/20/2006 2:49 PM Page 14
CC
Vue extérieure de la douche /
View outside Shower
Lèvre
Lip
Fig. S
H/I
CC
A
H/I
Intérieur Douche
Inside Shower
Fig. T
M
# 10049321-090804
14