Do you have a question about the MAAX KLEARA 6MM PIVOT and is the answer not in the manual?
List of tools and materials needed for installation.
Advice for installing shower doors on prefabricated stalls using wood framing.
Ensuring a silicone joint between walls and the plastic base before installation.
Determining door direction and marking sill location on the stall's center line.
Measuring door opening and cutting the sill to the correct size.
Applying silicone and securing the sill with masking tape.
Inserting pivot retainers and U-channel onto the side glass panel.
Tightening set screws against the side glass panel using the provided Allen key.
Ensuring wood structure behind wall for secure mounting of wall jamb.
Inserting pivot retainer on sill and nylon bushing into pin retainer.
Levelling side panel and marking hole locations for pivot retainers.
Partially removing adhesive tape film from U-channel for attachment.
Pulling down adhesive tape film to secure the U-channel to the wall.
Inserting and trimming U-channel filler between panels.
Installing gasket on door panel and assembling the door knob.
Removing pin retainer and preparing pins/bushings for installation.
Inserting pins into bushings and locking the door panel with pin retainer.
Ensuring wall structure and aligning wall jamb with sill.
Levelling wall jamb vertically and marking hole locations.
Drilling holes and securing the wall jamb in place using screws.
Levelling door and inserting expanding jamb into wall jamb.
Adjusting expanding jamb for a 1/16" gap between it and the stricker.
Securing the expanding jamb with three screws.
Installing drip shield on door panel and splash guard on glass clamp.
Applying silicone sealant to the outside of the shower door and removing excess.
Allowing silicone sealant to dry for 24 hours before use.
Using mild liquid cleaners and avoiding abrasive cleaners or harsh chemicals.
Removing dust with a damp cloth and stains with rubbing alcohol or polish.
Warranty coverage for defects in workmanship and materials for 10 years.
Exclusions from warranty coverage, including misuse and improper installation.
Recommendation for professional installation to prevent injury or damage.
Disclaimer of liability for personal injury, death, or consequential damages.
Procedure for obtaining warranty service from MAAX.
Exclusions from warranty coverage, including misuse and improper installation.
Recommendation for professional installation to prevent injury or damage.
Disclaimer of liability for personal injury, death, or consequential damages.
Procedure for obtaining warranty service from MAAX.
Contact details for technical services in Canada and the United States.
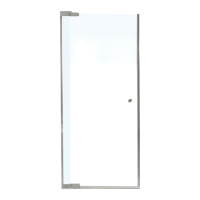
| Product Type | Shower Door |
|---|---|
| Door Configuration | Pivot |
| Glass Thickness | 6mm |
| Finish | Chrome |
| Material | Glass |
| Application | Bathroom |