# 10049321-090804
13
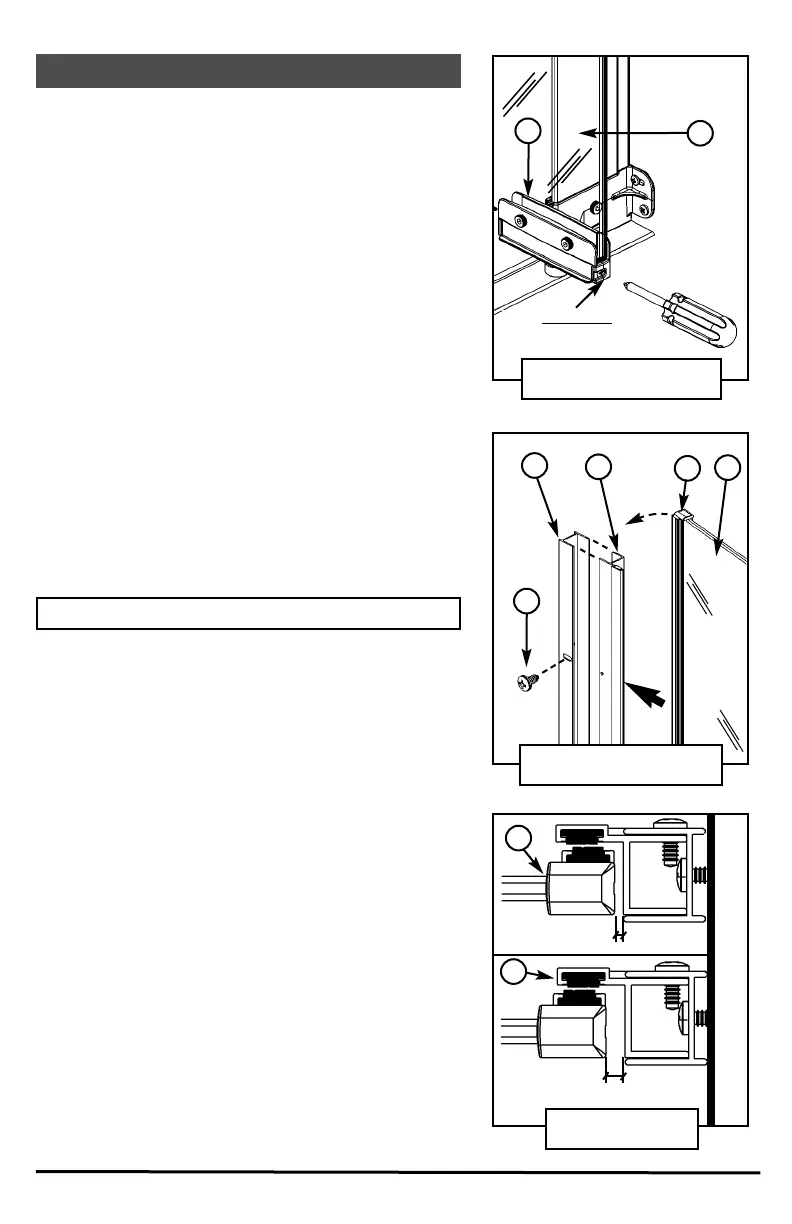
ÉTAPE 10 - AJUSTEMENT DE LA PORTE
H/I
A
Ajustement
Adjustment
I. Nivelez la porte (A) à l’aide des vis d’ajustement des
charnières de verre inférieures et supérieures (H ou I).
(Fig. O)
II. Insérez le montant ajustable (E) à l’intérieur du montant
mural (D). (Fig.P)
III. Fermez la porte (A) et ajustez le montant ajustable (E)
de façon à ce qu’il soit parallèle au montant de la porte
(C), en laissant un espace entre les deux (au minimum
de 1/16’’(1,6mm) et au maximum de 1/4” (6,5mm).
(Fig. P & Q)
IV. Fixez le montant ajustable (E) à l’aide de trois vis (BB).
(Fig. P)
STEP 10 - DOOR ADJUSTMENT
I. Level the door (A) using the adjustment screws on the
top and bottom glass clamps (H or I). (Fig. O)
II. Insert the expanding jamb (E) inside the wall jamb (D).
(Fig.P)
III. Close the door (A) and adjust the expanding jamb (E),
leaving a 1/16” gap between the expanding jamb (E)
and the stricker (C) (a minimum of 1/16” (1,6mm) and a
maximum of 1/4” (6,5mm). (Fig. P & Q)
IV. Fasten the expanding jamb (E) with three screws (BB).
(Fig. P)
C
E
BB
Mur / Wall
Minimum 1/16’’
(1,6mm)
Maximum 1/4’’
(6,5 mm)
Fig. O
Fig. P
C
E
A
Vue intérieure de la douche /
View Inside Shower
Vue intérieure de la douche /
View Inside Shower
Fig. Q
Vue de Haut /
Top View
D
10049321-060301(kleara 6mm single pivot).qxp 7/20/2006 2:49 PM Page 13