12
OVEN INSTALLATION
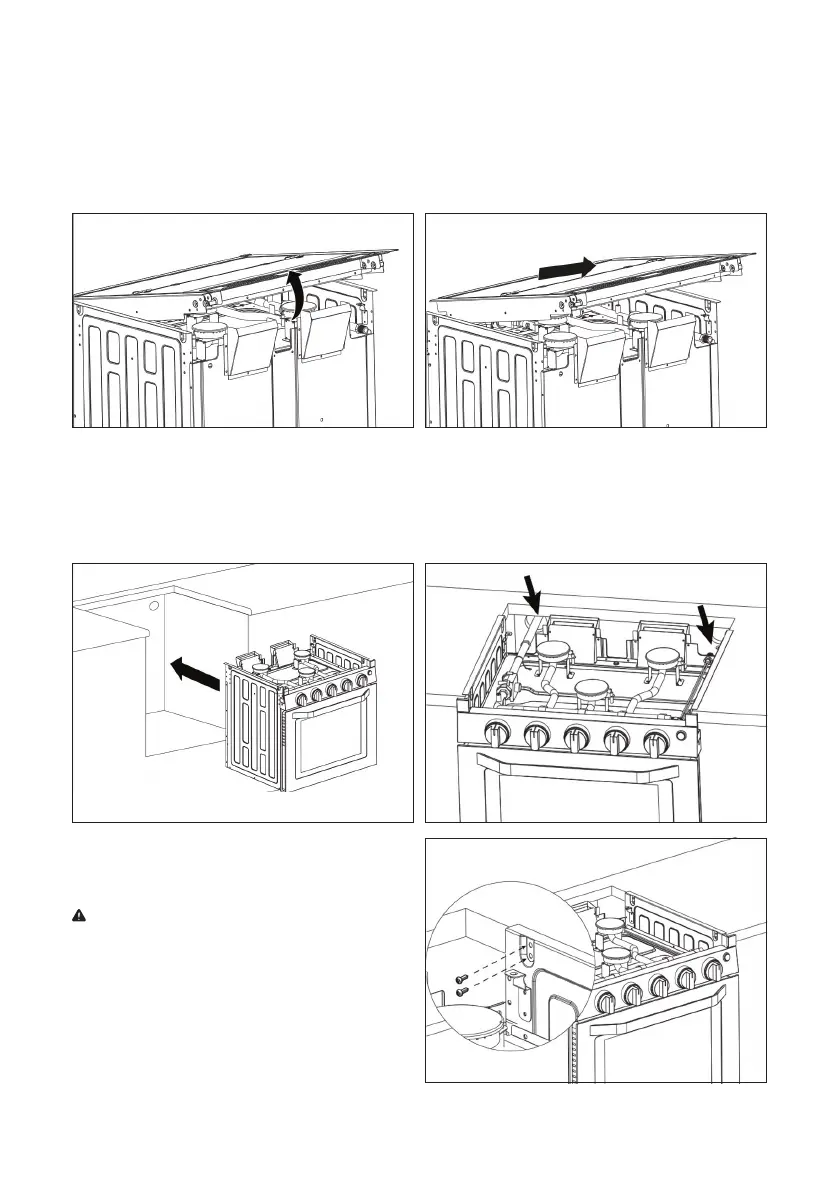
When the cabinet has been prepared according to the dimensions given and the gas line is in place�
1� Remove the range oven from its packaging�
2� Hold the baffle of the top glass cover and pull it upwards to release it from the oven� (Figure 5) Push a little
and lift up to remove the top glass cover from the oven� (Figure 6)
Figure 6
Figure 8Figure 7
Figure 5
3� Slide the range oven into the cabinet opening� Verify the oven is level from side to side and front to rear�
(Figure 7)
4� Connect a propane supply line to the range oven in the upper left rear corner of the cabinet� Connect a
positive 12V power supply wire and a 12V ground wire to the appliance in the upper right rear corner of the
cabinet� (Figure 8)
5� Use four tapping screws on both left and right
to secure the range oven onto the cabinet�
(Figure 9)
IMPORTANT: Make sure the gas supply pipe
cannot contact any moving parts after installation�
Leave adequate space for the gas supply pipe in case
it is bent or damaged after installation� Use propane
gas only for this appliance�
Figure 9