17
Oven Door Exterior
• It is recommended to use glass cleaner and paper towel or non-abrasive plastic scrubbing pad.
• It is recommended to apply glass cleaner to soft cloth or sponge.
• DO NOT apply directly to panel.
Grates and End Caps
• DO NOT clean until the grates and caps have cooled.
• DO NOT reassemble grates and caps if they are still wet.
• To avoid chipping, DO NOT bang grates and caps against each other or hard surfaces.
• It is recommended to utilize mildly abrasive cleaner.
• It is recommended to utilize a non-abrasive cloth or plastic scrubbing pad.
Burner Spreader
• It is recommended to frequently wash the burner spreader with boiling water and detergent to remove any
deposit build up. This will maintain steady flame output.
• ALWAYS dry the burner spreader thoroughly before re-installing.
Control Panel
• DO NOT spray glass cleaner on glass control panel.
• DO NOT use abrasive cleaners, steel wool pads, and gritty wash cloths. Damage may occur.
• Apply glass cleaner to soft cloth or sponge then begin cleaning glass panel.
Oven Cavity
NOTE: At high temperatures, foods react with porcelain, so staining, etching, pitting or faint white spots can
result.
• DO NOT begin cleaning the oven cavity until it has fully cooled.
• DO NOT use oven cleaners.
• It is recommended to use mild detergent and warm water.
• It is recommended to use soft cloth or non-abrasive plastic scrubbing pad.
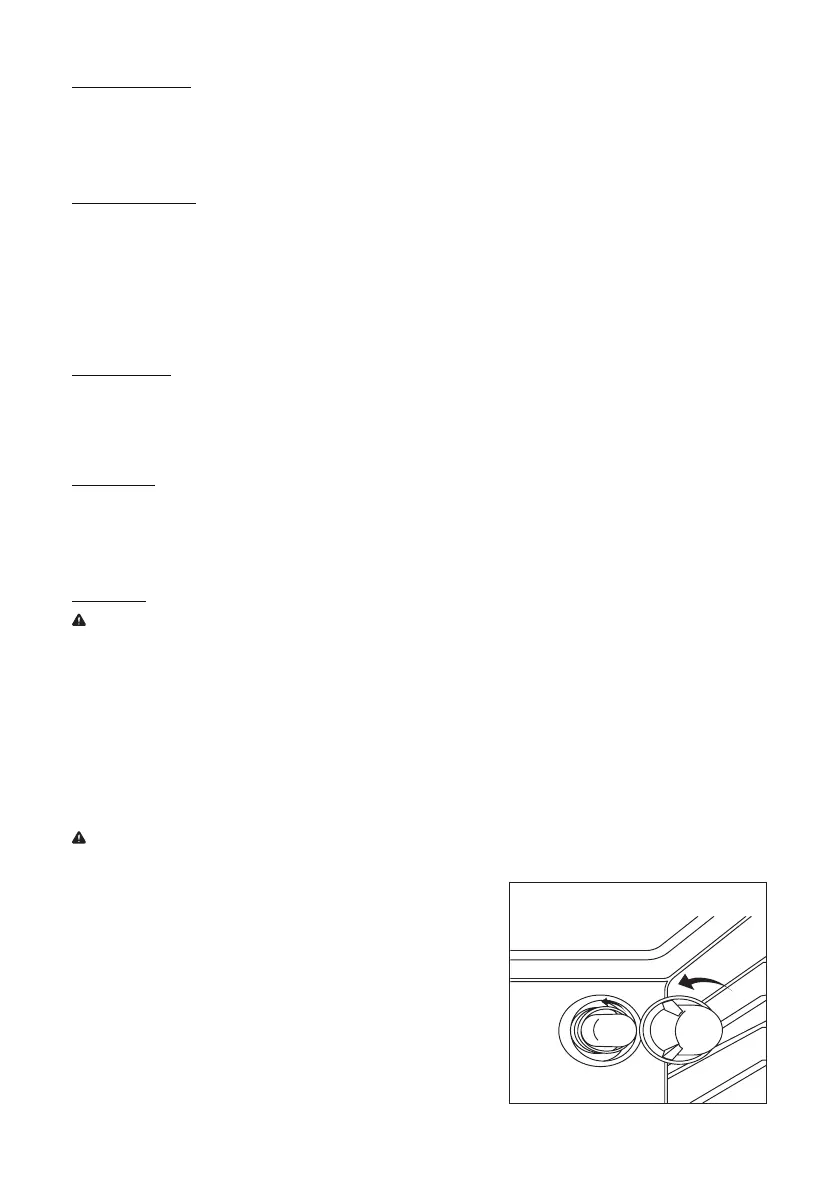
OVEN LIGHT REPLACEMENT
CAUTION: Before replacing, make sure the oven and cooktop are cool and all control knobs are to the OFF
position.
Figure 15
1. Remove the light cover by rotating it counter-clockwise. (Refer
to Figure 15.)
2. Then remove the light bulb by rotating it counter-clockwise.
3. Replace the old light bulb with a new oven-safe light bulb with
the following characteristics.
• Light bulb is a standard 25 – Watt (G9) appliance bulb
• Voltage: 120V
• Wattage: 25W
4. Re-install light cover by rotating it clockwise.