EN
Changing PIN code
PIN code is set as the factory default code (11). PIN code must be inserted to enter Valet
mode after turning key on/off 3 times if you have already selected “PIN code ON” from
optional table.
Procedures of change PIN code from the factory default code 11 to owner’s own code
1. System is disarmed.
2. Maintain the conditions of the trunk and the door being opened.
3. Turn the key on/off 3 times. Lights will flash once. Siren makes a long beep.
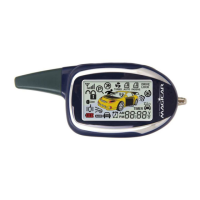
4. Push the button on RPS as many times, as your first number (1-9) is. Intervals
between the click/pushes must not be longer than 1.5 sec.
5. Siren beeps once. Lights will flash once.
6. Push the button on RPS as many times, as your second number (1-9) is.
7. Siren beeps twice. Lights will flash twice.
8. Press button IV on remote for authentication. Siren beeps three times and lights will
flash three times.
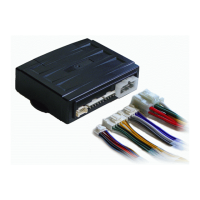
XI. WIRING DIAGRAM FOR DOOR LOCKING SYSTEM
Fig.1 Original built-in central power lock with a switch
inside the doors. A motor at the control level are
required.
Fig.2 Original central power lock & electric power lock
switch inside the front doors..
16
Fig.3 Original built-in central power lock & using
compressor to control the switch. Note: Active time 4
sec.
Air-compressor
Unlock
Lock
Electric motor switch
Main line
NC1
NC2
COM1
COM2
NO2
ellow/black
yellow
ellow/white
reen
black
reen
reen/white
CN3
+12V
Unlock
Lock
yellow/black
ellow
ellow/white
green
black
reen/white
reen
NC1
NC2
COM1
COM2
NO2
CN3
CN3
Front door switch
ellow/black
ellow
ellow/white
green/black
reen
white
reen
NC1
NC2
COM1
COM2
NO2
Unlock
Lock
+12V
Contact - locked
Contact - unlocked
yellow/black
ellow
yellow/white
reen/black
reen/white
reen
NC1
NC2
COM1
COM2
NO2
Original built-in control
unit.
Fig.4 Original built-in central power lock
Locked
Ground
Unlocked
CN3