Do you have a question about the MakerBot Replicator 2 Extruder and is the answer not in the manual?
Unload filament, turn off, remove guide tube, and unplug cables before starting the replacement.
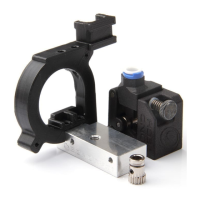
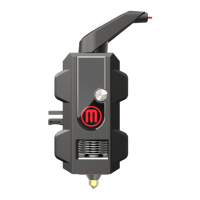
Gently pull the active cooling duct away from the nozzle to allow it to hang freely.
Use a 2.5 mm hex wrench to unscrew the two bolts holding the extruder to the carriage.
Carefully unclip the zip tie and other clips holding the extruder cable to the Replicator 2.
Loosen bolts at lower corners of the front extruder fan to remove the fan guard, fan, spacers, and heat sink.
Unplug the motor cable connector and set the motor assembly aside after removing the fan assembly.
Locate the two white heater wires and unplug the connector next to the active cooling fan.
Loosen the two black bolts attaching the bar mount to the active cooling assembly.
Snip the zip tie securing the extruder cable and remove the black wire wrapping from the cable.
Flip the MakerBot Replicator 2 onto its left side so the bottom of the machine faces you.
Use the 2.5 mm hex wrench to remove the eight M3x6 bolts holding the cover.
Release the red and yellow thermocouple leads from the Mightyboard terminals.
Connect the red and yellow leads of the new thermocouple to the correct terminals on the Mightyboard.
Secure the electronics bay cover using the eight short bolts and the 2.5 mm hex wrench.
Carefully cut tape, remove the old thermocouple from the extruder cable bundle, and add the new one.
Slide the old thermocouple out through the active cooling fan mount to detach the bar mount.
Align the new bar mount with the active cooling fan assembly and secure with two bolts.
Connect the black plastic connector of the two white heater wires to the active cooling fan assembly.
Slide the fan assembly bolts into the holes at the front of the bar mount and secure.
Slide the motor assembly under the extruder cap and align holes to secure with fan assembly bolts.
Connect the white plastic cable connector from the extruder cable to the top of the extruder motor.
Wrap the black wire wrapping around the entire length of the bundle of extruder wires.
Position and tightly zip-tie the wrapped extruder cable to the extruder cap.
Seat the extruder on the extruder carriage and secure it with the two remaining bolts.
Snap the active cooling duct back into its place after reattaching the extruder.
Gently push the extruder cable all the way into each of the clips at the back of the Replicator 2.
| Extruder Type | Single |
|---|---|
| Nozzle Diameter | 0.4 mm |
| Filament Diameter | 1.75 mm |
| Max Extruder Temperature | 230 °C |
| Material | PLA, ABS |