Do you have a question about the MakerBot Replicator Mini and is the answer not in the manual?
Pull door downward and away from the Mini's body.
Apply pressure from inside the printer to pop out the windows.
Pull the filament guide tube upward.
Manually rotate z-axis threaded rod clockwise to raise build plate holder.
Remove three Torx bolts and lift floor plate from printer.
Unplug the z-wire from the Motor Wire Harness.
Remove four Torx bolts using a T20 driver from the back of the base.
Unclip black clips on outer back panel using a 2.0mm hex driver.
Lean Z-stage assembly forward and pull up to remove.
Remove three Torx bolts from the rear left side of the Mini.
Unclip connectors and disconnect twenty-pin connector from Brooklyn PCB.
Pull Power Supply toward you to remove it out of the slot.
Remove eight flathead bolts from back panel edges and one tension bolt.
Remove Torx bolts from side panels, inside base, and ground wire.
Remove four Torx bolts from upper inside panels.
Unplug Camera Wire and Ribbon Cable from the Queens PCB.
Loosen two button head bolts on the left Gantry Motor Mount.
Remove the Gantry Belts from the Gantry Pulley.
Remove two Torx bolts using a T10 driver from the Extruder Carriage Assembly.
Pull rear panel of Housing Assembly upwards to remove.
Remove the FFC from the Brooklyn PCB.
Unplug the Motor Wire Harness from the Brooklyn PCB.
Unplug the 10-pin Ribbon Cable from the Brooklyn PCB.
Unplug the Wi-Fi Antenna from the Brooklyn PCB.
Unplug the 20-pin Power Supply Cable.
Lift up the Brooklyn PCB to remove.
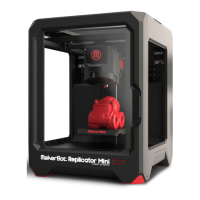
| Build Volume | 100 x 100 x 125 mm |
|---|---|
| Layer Resolution | 200 microns |
| Filament Diameter | 1.75 mm |
| Nozzle Diameter | 0.4 mm |
| Print Technology | Fused Deposition Modeling (FDM) |
| Supported Materials | PLA |
| Software | MakerBot Desktop |
| Dimensions | 295 x 310 x 381 mm |
| Connectivity | USB, Wi-Fi |
| Weight | 8 kg |