Do you have a question about the Makita 1806B and is the answer not in the manual?
Critical safety advice to read and understand before using the tool.
Guidelines for safe workspace and proper electrical connections.
Advice on alertness, attire, and avoiding hazards during operation.
Instructions for safe operation, maintenance, and accessory use.
Essential safety measures during planer operation and setup.
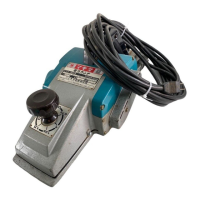
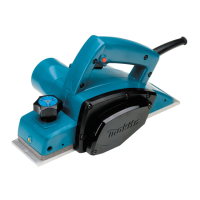
The Makita 1806B Power Planer is a robust and efficient tool designed for various woodworking tasks, particularly for smoothing and shaping wood surfaces. This manual provides comprehensive instructions for its safe operation, assembly, maintenance, and general care, ensuring optimal performance and longevity.
The primary function of the Makita 1806B Power Planer is to remove material from wood surfaces, creating a smooth and even finish. It is equipped with a powerful motor that drives a rotating drum fitted with sharp planer blades. As the tool is moved across the workpiece, these blades shave off thin layers of wood, allowing for precise material removal and surface preparation. The planer features a depth adjustment knob, which enables the user to control the cutting depth, ranging from rough cutting to fine finishing. This adjustability makes it suitable for a wide array of planing applications, from dimensioning lumber to fitting doors and windows. The tool is designed with double insulation, enhancing user safety by eliminating the need for a grounded power supply system.
Operating the Makita 1806B Power Planer requires adherence to specific procedures to ensure both safety and effective results.
Adjusting Depth of Cut: The depth of cut is easily adjusted by turning the knob located on the front of the tool. This allows for quick and precise changes to the planing depth, accommodating different material removal requirements. For rough cutting, a greater depth can be set, while for a finer finish, the depth of cut should be reduced, and the tool advanced more slowly.
Switch Action: The tool is equipped with a switch trigger for activation. To start the planer, simply pull the switch trigger. Releasing the trigger will stop the tool. For continuous operation, the switch trigger can be pulled and then locked into the "ON" position using the lock button. To stop the tool from the locked position, pull the switch trigger fully and then release it. Before plugging in the tool, it is crucial to verify that the switch trigger actuates properly and returns to the "OFF" position when released. When locking the tool in the "ON" position, always maintain a firm grasp on the tool for control.
Planing Operation: To begin planing, rest the tool's front base flat upon the workpiece surface, ensuring the blades do not make contact. Switch on the tool and wait until the blades reach full speed. Then, gently move the tool forward. Apply pressure on the front of the tool at the start of planing and at the back at the end of planing. This technique helps maintain an even cut. Planing can be made easier by inclining the workpiece in a stationary fashion, allowing for a somewhat downhill planing motion. The speed and depth of cut directly influence the quality of the finish. The power planer is designed to cut at a speed that prevents chip jamming. For optimal results, especially for a good finish, reduce the depth of cut and advance the tool more slowly.
Planer Blade Setting: Correct blade setting is paramount for achieving a smooth and even planing surface. The blades must be mounted so that their cutting edge is absolutely level and parallel to the surface of the rear base. Improper blade setting can lead to rough and uneven surfaces, nicks, or gouging. The manual provides visual examples of correct and incorrect blade settings to guide users.
Safety Guidelines: Several specific safety rules are emphasized for planer use. These include keeping rags, cloth, cord, and string away from the work area to prevent entanglement. It is essential to inspect workpieces for nails and remove them before operation to avoid damage to the blades. Only sharp blades should be used, and they must be handled with extreme care. The blade installation bolts must be securely tightened before operation. Users should hold the tool firmly with both hands and keep hands away from rotating parts. Before using the tool on an actual workpiece, it is recommended to let it run for a while to check for vibration or wobbling, which could indicate poor installation or an unbalanced blade. Ensure the blade is not contacting the workpiece before turning on the switch, and wait until the blade attains full speed before cutting. Always keep at least 200 mm (8") away from the tool at all times. Switch off the tool and wait for the blades to come to a complete stop before making any adjustments. Never stick fingers into the chip chute; if it jams, clean it out with a stick. Do not leave the tool running unattended. When setting the planer aside, switch it off and place it with the front base up on a wooden block to prevent the blades from contacting anything. Always change both blades or covers on the drum simultaneously to prevent imbalance, which can cause vibration and shorten tool life. Wait for complete run-down before putting the tool aside. Only use Makita blades specified in this manual. Be aware that some materials contain toxic chemicals, so take precautions to prevent dust inhalation and skin contact, following material supplier safety data.
Regular maintenance is crucial for the continued safe and efficient operation of the Makita 1806B Power Planer. Always ensure the tool is switched off and unplugged before performing any inspection or maintenance tasks.
Removing or Installing Planer Blades: To remove the blades, unscrew the five installation bolts on the drum with the hex wrench. The drum cover will come off with the blades. When installing new blades, first clean out any chips or foreign matter from the drum or blades. It is critical to use blades of the same dimensions and weight to avoid drum oscillation or vibration. Each blade has two adjusting screws, and the notch in the blade should fit over the head of the adjusting screw. After fitting the drum cover, secure all installation bolts finger-tight. Turn the drum until the blade edge is centered between the front and rear bases. Use a triangular rule placed flat on the rear base and extending over the blade edge to adjust the blade protrusion. The protrusion should be uniform across the entire width of the blade edge, with the triangular rule flush against it. After adjusting both blades, tighten all installation bolts evenly and alternately with the wrench, then secure the adjusting screws fully. Always handle blades carefully, preferably with gloves or rags, and use only the Makita wrench provided for installation to prevent overtightening or insufficient tightening.
Sharpening the Planer Blades: To maintain optimal performance, keep the planer blades sharp. The sharpening holder assembly is used for this purpose. Loosen the two wing nuts on the holder and insert the blades (A) and (B) so they contact sides (C) and (D), then tighten the wing nuts. Immerse the dressing stone in water for 2 or 3 minutes before sharpening. Hold the holder so that both blades contact the dressing stone for simultaneous sharpening at the same angle.
Replacing Carbon Brushes: Regularly check and replace carbon brushes when they wear down to the limit mark. Keep the carbon brushes clean and ensure they can slip freely in their holders. Both carbon brushes should be replaced at the same time with identical carbon brushes. To replace them, use a screwdriver to remove the chip cover, then remove the brush holder caps. Take out the worn brushes, insert the new ones, and secure the brush holder caps.
General Maintenance: For product safety and reliability, all repairs, maintenance, or adjustments should be performed by Makita Authorized or Factory Service Centers, using only Makita replacement parts. This ensures the tool continues to meet safety standards and performs as intended.
| Input power | 1200 W |
|---|---|
| Power source | AC |
| Idle speed | 15000 RPM |
| Planning width (max) | 152.4 mm |
| Chip thickness (max) | 2 mm |
| Product color | Black, Green, Grey |
| Carrying case | Yes |
| Depth | 530 mm |
|---|---|
| Width | 240 mm |
| Height | 150 mm |
| Weight | 8981 g |