Do you have a question about the Makita 5057KB and is the answer not in the manual?
Instructions on keeping hands away from the blade and proper body positioning to avoid injury.
Safe handling of the tool, blade selection, and avoiding hazards.
Explanation of kickback and operator prevention methods.
Supporting large panels and using sharp, undamaged blades to prevent issues.
Ensuring adjustments are tight and taking caution with specific materials or cuts.
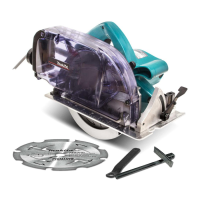
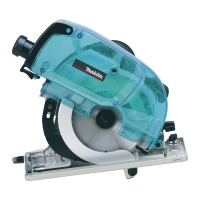
This document describes the Makita 5057KB Circular Saw with Dust Collection, a powerful tool designed for various cutting applications. The manual emphasizes safety, proper usage, and maintenance to ensure optimal performance and user protection.
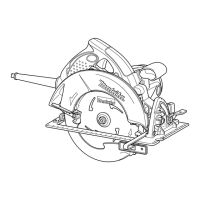
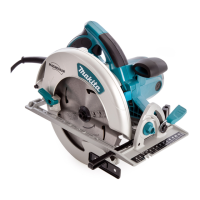
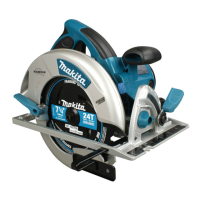
The Makita 5057KB is a circular saw primarily used for cutting wood and other materials. It features a dust collection system to help maintain a cleaner work environment by collecting dust and cut chips. The saw is equipped with a 185 mm (7-1/4") blade and is designed for both straight and bevel cuts. The tool's double insulation provides enhanced electrical safety.
The saw is designed for ease of use and control, featuring both a front grip and a rear handle for two-hand operation, ensuring a firm grip and better control during cutting.
Adjusting Depth of Cut: The depth of cut can be easily adjusted by loosening a lever on the depth guide and moving the base up or down. For cleaner and safer cuts, it is recommended to set the cut depth so that no more than one blade tooth projects below the workpiece, which helps reduce the potential for dangerous kickbacks. After adjustment, the lever must be securely tightened.
Bevel Cutting: The saw allows for bevel cuts from 0° to 45°. To set the desired angle, the lever on the bevel scale plate on the front of the base is loosened, the tool is tilted, and then the lever is securely tightened.
Sighting: For accurate straight cuts, the "A" position on the front of the base should be aligned with the cutting line. For 45° bevel cuts, the "B" position is used. The front of the base is graduated in inches, with the right edge of the notch serving as the zero point. The right side of the tool base also features a "0" graduation, indicating the blade edge position when the depth of cut is set at its deepest, useful for plunge cuts.
Dust Collection: The saw is equipped with a dust box to collect dust and chips. Users are advised to empty the dust box when it is about two-thirds full. This is done by pressing a lever to unlock the dust cap, opening it, and tipping the rear of the tool down. For even cleaner operations, the rubber cap can be removed from the dust cap, and a Makita vacuum cleaner hose can be connected.
Switch Action: The tool is started by pulling the switch trigger and stopped by releasing it. A crucial safety reminder is to always check that the switch trigger actuates properly and returns to the "OFF" position when released, before plugging in the tool.
Removing or Installing Saw Blade: When installing a new blade, it is essential to ensure the teeth are pointing up at the front of the tool. Only the Makita wrench should be used for installation or removal. To remove the blade, the clamping screws securing the dust box are first removed, followed by the dust box itself. The shaft lock is pressed to prevent blade rotation, and the hex bolt is loosened counterclockwise with the wrench. The hex bolt, outer flange, and blade can then be removed. Installation is the reverse process, with emphasis on securely tightening the hex bolt clockwise.
Operation: The tool should be held firmly with both hands (front grip and rear handle). The base is placed on the workpiece without the blade making contact. The tool is turned on, and once the blade reaches full speed, it is moved forward smoothly along the cutting line, keeping it flat on the workpiece surface. For clean cuts, a straight sawing line and uniform speed of advance are important. If the cut deviates, the user should release the switch, wait for the blade to stop, withdraw the tool, realign, and restart the cut. Eye protection is recommended to avoid injury from chips and wood dust.
Rip Fence (Guide Rule): A rip fence can be used for extra-accurate straight cuts and repeated cuts of uniform width. It slides snugly against the side of the workpiece and is secured with a screw on the front of the base.
Plunge Cuts (Pocket Cutting): For plunge cuts, the tool is tilted forward, resting the front of the base on the workpiece. The blade is aligned with the cutting line using the notch and graduation on the base. With a firm two-hand grip, the tool is switched on, and once full speed is reached, the retracting lever is pushed down with the thumb to retract the lower guard. As the blade enters the material, the lever is released. The tool is gradually lowered until the base rests flat, then advanced along the cutting line. After the cut, the switch trigger is released, and the blade is allowed to stop completely before withdrawal.
Regular maintenance is crucial for the tool's longevity, safety, and optimal performance.
General Safety: Before any adjustments, accessory changes, or storage, the tool must be disconnected from the power source to prevent accidental starting. Idle tools should be stored out of reach of children and untrained persons. Tools should be maintained with care, keeping cutting tools sharp and clean to prevent binding and ensure easier control. Any misalignment, binding, or breakage of parts should be addressed by qualified service personnel before use.
Lower Guard Check: Before each use, the lower guard must be checked for proper closing. It should move freely and close instantly without being clamped or tied open. If the saw is dropped, the guard should be inspected for bends. The retracting lever should not touch the tool housing. Any sluggish operation of the guard or spring due to damage, gummy deposits, or debris requires servicing.
Blade Cleaning: Dull or damaged blades should not be used as they can cause narrow kerfs, excessive friction, blade binding, and kickback. Blades should be kept sharp and clean. Gum and wood pitch hardened on blades can slow the saw and increase kickback potential. Blades should be removed from the tool and cleaned with gum and pitch remover, hot water, or kerosene (never gasoline).
Blade Depth and Bevel Adjustments: The locking levers for blade depth and bevel adjustments must be tight and secure before making a cut to prevent shifting, binding, and kickback.
Carbon Brushes: Carbon brushes should be removed and checked regularly. They need replacement when worn down to the limit mark. Brushes should be kept clean and free to slip in their holders. Both carbon brushes should be replaced simultaneously with identical carbon brushes. To replace, a screwdriver is used to remove the brush holder caps, the worn brushes are taken out, new ones inserted, and the caps secured.
Accuracy of 90° Cut: This adjustment is factory-set, but if it is off, the adjusting screw can be adjusted with a hex wrench while squaring the blade with the base using a triangular rule or try square.
Service and Replacement Parts: For product safety and reliability, all repairs, maintenance, or adjustments should be performed by Makita Authorized or Factory Service Centers using only Makita replacement parts.
The manual lists recommended accessories for the Makita 5057KB, emphasizing that only accessories or attachments specified in the manual should be used to avoid injury.
The manual strongly advises users to read and understand all instructions before using the tool and to save these instructions for future reference. It also includes a warning about dust created by power sanding, sawing, grinding, and drilling, which may contain chemicals known to cause cancer or reproductive harm, recommending work in well-ventilated areas with approved safety equipment like dust masks.
| Power Source | Corded Electric |
|---|---|
| Blade Diameter | 7-1/4 inches |
| No Load Speed | 5, 800 RPM |
| Weight | 10.1 lbs |
| Voltage | 120 V |
| Width | 9-1/2 inches |
| Bevel Capacity | 0 - 45 degrees |
| Arbor | 5/8 inch |