Do you have a question about the Makita DHP487 and is the answer not in the manual?
Details drilling limits for masonry, steel, wood, and fastening capacities for screws.
Lists no-load speed, blows per minute, overall length, rated voltage, and net weight.
Lists compatible battery cartridges and chargers, with a warning about using others.
Explains symbols, the tool's intended use, and its noise emission levels.
Specifies vibration emission values for concrete impact drilling and metal drilling modes.
States that the EC declaration of conformity is included as Annex A.
Provides comprehensive safety advice covering work environment, electrical precautions, PPE, and operator alertness.
Guidance on using the tool correctly, handling power disconnection, and secure storage.
Instructions for charging, using, storing, and handling battery packs to prevent hazards.
Emphasizes professional servicing and using only identical replacement parts for safety and reliability.
General safety advice for operating the tool, including ear protection, grip, and avoiding hot parts.
Specific precautions when using long drill bits, including speed, starting, and pressure.
Covers precautions for battery cartridge use, storage, shorting, temperature, and damage.
Provides advice on charging, discharging, and storing battery cartridges for optimal lifespan.
Step-by-step instructions on how to properly install and remove the battery cartridge.
Explains how to check the battery level using indicator lamps.
Details overload, overheat, and overdischarge protection systems that extend tool and battery life.
Describes how to operate the switch trigger, its speed control, and the function of the electric brake.
Instructions on how to use the front lamp and precautions regarding direct light exposure.
Explains how to change the direction of rotation using the reversing switch lever.
Details how to adjust the tool's speed using the speed change lever for different operations.
Guides on selecting between drilling, hammer drilling, and screwdriving modes.
Details the 20-level torque adjustment and provides a guide for screw size and graduation.
Instructions on how to insert and tighten or loosen drill bits and driver bits in the chuck.
Guidance on securely attaching the optional hook for temporarily hanging the tool.
Instructions for fitting and using the optional driver bit holder.
Steps for performing screwdriving, including torque adjustment and clutch engagement.
Guidelines for hammer drilling, including mode selection, drill bit type, and handling clogging.
Tips for effective drilling in wood, recommending wood drills with guide screws.
Precautions and techniques for drilling metal, including center-punching and using lubricants.
General advice on tool maintenance, emphasizing safety and professional servicing.
Lists recommended accessories and attachments for use with the tool.
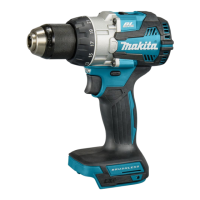
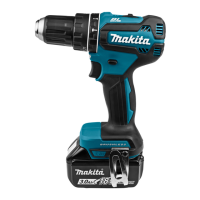
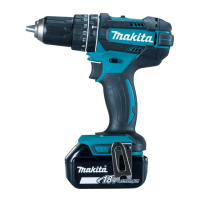
This document provides comprehensive instructions for the Makita Cordless Hammer Driver Drill DHP487, covering its functional description, usage features, and maintenance guidelines.
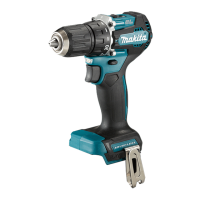
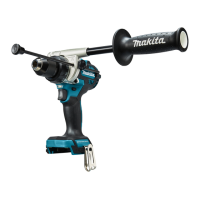
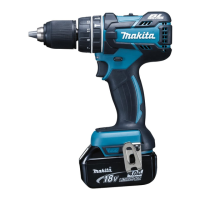
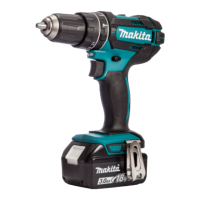
The Makita DHP487 is a versatile cordless hammer driver drill designed for various applications, including impact drilling in brick, brickwork, and masonry, as well as screw driving and drilling without impact in wood, metal, ceramic, and plastic.
Battery System: The tool operates on a D.C. 18V battery system. It is compatible with BL1815N, BL1820B, BL1830B, BL1840B, BL1850B, and BL1860B battery cartridges, and can be charged with DC18RC, DC18RD, DC18RE, DC18SD, DC18SE, DC18SF, and DC18SH chargers. Users are cautioned to only use specified battery cartridges and chargers to prevent injury or fire. The battery cartridge features indicator lamps and a check button to display the remaining capacity, allowing users to monitor battery life.
Protection Systems: The DHP487 incorporates a tool/battery protection system that automatically cuts off power to extend tool and battery life. This system activates under specific conditions:
Switch Action and Electric Brake: The tool is started by pulling the switch trigger, and speed is increased by applying more pressure. Releasing the trigger stops the tool. An electric brake ensures the tool stops quickly after the trigger is released. If the brake consistently fails, servicing is required.
Front Lamp: A front lamp illuminates when the switch trigger is pulled, staying on for approximately 10 seconds after release. This feature aids visibility in dimly lit areas. Users are advised not to look directly into the light source.
Reversing Switch: The tool is equipped with a reversing switch to change the direction of rotation. Depressing the lever from the A side results in clockwise rotation, while depressing it from the B side results in counterclockwise rotation. The neutral position locks the switch trigger, preventing accidental starting. Users should always check the direction of rotation before operation and only change it when the tool has come to a complete stop to prevent damage.
Speed Change: The DHP487 offers two speed settings: "1" for low speed and high torque (heavy loading operation), and "2" for high speed and low torque (light loading operation). The speed change lever should be set to the desired position when the tool is off. Operating the tool with the lever halfway between settings or changing speed while running can damage the tool.
Action Modes: The tool has three action modes, selected by turning the action mode changing ring to align with an arrow on the tool body:
Adjusting Fastening Torque: The fastening torque can be adjusted in 20 levels using the adjusting ring, from minimum at level 1 to maximum at level 20. Users should perform a trial screw drive into their material to determine the appropriate torque level for specific applications.
Battery Installation/Removal: To remove the battery cartridge, slide it from the tool while pressing the button on the front. To install, align the tongue with the groove in the housing and push until it clicks into place and the red indicator is no longer visible. Forcible insertion is discouraged.
Driver Bit/Drill Bit Installation/Removal: The chuck jaws are opened by turning the sleeve counterclockwise. Insert the driver bit/drill bit as far as it will go, then tighten the chuck by turning the sleeve clockwise. To remove, turn the sleeve counterclockwise.
Hook Installation: An optional hook can be installed on either side of the tool by inserting it into a groove and securing it with a screw. This hook is convenient for temporarily hanging the tool. Users are cautioned to secure it firmly and use it only for its intended purpose.
Driver Bit Holder Installation: An optional driver bit holder can be fitted into the protrusion at the tool foot on either side and secured with a screw. It can store 45 mm-long driver bits when not in use.
Screwdriving Operation: For screwdriving, set the action mode changing ring to the "screwdriving" mark and adjust the torque level using the adjusting ring. Ensure the driver bit is straight in the screw head, apply pressure, and start the tool slowly, gradually increasing speed until the clutch cuts in. For wood screws, pre-drilling a pilot hole (2/3 the screw diameter) is recommended to ease driving and prevent splitting.
Hammer Drilling Operation: For hammer drilling, set the action mode changing ring to the "hammer drilling" mark. The adjusting ring can be aligned to any torque level. Use a tungsten-carbide tipped drill bit. Position the bit at the desired location, pull the switch trigger, and apply light pressure. Avoid forcing the tool or applying excessive pressure if the hole clogs; instead, run the tool at idle and partially remove the bit to clear debris.
Drilling in Wood: For best results, use wood drills with a guide screw, which aids drilling by pulling the bit into the workpiece.
Drilling in Metal: To prevent slipping, make an indentation with a center-punch and hammer before drilling. Use a cutting lubricant for metals, except iron and brass, which should be drilled dry. Avoid excessive pressure, as it can damage the drill bit and reduce tool performance.
Using as a Hand Screwdriver: To use the tool as a hand screwdriver, switch it off, move the reversing switch lever to the neutral position, and turn the action mode changing ring to the "screwdriving" mark. This feature is convenient for checking screwdriving but not for tasks requiring excessive force.
General Maintenance: Before any inspection or maintenance, always ensure the tool is switched off and the battery cartridge is removed. Avoid using gasoline, benzine, thinner, alcohol, or similar substances, as they can cause discoloration, deformation, or cracks. All repairs, maintenance, or adjustments should be performed by Makita Authorized or Factory Service Centers using genuine Makita replacement parts to maintain product safety and reliability.
Battery Care:
Cleaning: Use a dry cloth to wipe dirt off the lamp lens, being careful not to scratch it, as this may reduce illumination. After drilling, an optional blow-out bulb can be used to clean dust from the hole.
Optional Accessories: Makita recommends using specific accessories and attachments with the DHP487, including various drill bits, driver bits, tungsten-carbide tipped drill bits, blow-out bulbs, driver bit holders, hooks, and genuine Makita batteries and chargers. Users should contact their local Makita Service Center for assistance with these accessories.
| Voltage | 18V |
|---|---|
| Max Torque | 40 Nm |
| Speed Settings | 2 |
| Max Drilling Capacity in Wood | 36 mm |
| Max Drilling Capacity in Metal | 13 mm |
| Chuck Size | 13 mm |
| Chuck Capacity | 1.5 - 13 mm |
| Impacts per Minute (Hi) | 0 - 25, 500 ipm |
| Impacts per Minute (Lo) | 0 - 7, 500 ipm |
| No Load Speed (Hi) | 0 - 1, 700 rpm |
| No Load Speed (Lo) | 0 - 500 rpm |
| Max drilling diameter in masonry | 13 mm |
| Max tightening torque (hard) | 40 Nm |
| Max tightening torque (soft) | 23 Nm |
| Battery Type | Li-ion |
| Length | 164 mm |
| No Load Speed | 0 - 1, 700 rpm |