7 ENGLISH
Speed change
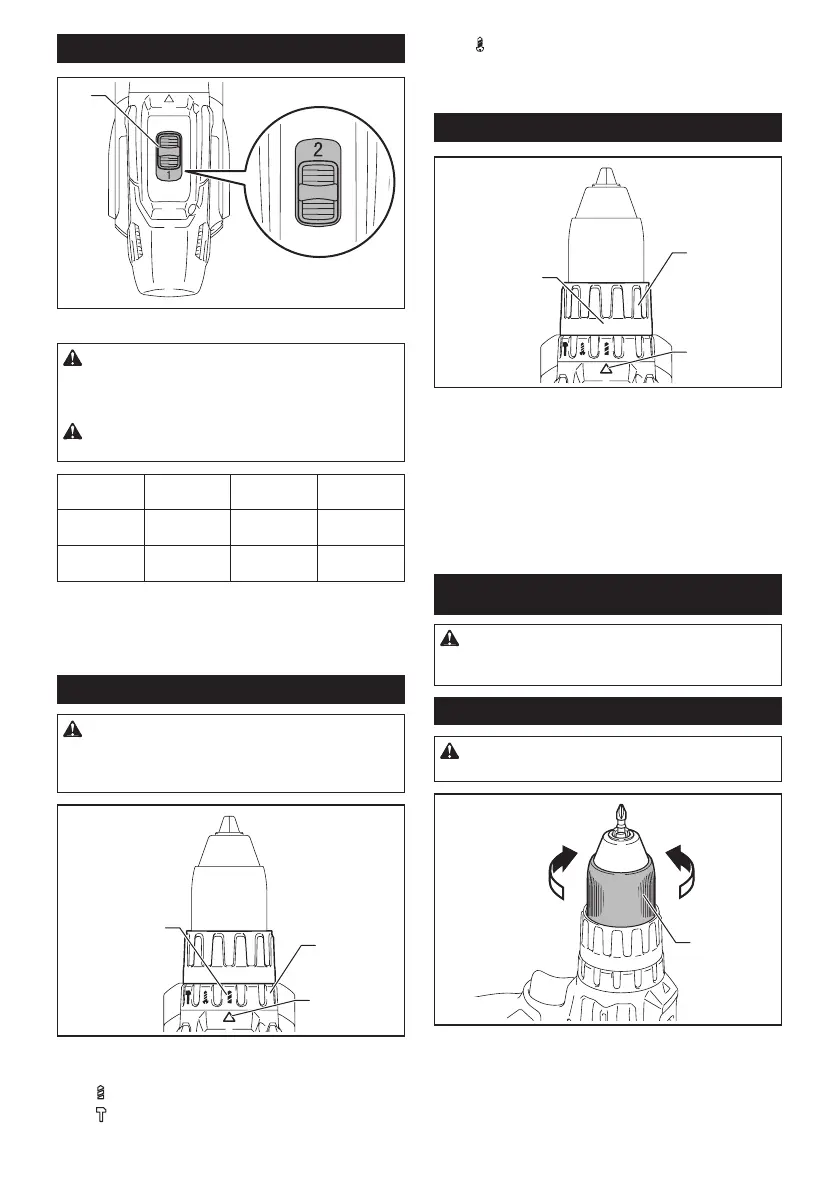
1
►1. Speed change lever
CAUTION:
Always set the speed change lever
fully to the correct position. If you operate the tool with
the speed change lever positioned halfway between the
"1" side and "2" side, the tool may be damaged.
CAUTION: Do not use the speed change lever
while the tool is running. The tool may be damaged.
Displayed
Number
Speed Torque Applicable
operation
1 Low High Heavy load-
ing operation
2 High Low Light loading
operation
Tochangethespeed,switchothetoolrst.Pushthespeedchange
lever to display "2" for high speed or "1" for low speed. Be sure that
the speed change lever is set to the correct position before operation.
If the tool speed is coming down extremely during the operation with
display "2", push the lever to display "1" and restart the operation.
Selecting the action mode
CAUTION: Always set the ring correctly to
your desired mode mark. If you operate the tool
with the ring positioned halfway between the
mode marks, the tool may be damaged.
ᵏ
ᵐ
ᵒ
ᵔ
1
2
3
►1. Action mode changing ring 2. Mark 3. Arrow
This tool has three action modes.
•
Drilling mode (rotation only)
•
Hammer drilling mode (rotation with hammering)
• Screwdriving mode (rotation with clutch)
Select one mode suitable for your work. Turn the
action mode changing ring and align the mark that you
selected with the arrow on the tool body.
Adjusting the fastening torque
ᵏ
ᵐ
ᵒ
ᵔ
1
2
3
►1.Adjustingring2. Graduation 3. Arrow
Thefasteningtorquecanbeadjustedin16levelsby
turningtheadjustingring.Alignthegraduationswiththe
arrow on the tool body. You can get the minimum fas-
tening torque at 1 and maximum torque at 16.
Before actual operation, drive a trial screw into your
material or a piece of duplicate material to determine
which torque level is required for a particular application.
ASSEMBLY
CAUTION: Always be sure that the tool is
switched o and the battery cartridge is removed
before carrying out any work on the tool.
Installing or removing driver bit/drill bit
CAUTION:
After inserting the driver bit, make sure
thatitisrmlysecured.Ifitcomesout,donotuseit.
1
23
►1. Sleeve 2. Open 3. Close
Turn the sleeve counterclockwise to open the chuck
jaws.Placethedriverbit/drillbitinthechuckasfar
as it will go. Turn the sleeve clockwise to tighten the
chuck. To remove the driver bit/drill bit, turn the sleeve
counterclockwise.

 Loading...