5 ENGLISH
FUNCTIONAL
DESCRIPTION
CAUTION:
• Always be sure that the tool is switched off and
unpluggedbeforeadjustingorcheckingfunction
on the tool.
Switch action
CAUTION:
• Before plugging in the tool, always check to
see that the switch lever actuates properly and
returns to the "OFF" position when the rear of
the switch lever is depressed.
• Switch can be locked in "ON" position for ease
of operator comfort during extended use. Apply
caution when locking tool in "ON" position and
maintainrmgraspontool.
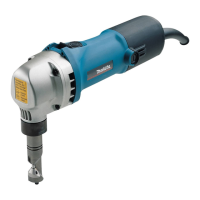
1
►1. Switch lever
To start the tool, slide the switch lever toward the "I
(ON)" position. For continuous operation, press the
front of the switch lever to lock it.
To stop the tool, press the rear of the switch lever, then
slide it toward the "O (OFF)" position.
ASSEMBLY
CAUTION:
• Always be sure that the tool is switched off and
unplugged before carrying out any work on the
tool.
Adjusting the blade clearance
For JS1601 Only
Adjusttheclearancebetweenthesidebladeand
the center blade according to the thickness of the
workpiece.
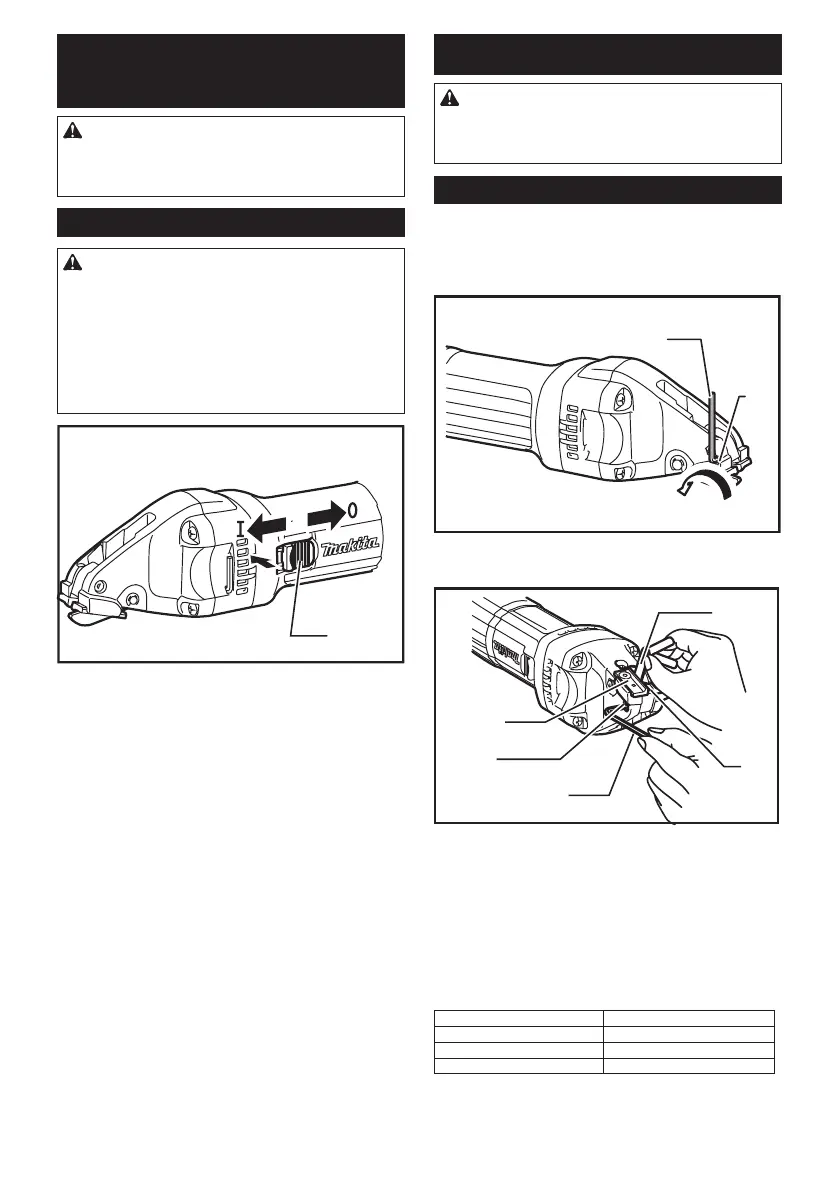
1
2
►1. Hex wrench 2. Screw
First use a hex wrench to loosen the screw.
1
2
3
4
5
►1. Thickness gauge 2. Center blade 3. Side blade
4. Hex socket head bolt 5. Hex wrench
Thenusethehexwrenchtoadjusttheclearanceby
tightening or loosening the bolt. There may be a slight
difference between clearances of both sides of the
center blade.
Check the smaller clearance with the thickness gauge
andadjustit.
Whenusingthethicknessgaugetoadjusttheblade
clearance, refer to the table.
Workpiece thickness (mm) Marking on thickness gauge
Less than 0.8 0.5
0.8 - 1.3 1.0
Afteradjustingtheclearance,tightenthescrew
securely.

 Loading...