8 ENGLISH
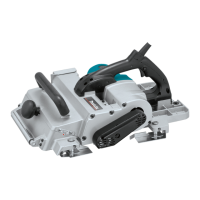
Removing or installing planer blades
CAUTION:
• Tightenthebladeinstallationboltscarefully
whenattachingthebladestothetool.Aloose
installationboltcanbedangerous.Always
check to see they are tightened securely.
• Handlethebladesverycarefully.Usegloves
orragstoprotectyourngersorhandswhen
removingorinstallingtheblades.
• Use only the Makita wrench provided to remove
orinstalltheblades.Failuretodosomayresult
inovertighteningorinsufcienttighteningofthe
installationbolts.Thiscouldcauseaninjury.
For tool with conventional planer blades
►Fig.4: 1. Socket wrench 2. Bolt
►Fig.5: 1. Bolts 2. Drum 3.Planerblade4. Drum
cover 5.Adjustingplate
►Fig.6: 1. Inside edge of gauge plate 2. Blade edge
3.Planerblade4.Adjustingplate5. Screws
6. Heel 7.Backsideofgaugebase8. Gauge
plate 9.Gaugebase
Toremovethebladesonthedrum,unscrewtheinstal-
lationboltswiththesocketwrench.Thedrumcover
comesofftogetherwiththeblades.
Toinstalltheblades,rstcleanoutallchipsorforeign
matteradheringtothedrumorblades.Usebladesof
the same dimensions and weight, or drum oscillation/
vibrationwillresult,causingpoorplaningactionand,
eventually,toolbreakdown.
Placethebladeonthegaugebasesothattheblade
edgeisperfectlyushwiththeinsideedgeofthegauge
plate.Placetheadjustingplateontheblade,thensim-
plypressintheheeloftheadjustingplateushwiththe
backsideofthegaugebaseandtightentwoscrewson
theadjustingplate.Nowsliptheheeloftheadjusting
plateintothedrumgroove,thentthedrumcoveronit.
Tightenalltheinstallationboltsevenlyandalternately
with the socket wrench.
Repeattheaboveproceduresfortheotherblade.
For tool with mini planer blades
►Fig.7: 1. Socket wrench 2. Bolt
1. Removetheexistingblade,ifthetoolhasbeen
in use, carefully clean the drum surfaces and the
drumcover.Toremovethebladesonthedrum,
unscrewthethreeinstallationboltswiththesocket
wrench. The drum cover comes off together with
theblades.
►Fig.8: 1. Pan head screw 2.Adjustingplate
3.Planerbladelocatinglugs4. Gauge
plate 5.Heelofadjustingplate6. Set plate
7.Insideankofgaugeplate8.Gaugebase
9.Backsideofgaugebase10. Mini planer
blade
2. Toinstalltheblades,looselyattachtheadjusting
plate to the set plate with the pan head screws
andsettheminiplanerbladeonthegaugebase
sothatthecuttingedgeofthebladeisperfectly
ushwiththeinsideankofthegaugeplate.
3. Settheadjustingplate/setplateonthegauge
basesothattheplanerbladelocatinglugsonthe
setplaterestintheminiplanerbladegroove,then
pressintheheeloftheadjustingplateushwith
thebacksideofthegaugebaseandtightenthe
pan head screws.
4. Itisimportantthatthebladesitsushwiththe
insideankofthegaugeplate,theplanerblade
locatinglugssitinthebladegrooveandtheheel
oftheadjustingplateisushwiththebacksideof
thegaugebase.Checkthisalignmentcarefullyto
ensure uniform cutting.
5. Sliptheheeloftheadjustingplateintothegroove
of the drum.
►Fig.9: 1.Miniplanerblade2. Groove 3. Set plate
4.Hex.angeheadbolts5. Drum cover
6. Drum 7.Adjustingplate
6. Setthedrumcoverovertheadjustingplate/set
plateandscrewinthethreehexangeheadbolts
sothatagapexistsbetweenthedrumandtheset
platetoslidetheminiplanerbladeintoposition.
Thebladewillbepositionedbytheplanerblade
locating lugs on the set plate.
7. Theblade'slengthwiseadjustmentwillneedtobe
manuallypositionedsothatthebladeendsare
clear and equidistant from the housing on one side
andthemetalbracketontheother.
8. Tightenthethreehexangeheadbolts(withthe
socket wrench provided) and rotate the drum to
checkclearancesbetweenthebladeendsandthe
toolbody.
9. Checkthethreehexangeheadboltsfornal
tightness.
10. Repeatprocedures1-9fortheotherblade.

 Loading...