ITALIANOENGLISHFRANÇAIS
10
functioning correctly, if the
green LED does not illuminate
when the ignition is switched
on, then this indicates no
power to the ECU. Make
sure that you have properly
connected the wiring harness.
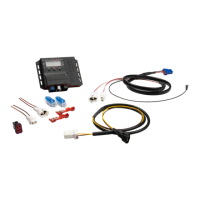
Working
The Force Master 2 CDI is
preprogrammed with base fuel
curves. The curves are selected
using the switch labeled MAPS.
These curves adjust fuel delivery
based on throttle position and
RPM, providing the right amount
of fuel under all conditions. The
fuel curves correspond to varying
levels of modiications.
The levels of modiication are
broken down into the following
groups:
• Curve 0: original twin-cylinder,
original camshaft, Malossi
exhaust system, Malossi air
ilter
• Curve 1: Malossi pistons Ø,
Malossi camshaft, Malossi
exhaust system, Malossi air
ilter
• Curve 2: Malossi twin-cylinder
Ø, original camshaft, Malossi
exhaust system, Malossi air
ilter
• Curve 3: Malossi twin-cylinder
Ø, Malossi camshaft, Malossi
exhaust system, Malossi air
ilter
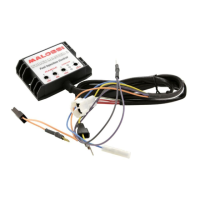
Tha Malossi CDI is supplied
with curve and zeroed
potentiometers.
In addition to the curves, there
are potentiometers that allow
you to ine tune the curve you
select. These potentiometers
allow you to adjust the fuel curve
from to – in dierent
RPM ranges:
» low: – RPM
» mid: – RPM
» high: – max RPM
• To add fuel, turn the
potentiometers clockwise.
To subtrac fuel, turn
the potentiometer
counterclockwise.
• With the potentiometer pointed
straight up at the zero mark
towards the Malossi logo, that
is adjustment.
• With the potentiometer
pointed straight up at the “ - ”
mark is –.
• With the potentiometer
pointed straight up at the “ ”
mark is .