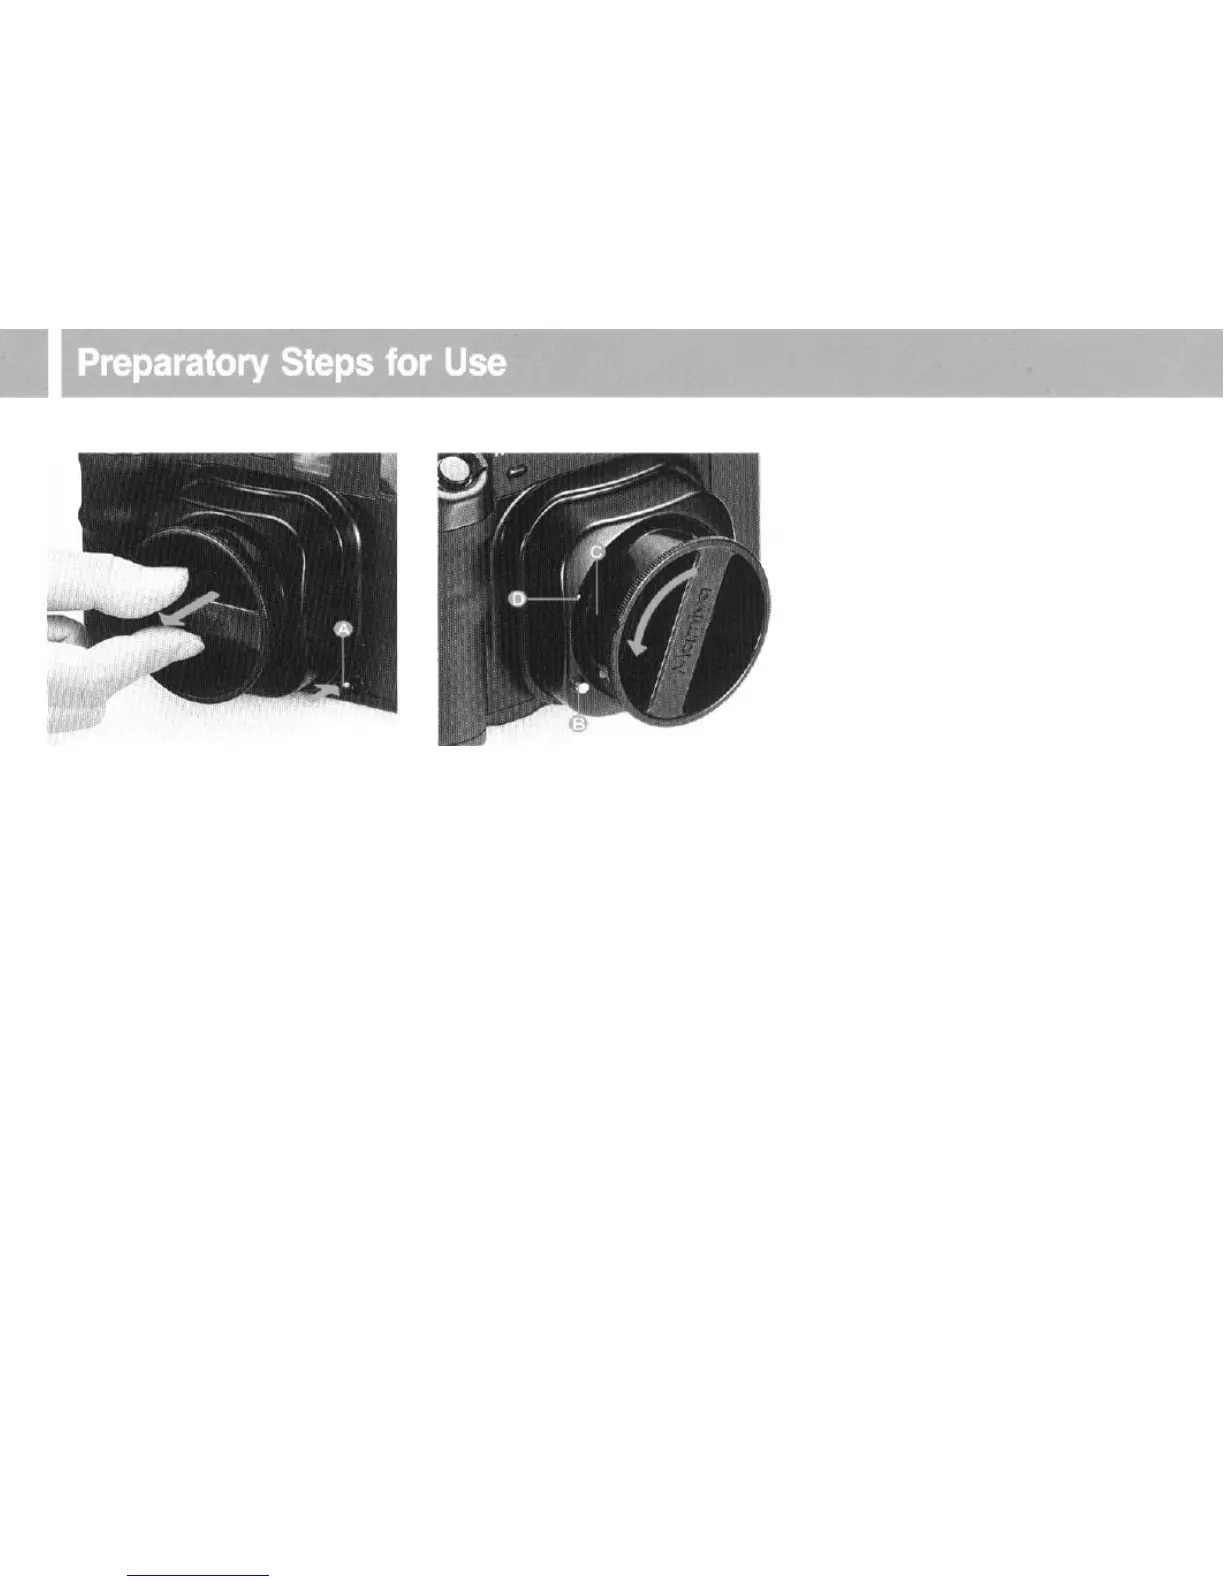
EasyManuals Logo

Mamiya 6 User Manual

Mamiya 6
35 pages
To Next Page IconTo Next Page
To Previous Page IconTo Previous Page
Page #10 background imageLoading...
Page #10 background image
In
order to attach the lens, first pull out the
lens mount and remove the camera body
cap. To do this, while pressing the retraction/
extension button (A) in, pull the lens mount
out by gripping the cross bar of the lens cap.
Then, while pressing the lens release button
(B) in, rotate the cap counterclockwise, and
align the groove (C) on the cap’s side with
the lens alignment dot (D) on the body. The
body cap can then be pulled out.
*The lens release button cannot be pressed
when the light shield curtain is open. So make sure
the curtain is closed. For curtain
opening/closing
see page 13.

Questions and Answers:

Question and Answer IconNeed help?

Do you have a question about the Mamiya 6 and is the answer not in the manual?

Mamiya 6 Specifications

General IconGeneral
Film format120/220 roll film
Image size6x6 cm
Lenses50mm f/4, 75mm f/3.5, 150mm f/4.5
ShutterLeaf shutter
Shutter speed4 sec to 1/500 sec, Bulb
MeteringTTL center-weighted metering
FocusManual focus
ViewfinderBright-line rangefinder with parallax correction
FlashHot shoe
TypeRangefinder camera

Related product manuals