3-30
D5/4
D5 HYDRAULIC OIL
DRAIN REPLACE
Set the platform on a horizontal surface in Transport
position, with the engine off.
DRAINING THE OIL
- Place a tray under the draining plug Ref. 1 (Fig. D5/1
and D5/2) and unscrew the collar Ref. 2 (Fig. D5/2).
- Withdraw the draining plug Ref. 1 (Fig. D5/2).
- Remove the filling plug 3 (Fig. D5/4) to facilitate
drainage.
- Remove the Durit Ref. 5 (Fig. D5/3) from the auxiliary
pump before draining the oil residue from it.
- Re-tighten the Durit Ref. 5 on the auxiliary pump.
- Remove the Durit Ref. 6 in order to access the inlet
filter Ref. 7 (Fig. D5/3 and D5/4).
- Remove and clean the inlet filter using a jet of
compressed air Ref. 7 or replace it.
- Re-fit the inlet filter Ref. 7 and the Durit Ref. 6.
CLEANING THE STRAINER
- Remove the strainer Ref. 3 (Fig. D5/4), clean it using
a jet of compressed air.
- Put the strainer back in place.
REFILLING THE OIL
Use an oil bath and a very clean funnel; clean
the top of the oil can before filling.
-Refit the drain plug 1 (Fig. D5/1) and tighten it.
- Refill with hydraulic oil (see the LUBRICANTS section)
via the filling hole 4 (Fig. D5/4).
- The oil level should be above the red mark on the
gauge 5 (Fig.D5/5).
Dispose of the drained oil in an environmen-
tally-friendly manner.
D6 CONDITION OF THE HOSES
CHECK
- Check the apparent condition (cracking) of the hoses subject to heat stresses and UV; their
technical characteristics may have altered (porosities).
BEWARE OF LEAKS
Hydraulic oil escaping under high pr
essure can pierce the skin and cause
severe lesions. If you are injured by a jet of oil under pressure, immediately
consult a doctor.
If you are in doubt about any leak, do not search with your hand: check with
a piece of cardboard while protecting your hands and your body.
For your safety’s sake, replace worn hoses
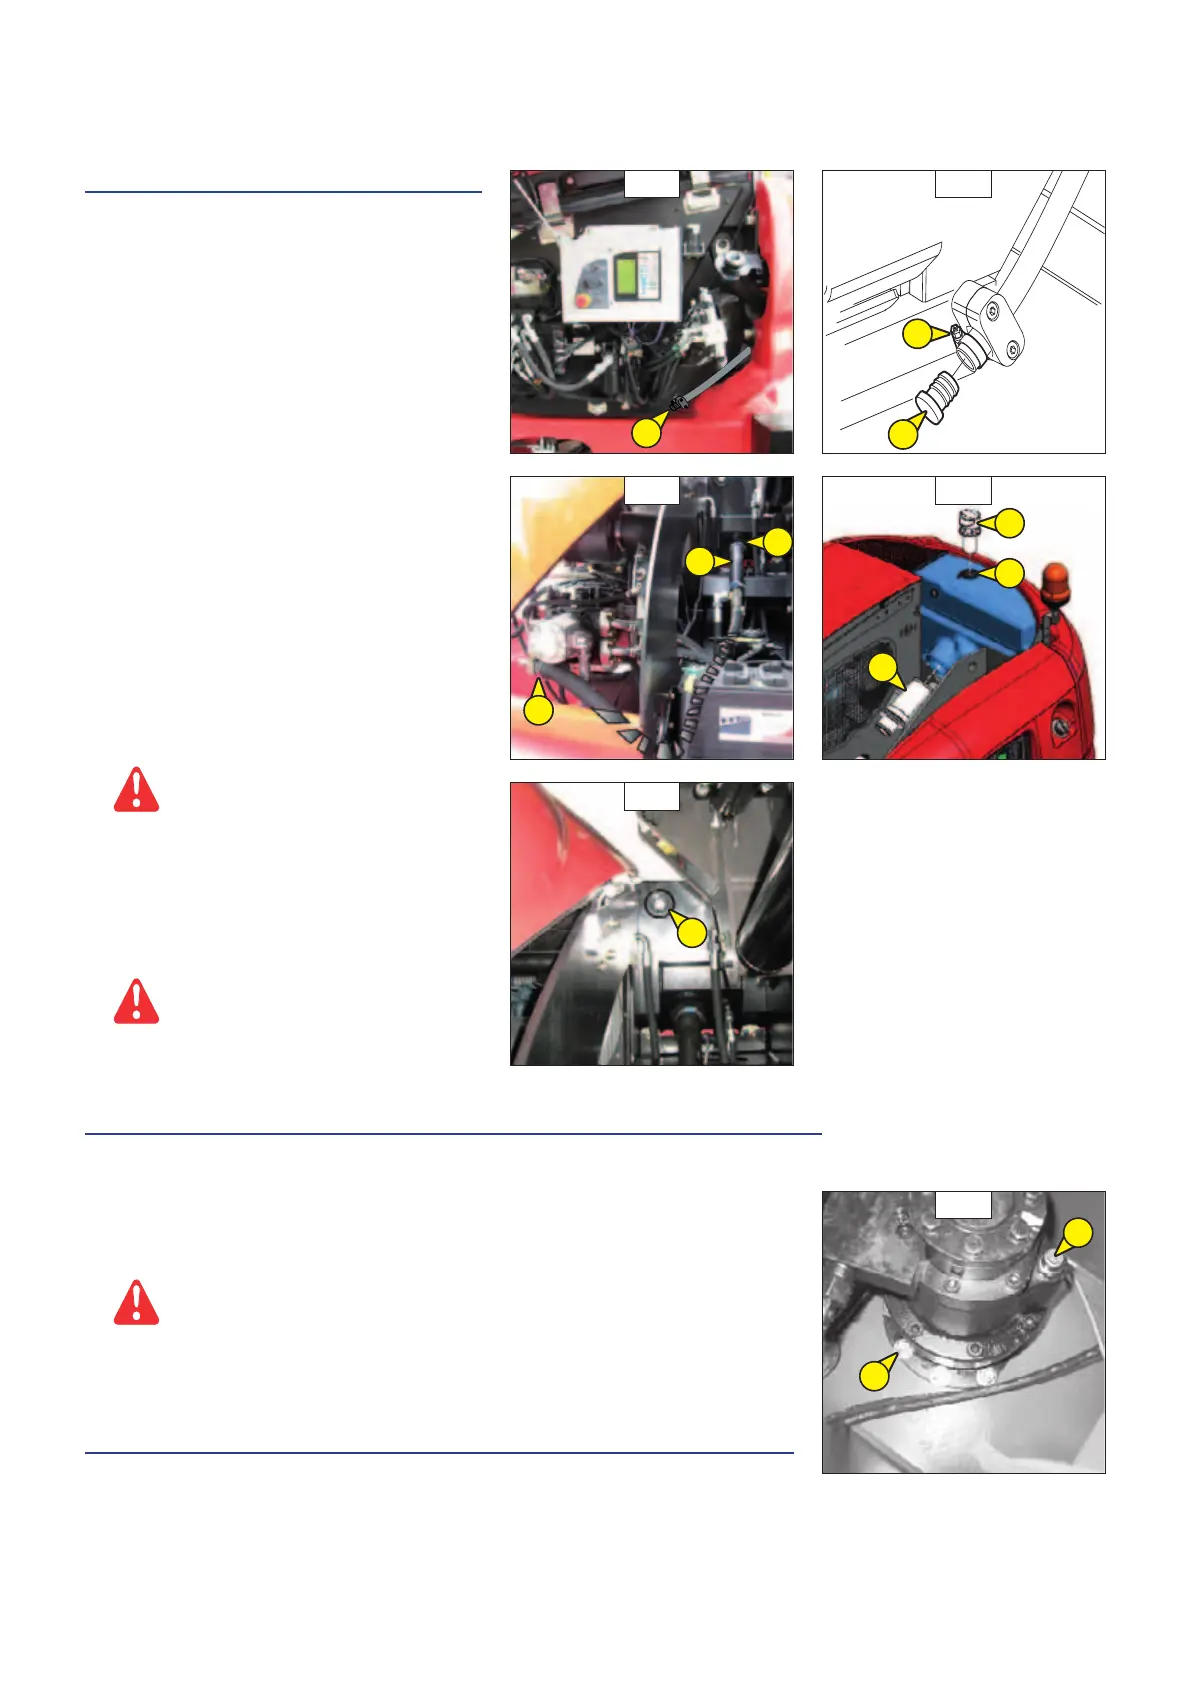
D7 TIGHTENING THE TURRET ROTATION MOTOR’S BOLTS
CHECK
Set the lifting platform on a horizontal surface with the engine switched off.
- Check that the nine bolts are tight 1 (Fig. D7).
- The tightening torque for the screws is 8 daN.m ± 10%.
- 1 daN = 1 Kg.
D5/2
D5/1
D5/3
D7
3
1
2
1
2
D5/5
5
5
7
7
6
1
4
647414 EN (27/05/2015)