3 - 303 - 30
tered through a strainer tered through a strainer or a clean,or a clean, lint-free cloth and install the filler plug 2 lint-free cloth and install the filler plug 2 (fig. E1/2).(fig. E1/2).
- If nece- If necessaryssary,, bleed thbleed the fuel cire fuel circuit (scuit (seeee : 3 - MAINTEN: 3 - MAINTENANCEANCE : G1 - FUEL SYS: G1 - FUEL SYSTEM).TEM).
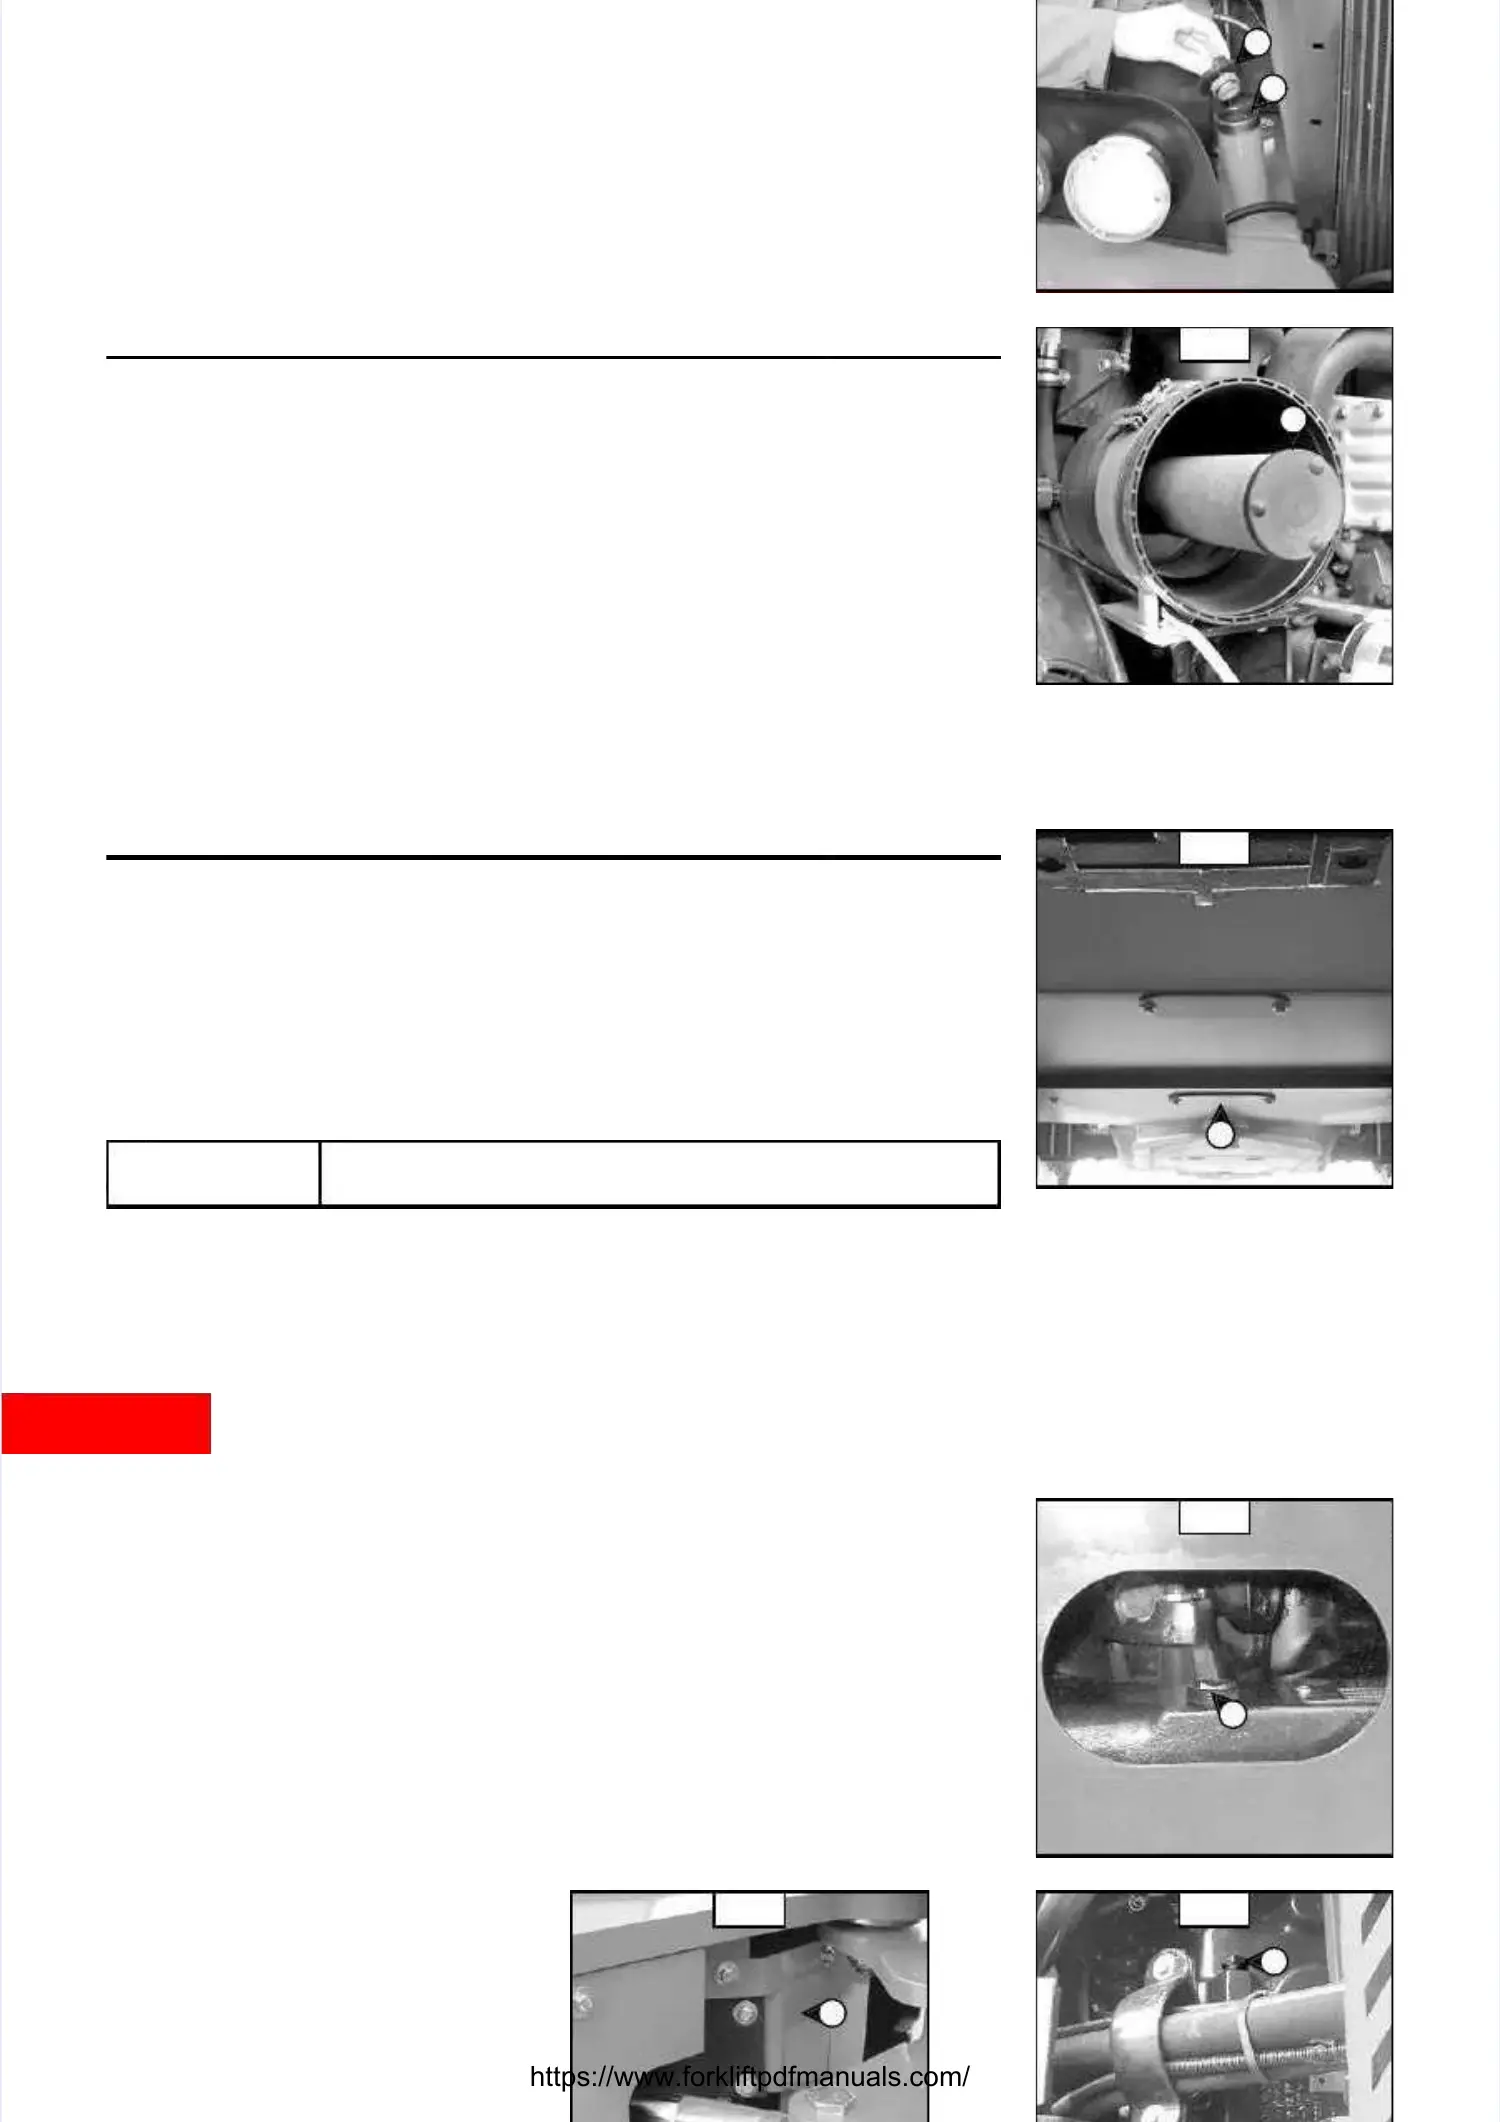
E2 - SE2 - SAAFFEETTYY DRDRYY AAIIRR FIFILTLTEERR CACARTRTRIRIDGDGEE
CHANGECHANGE
- For the disassembly and reassembly of - For the disassembly and reassembly of the cartridge,the cartridge, see : 3 - MAINTENANCE : D3 - DRYsee : 3 - MAINTENANCE : D3 - DRY
AIR FILTER CARTRIDGE.AIR FILTER CARTRIDGE.
- Gently remove the dry air filter safety cartridge 1 (fig. E2),- Gently remove the dry air filter safety cartridge 1 (fig. E2), taking care to avoid staking care to avoid spilling thepilling the
dust.dust.
- Clean the gasket - Clean the gasket surface on the filter with surface on the filter with a damp,a damp, clean lint-free cloth.clean lint-free cloth.
- Before installing check the state of the new safety cartridge (see : 3 - MAINTENANCE :- Before installing check the state of the new safety cartridge (see : 3 - MAINTENANCE :
FILTERS CARTRIDGES AND BELTS).FILTERS CARTRIDGES AND BELTS).
- Introduce the cartridge into the f- Introduce the cartridge into the filter axis and push it in,ilter axis and push it in, pressing the edges and pressing the edges and not thenot the
middle.middle.
NOTE : NOTE : The schedule for changing the safety cartridge is The schedule for changing the safety cartridge is given for reference onlygiven for reference only. The safe-. The safe-
ty cartridge must be changed for every two changes of the air filter cartridge.ty cartridge must be changed for every two changes of the air filter cartridge.
E3 - TE3 - T
RANRANSMISMISSISSIONON OILOIL
DRAINDRAIN
Park the lift truck on level Park the lift truck on level ground with the I.C. ground with the I.C. engine stopped,engine stopped, the transmission oil stillthe transmission oil still
warm.warm.
DRAINING THE OILDRAINING THE OIL
- Remove access panel 1 (fig. E3/1).- Remove access panel 1 (fig. E3/1).
- Place a container under drain plug 2 (fig. E3/2) and unscrew the drain plug.- Place a container under drain plug 2 (fig. E3/2) and unscrew the drain plug.
- Remove access panel 3 (fig. E3/3).- Remove access panel 3 (fig. E3/3).
- Remove dipstick 4 (fig. E3/4) in order to ensure that the oil is drained properly.- Remove dipstick 4 (fig. E3/4) in order to ensure that the oil is drained properly.
Dispose the drain oil in an ecological manner.
Dispose the drain oil in an ecological manner.
E2E2
22
33
11
E3/1E3/1
11
Dispose of the drain oil in an ecological manner.Dispose of the drain oil in an ecological manner.
IMPORTANTIMPORTANT
FILLING UP THE OILFILLING UP THE OIL
- Install and tighten drain plug 1 (fig. E3/1) (tightening torque 32 ft/lb).- Install and tighten drain plug 1 (fig. E3/1) (tightening torque 32 ft/lb).
- Fi- Fill up with oil (see : 3 - MAINTENANCEll up with oil (see : 3 - MAINTENANCE : LUBRICANTS AND FUEL) : LUBRICANTS AND FUEL) by filler port 4 (fig. E3/4)by filler port 4 (fig. E3/4)
and install the plug.and install the plug.
- Check oil nivel (see : - Check oil nivel (see : 3 - MAINTENANCE3 - MAINTENANCE : A5 - CHECK THE TRANSMI: A5 - CHECK THE TRANSMISSION OIL LEVEL).SSION OIL LEVEL).
E3/2E3/2
22
EE33//33 EE33//44
33
44
CONTENTSCONTENTS

 Loading...