8 Operator’s Manual
BEFORE YOU START
• Remove packing materials and unpack all parts and lay them
on a at, stable surface.
• Make sure the delivery contents are complete and free of any
damage. If you nd that parts are missing or show damage do not
use the tiller/cultivator but contact the Mantis customer service
center at 1-800-366-6268 for assistance. Using an incomplete or
damaged tiller/cultivator represents a hazard to people and property.
• Ensure that you have all the accessories and tools needed for
assembly and operation. This also includes suitable personal
protective equipment.
Assembly
TILLER/CULTIVATOR ASSEMBLY
The tiller/cultivator and the packaging are not
children’s toys! Children must not play with
plastic bags, sheets and small parts! There is
a danger of choking and suffocation!
The tiller/cultivator must be fully assembled before operation! Do not use tiller/cultivator that is only partly
assembled or assembled with damaged parts! Follow the assembly instructions step-by-step and use the
pictures provided as a visual guide to easily assemble the product! Do not connect the tiller/cultivator to
power supply before it is completely assembled! Failure to comply could result in accidental starting and
serious personal injury.
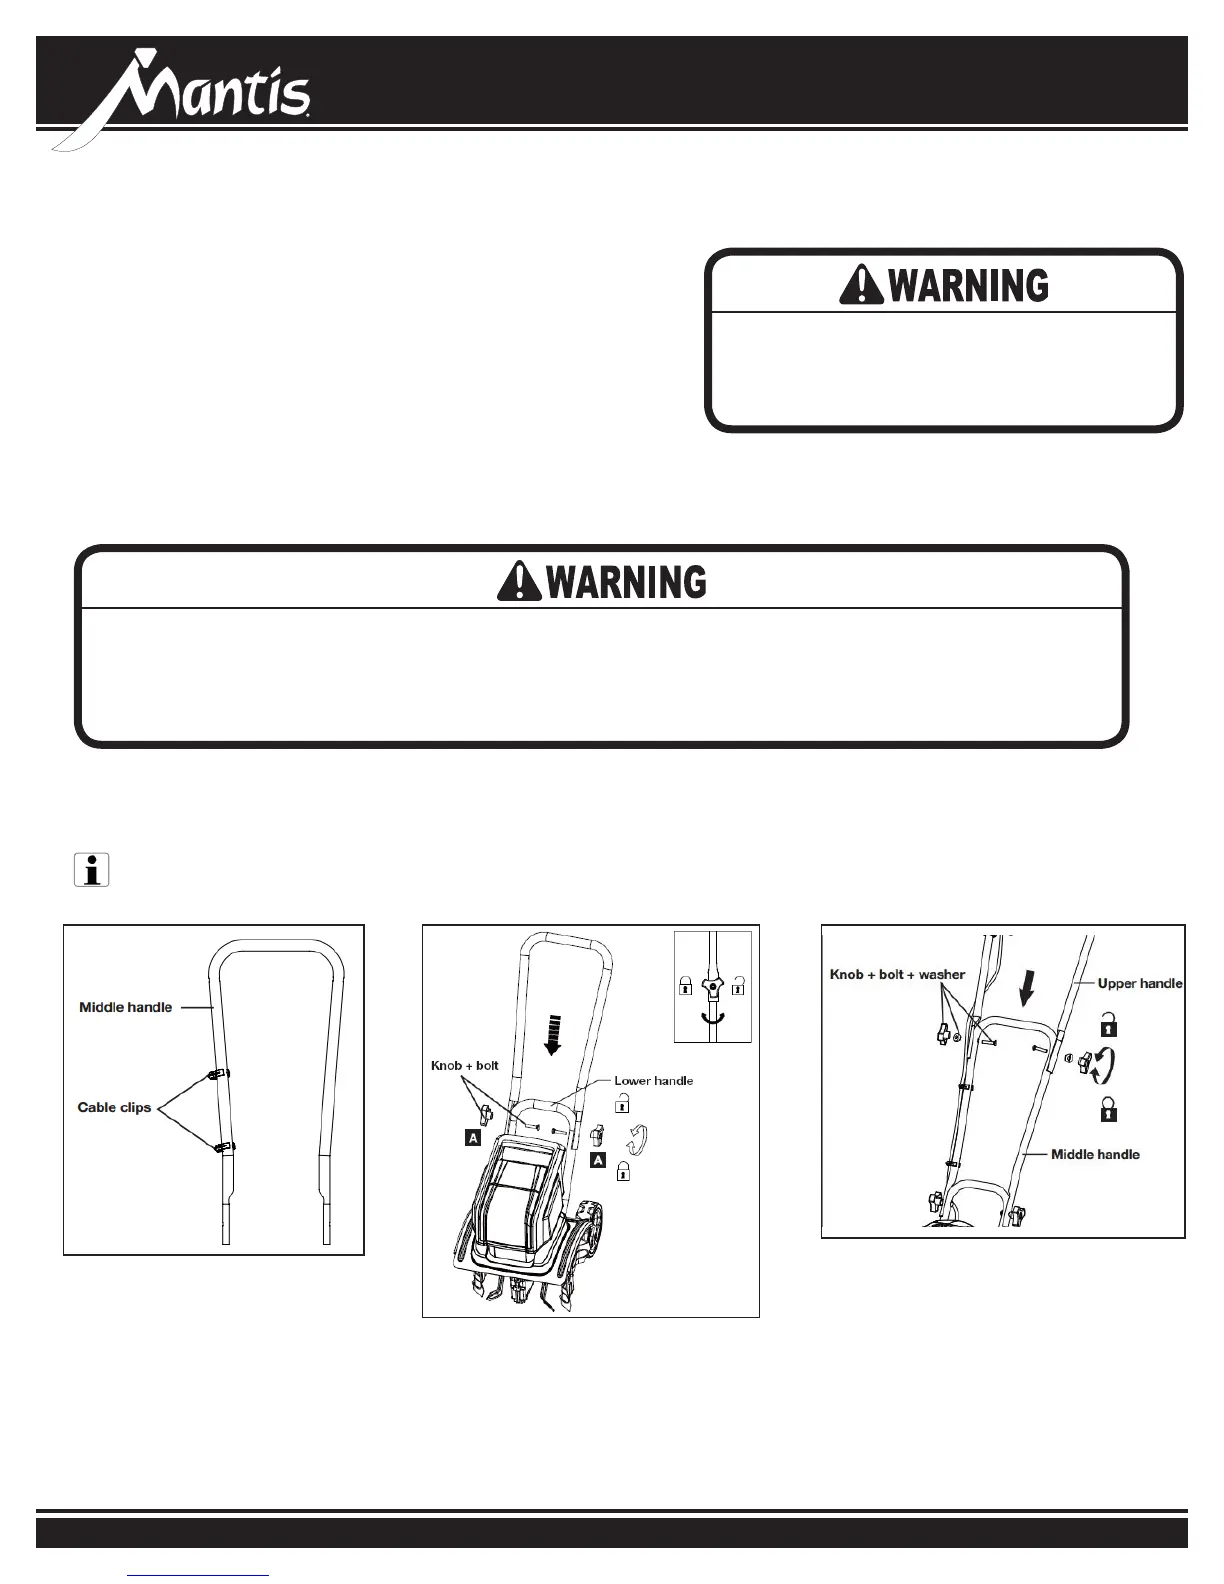
• Attach the cable clips to the middle
handle bar
1
NOTE: Take care of small parts that are removed during
assembly or when making adjustments. Keep them secure to
avoid loss.
Handle bar
1.Attach the cable clips on the middle handle bar (Fig. 1).
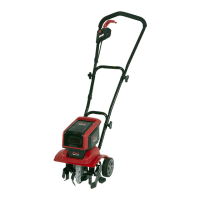
2. Secure the middle handle to the lower handle using the first set of knobs,
bolts,and washers. Tighten the knobs on each side to ensure a secure fit (Fig.
2).
• Secure the middle handle to the lower
handle using the rst set of knobs, bolts,
and plastic washers. Tighten the knobs
on each side to ensure a secure t.
2
NOTE: Take care of small parts that are removed during
assembly or when making adjustments. Keep them secure to
avoid loss.
Handle bar
1.Attach the cable clips on the middle handle bar (Fig. 1).
2. Secure the middle handle to the lower handle using the first set of knobs,
bolts,and washers. Tighten the knobs on each side to ensure a secure fit (Fig.
2).
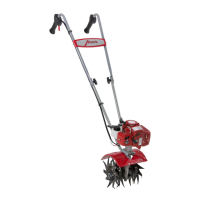
• Connect the upper handle to the middle
handle using the second set of knobs, bolts
and plastic washers. Tighten the knobs on
each side to ensure a secure t.
3
15
3. Connect the upper handle to the middle handle using the second set of knobs,
bolts and washers. Tighten the knobs on each side to ensure a secure fit (Fig.
3)
4. Secure the cable inside the cable clips (Fig. 4).
WARNING! Make sure all handle knobs are properly tightened
before using before using the product.
Connection to power supply
For safety reasons the product is equipped with a short power cord. Do not
connect the product directly to the power supply using this power cord. A proper
extension cord is required for operation. Observe the technical requirements for
this product when purchasing an extension cord.
NOTE: Take care of small parts that are removed during assembly
or when making adjustments. Keep them secure to avoid loss.
7
Symbols
On the product, the rating label and within these instructions you will find among
others the following symbols and abbreviations. Familiarise yourself with them to
reduce hazards like personal injuries and damage to property.
Lock / to tighten or secure.
Read the instruction manual.
Wear protective, slip-resistant footwear.
Wear tight-fitted protective clothes.
Remove plug from the mains immediately if the cable is
damaged or cut.
Do not expose the product to rain or wet conditions (moisture).
Work across the slopes, never up and down.