3
Features
1
2
33
4
6
55
777
888
9
11
10
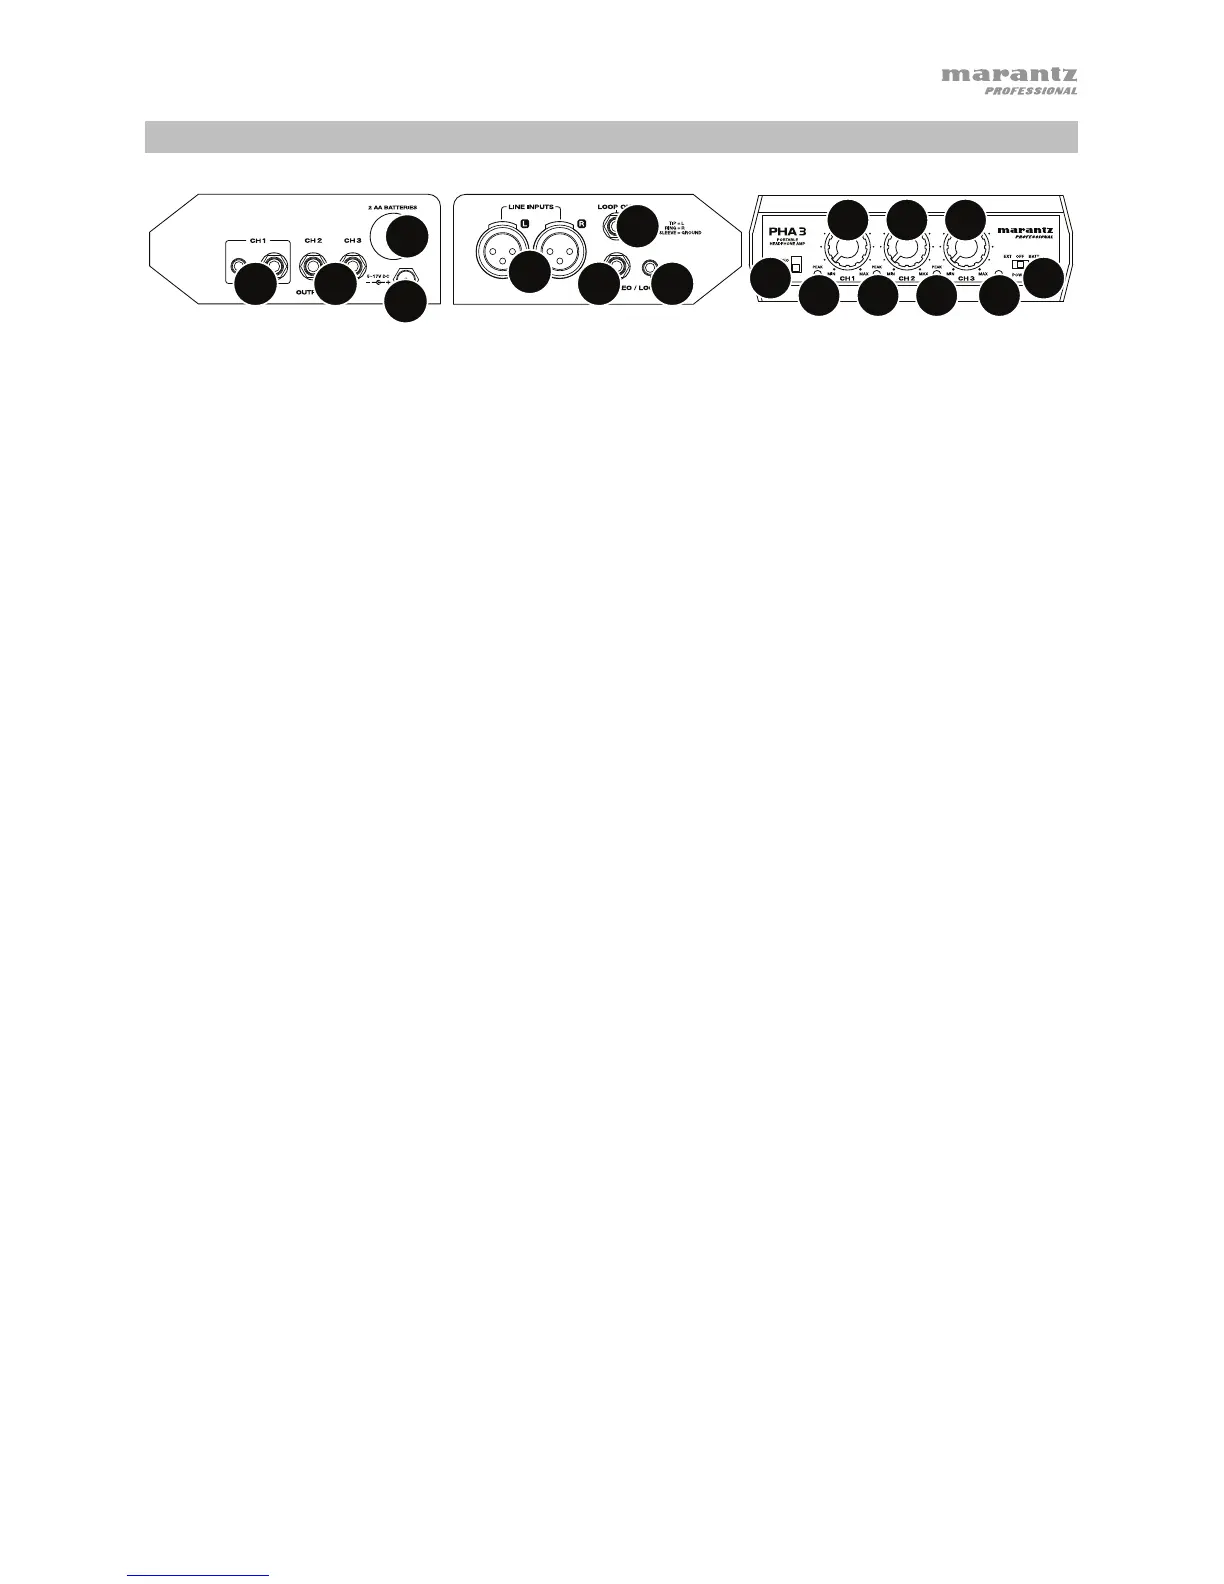
1. Power Input: Use the included power adapter to connect this input to a power outlet.
Alternatively, install batteries in the battery compartment.
2. Battery Compartment: Remove the cover to this battery compartment to install 2 AA
batteries in it. Insert the positive (+) end of the battery first.
3. Outputs: Connect 1/4” (6.35 mm) stereo headphones to these outputs. Channel 1 can also
accept 1/8” (3.5 mm) stereo headphones.
Use the Level knobs to set the volume level of each output. The Level knob for Channel 1
will control the level of the 1/4” (6.35 mm) and 1/8” (3.5 mm) outputs.
4. Line Inputs: Use standard XLR cables to connect your audio source to these inputs.
5. Stereo/Loop In: Use a standard 1/4” (6.35 mm) or 1/8” (3.5 mm) TRS cable to connect your
audio source to these inputs.
Alternatively, connect this input to the Loop Out of an additional PHA3. This lets you “daisy-
chain” multiple PHA3 units together. Use the included 1/4”-to-1/8” (6.35 mm to 3.5 mm) TRS
cable or a standard 1/4” (6.35 mm) TRS cable.
6. Loop Out: Connect this output to the Loop In of an additional PHA3. This lets you “daisy-
chain” multiple PHA3 units together. Use the included 1/4”-to-1/8” (6.35 mm to 3.5 mm) TRS
cable or a standard 1/4” (6.35 mm) TRS cable.
7. Level: Turn these knobs to set the volume level of each output. The Level knob for Channel 1
will control the level of the 1/4” (6.35 mm) and 1/8” (3.5 mm) outputs.
8. Peak LED: These LEDs will light up when the signal of each output is “clipping” (distorting). If
this happens, turn the corresponding Level knob counterclockwise to reduce its level.
9. Stereo/Mono: Use this switch to set whether the outputs send a stereo signal or summed
mono signal.
10. Power Switch: Use this switch to power PHA3 on or off. To use the power adapter, set it to
Ext. To use batteries, set it to Batt.
11. Power LED: This LED will light up when PHA3 is powered on.
Right Panel Left Panel Front Panel