SELECTISG
YOUR
FIREPLACE LOCATION
To determine the safest and most efficient location
for
your
fireplace, consider such factors
as
room traffic, locaiion of doors
anri windows, and constr~lction above and below the installation
arra.
The fireplace
may
be installed in any location that is free of
air conditioning ducts,
electrical wiring and plurnhing.
This
location must
alsn
allow for the necessary clearances.
LOCATION
Comers should be
cuiijiderrrl
where
space is linrited or at
a
premium.
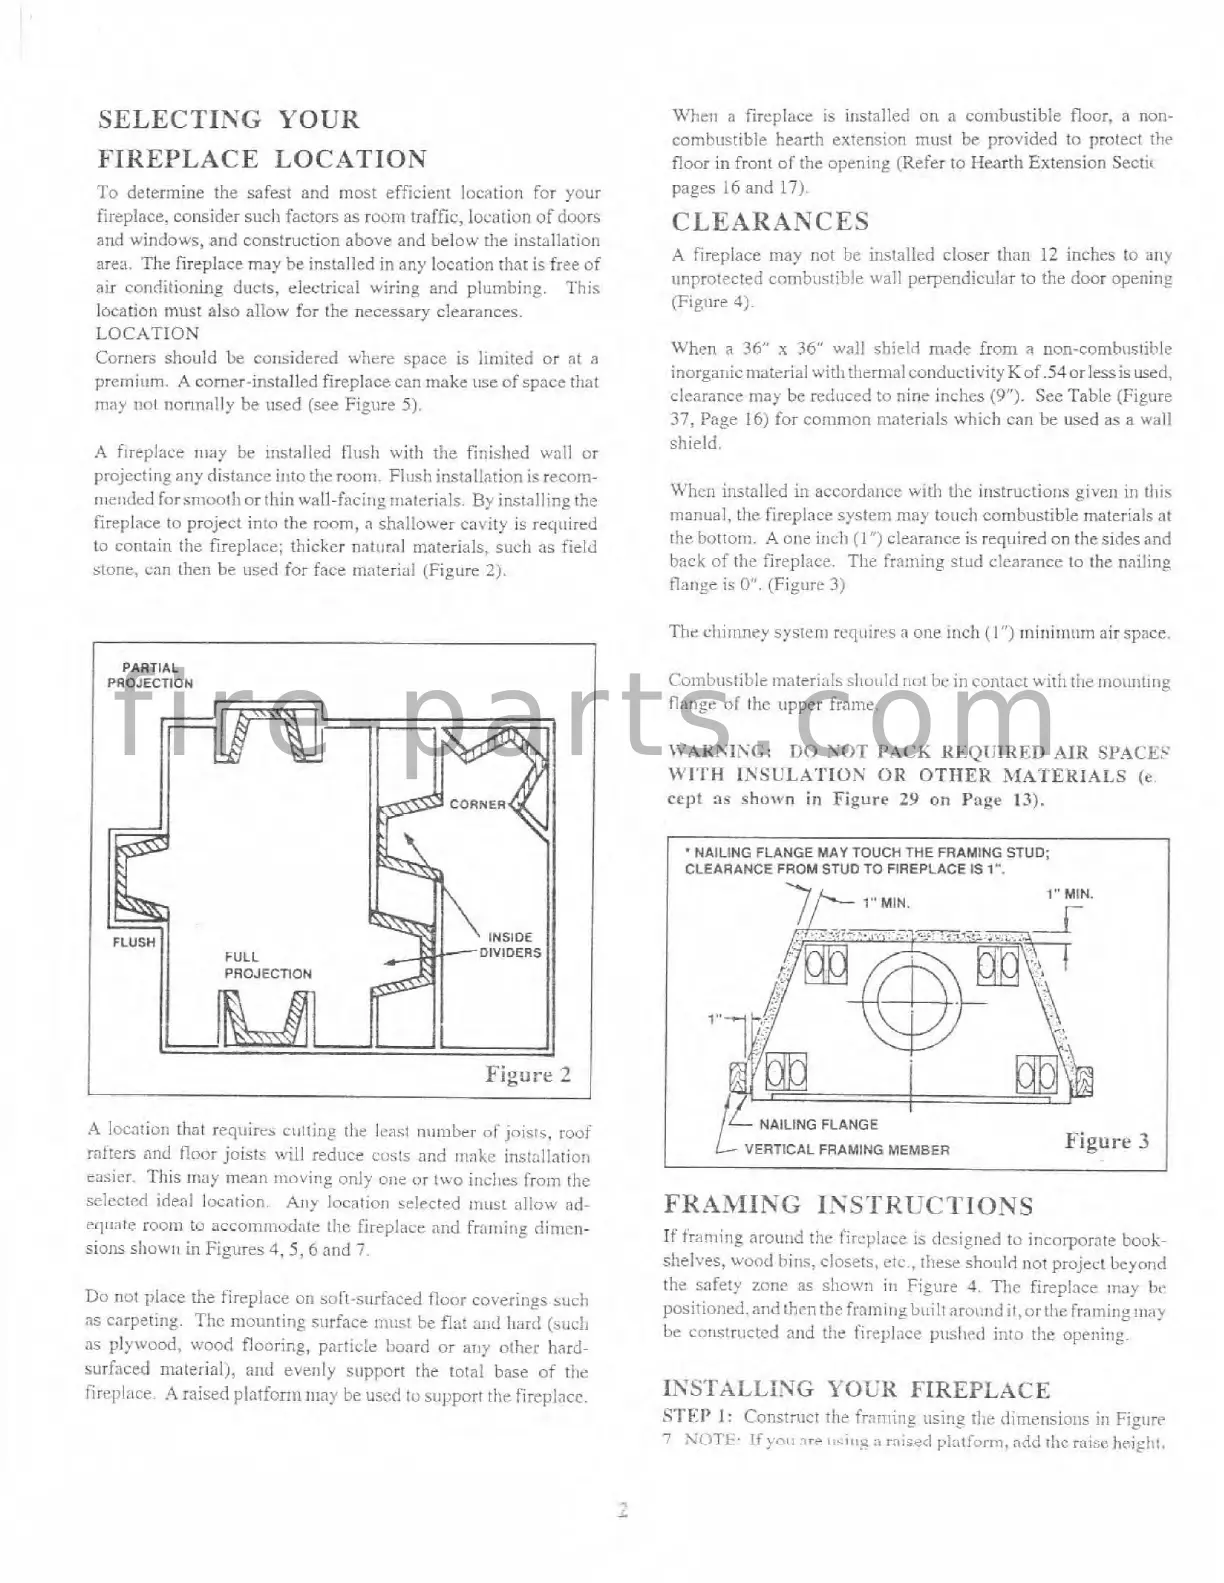
A
corner-installed fireplace can make rtir of space tililt
may
tiot norlnally be used (see Figure
5).
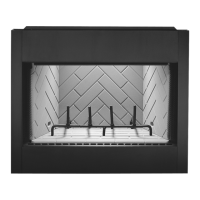
A
fireplace illity he i:rstalled flush with tlre tinislted wall or
projectin8
any
distalice into tile ruoni. Flash installation
is
recom-
rnrnded forsiiiootli or thin wall-facit~g nlaterinls By insrnllin~ the
fireplace to project into
the room, a shallou,er cavity is reqiiirrd
to contain the fireplace; tllichcr natural materials, sucti as field
stui~r,
can
then
be
used
for face r~rateiiill (Figure
2).
PARTIAL
PROJECTION
1
Figure
2
A
locntiori that requirrs culling tl~e Icilst
nr~~i,brr
of
joists, roof
rniters and floor joists will redr~ce
COS!S
and m:lkc installntiotl
rdsicr. This
iiii~~
inean :novil~g only one or two itlcl~es from tlie
selectcd ideal location. Any locatiotl brlrcted tii~rst allow nd-
cqmtr room to accomiiiodate tlic fireplace and frnilliri~ riinlon-
sions sl~ow~i in Figures
4,5,6
and
7.
Uil
nut plnce t!re fireplace
on
,oh-surfaced tloor coveriogs suuii
as carpeting. Thc nlouririn~ surface rnlist he
fla:
and hnrri (such
as pl?\\.ood, wood flooring, pairicle hoard or
any
other hard-
surfac~ri rn~tterialj, anii evenly support the torn1 base
of
tlx
firrp1:ice
A
raised platfor~n
11111~
be used to support
tilt
fireplace.
Whet)
a
fireplace is irrstalled on a combustible floor,
a
non-
combustible hearth extension
rnrist
b~
provided to protect tl~r
floor in front of the opetii~ig (Refer to Hearth Extension Sectic
pages
16
and
17).
CLEARANCES
A
fireplace niay not he i~lstallcrl closer thau
12
inches to any
~tnprotccted cornbutiblr wall prrpendicul:~r to !lie door opening
(Figurr
4).
li'hen
a
36"
x
36'
wall shicld niadc from a non-comhrrstihlc
inorgariicn~vterial
witl~tl~eririalcoriductivity
Kof.54orlessis used,
clearance may
bz rediiced
to
nine iiicllcs
(9").
SeeTable (Figure
37,
Page
16)
for comnron lnaterials which can be used
a
a
wall
shield.
Wllert installed in accordance with tlie ittitructiot~s pivcn in this
manual, the firrplnce system may tooch combustible materials at
tile hotto~ii.
A
one iclcl~ (1") clearnrwr
is
requircrl on the sides and
hack of
tile fireplace.
The
framing stud clearance to the nailing
tlarlpe is
0.
(Figorc
3)
Tile
ol~i~iiney sys~eni ruq11in:s a one inch (1") rnillirnutn air space.
Combustible m;~terl;ils sllould
>,<it
be
in contact wirl: ttit tnoiiriiing
flange
ol
tllc t~pper iraine.
\VAKKIS(;:
DO
SOT
PACK
Kk:QIiIRED
AIR
SPACE?
WITH
INSULATION
OR
OTHER
MATEK1AI.S
(e
cept
as
shown
in
Figure
29
on
Page
13).
I
.NAILING
FLANGE
MAY
TOUCH
THE
FRAMING
STUD;
CLEARANCE
FROM
STUD
TO
FIREPLACE
IS
1".
I
>/--
;"
MIN.
1"
MIN.
7
NAILING
FLANGE
VERTICAL
FRAMING
MEMBER
Figurr
3
FRAMING 1SSTMI;CTIOYS
If
fr:lnlinp arou~rd tl~c fiicploce is drsigned to incnrponte
book^
shelves, wood hins, closets, ctc, these shoiild not project bcynnd
the safety zone as shown
ir:
Figure
4.
The
fireplace tnny
br
positioned.iii~d t:icnthc fmmitig built aro~rild
it.
or
the framing itrar
be cr>ntrt~cted and tile fiircpl;ice
PIISIIP~
into tlie opetiiii?.
IKSTALLING
YOUR
FIREPLACE
STEP
I:
Construct tile frnrniiig using tlic dimcnsioirz
ill
Figl~rr
7
Xi>TE.
If
pi>
nr+
~i..iri+
;i
raised pl;ttk,r-rn,
add
tllr rois~; t~si~t~t.
f i r e - p a r t s . c o m