22
MOUNTING
1. Identify a suitable location per the “Location and Clearance Guidelines”. Ensure that the
heater will be attached in a manner that is sufcient to support the weight of the heater in operation.
2. If the wall is not reproof, the water heater should then be cushioned with a reproof board, of
which each rim projects beyond the corresponding rim of the water heater by 100mm and is 10mm
off the wall.
3. For installation on concrete or block, drill three each 5/16” (or 8 mm) holes at the marked
locations. Insert the supplied ¼” (6 mm ) steel expansion bolts into the holes.
4. For wall installation, locate a stud and use supplied mounting screws or hollow wall
anchors. To use the hollow wall anchors, drill 5/16” holes at marked locations and insert the
anchors into the hole. A combination of mounting screws and anchors is acceptable.
5. Remove the cover of water heater from carton.
6. Position the water heater into place. Fasten to the wall.
1) 1. Installation height: It is appropriate to use the water heater display or the re hole to be
level with the horizontal visual height (generally 1.5m).
2) After determining the height, mark the hole according to the water heater's hanging hole,
drill a hole with diameter of Ø8mm and a depth of 50mm, and inserted into the M6 metal
expansion bolt. The lower part drill a hole with diameter of Ø6mm and a depth of 35mm and
inserted into two Ø6mm plastic expansion. Plug (Figure 1).
3) Hang up the water heater and tighten the expansion screw and nut after visually perpendicular to the ground.
4) 621mm (24.45 inches) and 120mm (4.72 inches) are the distance of the hole.
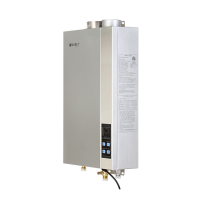
The heater MUST be installed in a vertical position with fuel gas inlet
at the bottom and exhaust vent positioned at the top. Installation in
any other orientation will result in damage and will void warranty.
 Loading...