10
6
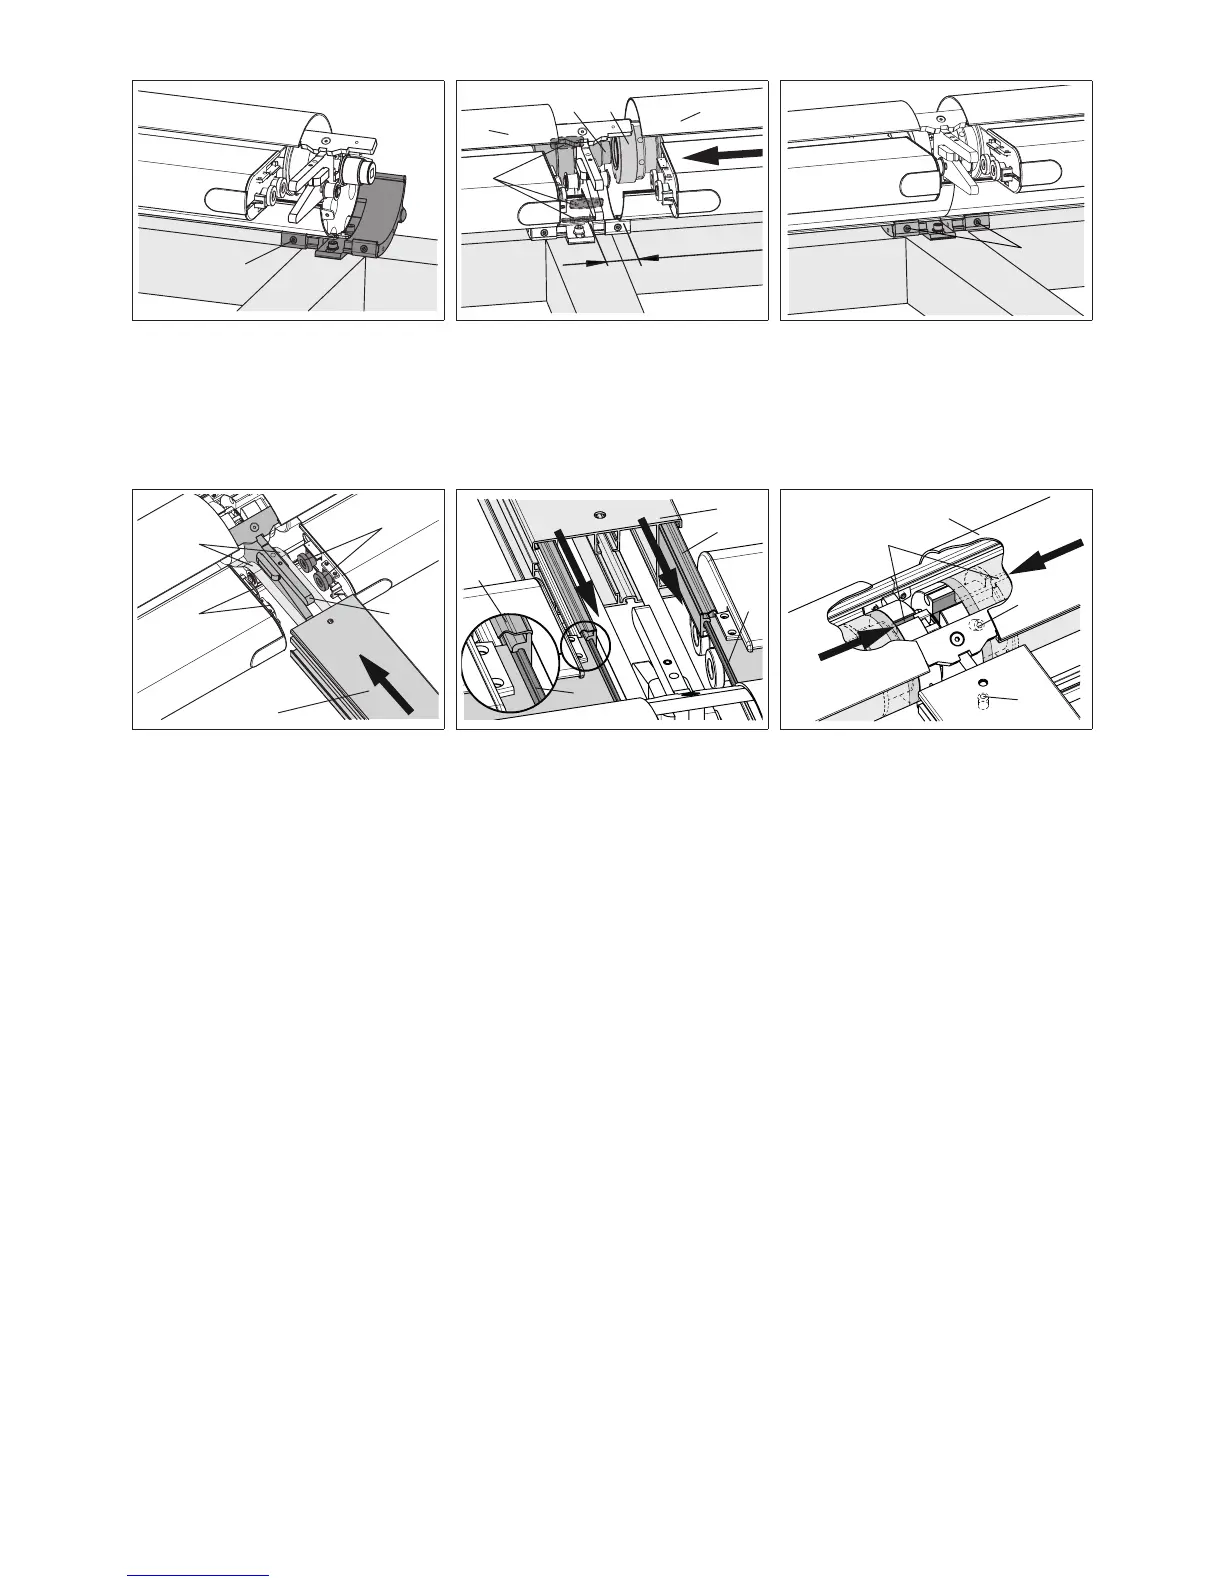
4. Tighten the SW 5 cylinder head
screws at the clamp plate (6) of the
brackets to secure the drive awning.
5. Fit the awning to be coupled (7) to the
bottom couple bracket with a clearance
of 50 mm to the drive awning (3). Slightly
lift the fabric roller (8) and push the
awning to be coupled onto the socket (9)
and the pincher carriages (10) of the
drive awning (3).
6. Tighten the SW 5 cylinder head
screws (6) at the clamp plate of the
brackets fo secure the awning to be
coupled.
15
14
18
7
17
16
7. Push the coupling track (11) via the
track rollers (12) onto the auf den
cassette coupling bracket (5) until the
stop. While doing this, guide the lug-end
of the drive belt (13) into the cassette as
described for single units.
Attention! Do not twist transport
bands! See point 7a for tracx system.
7a. Attention!
For awnings with tracx system:
Thread the cover of both awnings with
the "zip" (14) in the respective plastic
tracks (15) [in the guide track (11)].
Subsequently attach the guide tracks
and x them.
11 = guide track with inside plastic track
(15)
8. Fix the coupling track by tightening
the SW 5 threaded pin (16). Turn the
fabric roller of the coupled awning (7)
until the roller tube grooves (17) of the
cloths are aligned with each other.
Tighten one of the four SW 5 threaded
pins (18) that are offset by 90° in the fab-
ric roller of the coupled awning (7).