ENGLISH
REAR PANEL FUNCTIONS (CONT.)
the amount of eect can be dialled in with
the MIX control.
The +4dBu/-10dBV switch allows you
to congure the loop for use with either
rack equipment (+4dBu seng) or with
stompbox level FX (-10dBV seng).
When MIX is set to WET all of the signal
from external FX goes through the FX
LOOP. Add more direct (unprocessed)
signal by turning MIX towards DRY. This
allows you to mix any amount of the
external FX without losing or degrading
the direct signal quality.
When mixing the WET and DRY signals
the external FX processor’s output should
be congured to remove the direct
(unprocessed) signal or an unpleasant
phasing eect may occur when mixing
it again in the amplier. If the amplier
sounds thin aer connecng external
FX check that no direct signal is being
returned from the processors output.
Note: If the FX loop is switched ON and
the MIX control is set to WET without an
external processor connected, the amplier
will be muted.
19. LOUDSPEAKERS
There are 5 speaker outputs available on
the rear panel. They are labelled according
to the intended impedances:
1 x16 OHM
Connect a 16 Ohm speaker cabinet to this
jack.
1 x 8 OHM/2 x 16 OHM
Connect a single 8 Ohm speaker cabinet or
two 16 Ohm guitar cabinets.
1 x 4 OHM/2 x 8 OHM
Connect a single 4 Ohm speaker cabinet
or two 8 Ohm speaker cabinets.
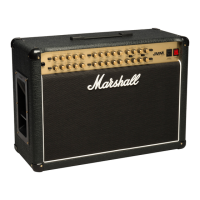
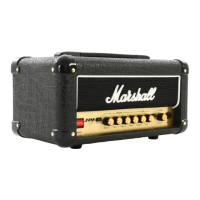
WARNING: Although JVM4 has 5 speaker
outputs never attempt to connect more
speakers than rated. The safe combinations
are 1x16 Ohm, 1x8 Ohm, 2x16 Ohm,
1x4 Ohm or 2x8 Ohm. Any other speaker
conguration may stress the power amplier
section and in extreme cases may lead to valve
and/or output transformer failure. NEVER
use the JVM410H or JVM410C without a
speaker load.
Book-00086-01 - 04/17 (JVM4_Manual86_FINAL_19.04.17).indd 16 28/04/2017 11:14
ENGLISH
HINTS AND TIPS
FACTORY RESET
This will erase all the MIDI presets and set
MIDI recepon channel to #1. Please note
that once the memory is erased it cannot
be recovered:
a) Switch the amplier o (POWER switch
OFF).
b) Whilst pressing and holding the CLEAN
CHANNEL/ GAIN switch, switch the
amplier on (POWER switch ON). The 4
channel LEDs will glow red.
c) Release the switch.
d) To conrm the factory reset press the
CRUNCH MODE switch.
e) If you want to abort the reset, press any
other key.
FOOTSWITCH RESET
To restore factory sengs:
a) Unplug the footswitch at any of the
cable sides.
b) Press and hold switch #6 (right switch).
c) Plug in the footswitch cord.
d) Release the switch and the FX led will
start blinking.
e) If you want to erase the footswitch
memory press the switch #5. To keep
the memory press any of the #1 to #4
switches. Please note that once the
memory is erased it cannot be recovered.
f) Release the switch and the footswitch
will synchronise with the amplier.
The factory default is as follows:
FSW #1: CLEAN FSW #2: CRUNCH
FSW #3: OD1 FSW #4: OD2
FSW #5: MASTER FSW #6: REVERB
HINTS
Hint 1:
It is possible to use dierent modes in the
same channel with dierent volumes to
avoid imbalance which can be especially
interesng in the CLEAN channel. To
do this simply create 2 presets in the
footswitch assigning MASTER 1 or
MASTER 2 to any of the modes. If you do
not connect any eect to the SERIAL /
PARALLEL FX LOOP the MIX control can
be used to act like an extra volume control
in any of the channels.
Hint 2:
To have a tuner output mung the
amplier, connect the tuner to the FX
LOOP SEND and select the CLEAN
channel. Turn the MIX control to WET
and switch the FX LOOP on. Store this
preset as described before and label it
for example as ‘tuner’. Obviously in this
conguraon it is not possible to connect
any other eect to the FX LOOP.
Hint 3:
A note about using 2 heads simultaneously
– The suggested procedure is connect the
‘master’ head PREAMP OUT to the ‘slave’
head POWER AMP IN and switch the
POWER AMP INSERT to ACTIVE in the
‘slave’ amplier.
In order to track the MASTER volume
sengs in both heads it is suggested to
use MIDI control with both ampliers
programmed in the same way. Connect
the MIDI IN of one of the ampliers to
the MIDI THROUGH of the other and
the pedalboard or MIDI equipment to the
remaining MIDI IN.
 Loading...
