This document provides assembly instructions for the Martha Stewart Braxton Accent Chair.
Function Description:
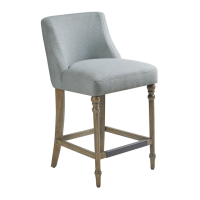
The Braxton Accent Chair is a piece of furniture designed for seating. It consists of a back cushion, a seat, a back frame, two finials, a left arm, a right arm, a left front leg, and a right front leg. The assembly process involves attaching these components using various bolts, washers, and wrenches to form a complete chair structure.
Important Technical Specifications:
Parts List:
- P1: Back Cushion (QTY: 1)
- P2: Seat (QTY: 1)
- P3: Back Frame (QTY: 1)
- P4: Finial (QTY: 2)
- P5: Left Arm (QTY: 1)
- P6: Right Arm (QTY: 1)
- P7: Left Front Leg (QTY: 1)
- P8: Right Front Leg (QTY: 1)
Hardware List:
- H1: Big Long Bolts (Ø5/16"*3-1/4", QTY: 4)
- H2: Big Medium Bolts (Ø5/16"*2-1/2", QTY: 4)
- H3: Big Short Bolts (Ø5/16"*1-1/2", QTY: 1)
- H4: Big Lock Washers (Ø5/16", QTY: 9)
- H5: Big Flat Washers (Ø5/16"*19mm, QTY: 9)
- H6: Big Allen Wrench (5/16", QTY: 1)
- H7: Small Bolts (Ø1/4"*1-3/4", QTY: 6)
- H8: Small Lock Washers (Ø1/4", QTY: 6)
- H9: Small Flat Washers (Ø1/4"*12mm, QTY: 2)
- H10: Small Flat Washers (Ø1/4"*19mm, QTY: 4)
- H11: Small Allen Wrench (1/4", QTY: 1)
- H12: Wooden Plugs (QTY: 2)
Usage Features:
Pre-assembly Instructions:
- Read Instructions: All instructions must be read carefully before beginning assembly.
- Two-Person Assembly: For safety and ease, assembly by two or more adults is recommended.
- Retain Instructions: Keep the instructions for future reference.
- Check Contents: Do not discard any packaging content until assembly is complete to avoid accidentally discarding small parts or hardware.
- Unpack Parts: Take out all parts and hardware from the box before starting.
Assembly Procedures:
Step 1: Attach the seat (P2) to the back frame (P3).
- Preparation: Assemble the chair on a flat, soft surface such as a carpet or cloth to prevent scratching the finish.
- Hardware:
- (H1)x4 Big Long Bolts Ø5/16"*3-1/4"
- (H3)x1 Big Short Bolts Ø5/16"*1-1/2"
- (H4)x5 Big Lock Washers Ø5/16"
- (H5)x5 Big Flat Washers Ø5/16"*19mm
- (H6)x1 Big Allen Wrench 5/16"
- Process: Secure the seat to the back frame using the specified bolts and washers. Ensure the "Located Dowel" on the seat aligns with the corresponding hole in the back frame. Use the Big Allen Wrench (H6) to tighten.
Step 2: Attach the left front leg (P7) and right front leg (P8) to the seat (P2).
- Hardware:
- (H2)x4 Big Medium Bolts Ø5/16"*2-1/2"
- (H4)x4 Big Lock Washers Ø5/16"
- (H5)x4 Big Flat Washers Ø5/16"*19mm
- (H6)x1 Big Allen Wrench 5/16"
- Process: Attach the front legs to the underside of the seat using the specified hardware. Use the Big Allen Wrench (H6) to tighten.
Step 3: Loosely attach the left arm (P5) and right arm (P6) to the seat (P2).
- Hardware:
- (H7)x4 Small Bolts Ø1/4"*1-3/4"
- (H8)x4 Small Lock Washers Ø1/4"
- (H10)x4 Small Flat Washers Ø1/4"*19mm
- (H11)x1 Small Allen Wrench 1/4"
- Process: Connect the arms to the seat using the small bolts, lock washers, and flat washers. At this stage, the bolts should only be loosely attached. Use the Small Allen Wrench (H11).
Step 4: Attach the left arm (P5) and right arm (P6) to the back frame (P3) and securely tighten all bolts.
- Preparation: Turn the assembled chair to an upright position.
- Hardware:
- (H7)x2 Small Bolts Ø1/4"*1-3/4"
- (H8)x2 Small Lock Washers Ø1/4"
- (H9)x2 Small Flat Washers Ø1/4"*12mm
- (H11)x1 Small Allen Wrench 1/4"
- Process: Attach the arms to the back frame using the specified hardware. Once all arm connections (to both seat and back frame) are made, securely tighten all bolts from Step 3 and Step 4. Use the Small Allen Wrench (H11).
Step 5: Screw the finials (P4) to the post top of the back frame (P3) and insert wood plugs (H12).
- Process (Part 1 - Finials): Screw the two finials (P4) onto the top posts of the back frame (P3).
- Process (Part 2 - Wood Plugs): Insert the two wooden plugs (H12) into the bolt holes. Tap them with a rubber hammer or mallet until their edges are even with the wood surface, concealing the bolt heads.
Step 6: Place the back cushion (P1) to the seat (P2) and the back frame (P3).
- Process: Position the back cushion onto the seat and against the back frame.
- Important Note: Failure to follow these instructions may cause the bolts to misalign during assembly.
Maintenance Features:
Additional Note About Safety:
- Periodic Inspection: Bolts may loosen during normal everyday use. They should be periodically inspected and re-tightened to prevent damage or injury.
- Hardware Tightness: Always check to ensure that all hardware is kept tightened.