EasyManua.ls Logo

Martha Stewart Delaney - User Manual

Martha Stewart Delaney
3 pages
Print Icon
To Next Page IconTo Next Page
Loading...
Pre-assembly:
Take out all parts and hardware from box.
Do not discard any content until assembly is complete to avoid accidentally discarding small parts or hardware.
Important safety instructions:
Please read carefully all instructions before assembly.
For your safety and ease, assembly by two or more adults is recommended.
Keep instructions for future use.
Allen Wrench
Lock Washers 5/16"
Flat Washers 5/16"
CHAIR BODY
Step 1:
Assemble the Chair on a flat and soft surface either on a carpet or cloth to prevent the finish from
scratching. Open Leg box then take out the Legs (P2), (P3), (P4), (P5) and Stretchers (P6), (P7), (P8), (P9).
ASSEMBLY INSTRUCTIONS
Description: Delaney Counter Stool
Item
QTY
Item
Description
QTY
P1
P2
P6
Page 1 of 3
Parts List
FRONT STRETCHER
Bolts 5/16"x 1"
1
SCREW Ø4 x 1 1/2"
1
1
P3
1
P4
1
Question and Answer IconNeed help?

Do you have a question about the Martha Stewart Delaney and is the answer not in the manual?

Summary

Delaney Counter Stool Assembly Instructions

Important Safety Instructions

Crucial safety guidelines to follow before and during assembly for user protection.

Pre-assembly Preparation

Steps to prepare parts and the workspace before beginning the assembly process.

Assembly Steps

Step 1: Prepare Chair Body and Parts

Prepare the chair body and unpack all legs and stretchers from the box.

Step 2: Attach Legs to Chair Body

Attach the front and back legs to the chair body using bolts and washers.

Step 3: Attach Front Stretcher

Connect the front stretcher to the front legs using screws.

Step 4: Attach Side and Back Stretchers

Attach side and back stretchers to the legs and tighten all bolts.

Finalization and Maintenance Notes

Step 5: Final Positioning and Adjustments

Turn the assembled chair upright and adjust leg levelers as needed.

Additional Safety and Maintenance Note

Periodically inspect and re-tighten bolts to ensure continued safety and stability.

Overview

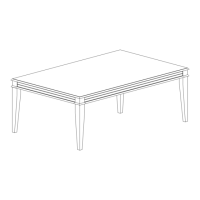
This document provides assembly instructions for the Martha Stewart Delaney Counter Stool. It outlines a step-by-step process for assembling the stool, including a detailed parts list, hardware list, and clear diagrams for each step.

Function Description:

The Delaney Counter Stool is a piece of furniture designed for seating at a counter or similar elevated surface. It requires assembly by the user, involving the attachment of legs and stretchers to the main chair body using provided hardware.

Important Technical Specifications:

Parts List:

  • P1: CHAIR BODY (Quantity: 1) - The main seating component of the stool.
  • P2: FRONT LEFT LEG (Quantity: 1) - One of the front support legs.
  • P3: FRONT RIGHT LEG (Quantity: 1) - The other front support leg.
  • P4: BACK LEFT LEG (Quantity: 1) - One of the back support legs.
  • P5: BACK RIGHT LEG (Quantity: 1) - The other back support leg.
  • P6: FRONT STRETCHER (Quantity: 1) - A horizontal support bar connecting the front legs.
  • P7: SIDE LEFT STRETCHER (Quantity: 1) - A horizontal support bar connecting a front leg to a back leg on the left side.
  • P8: SIDE RIGHT STRETCHER (Quantity: 1) - A horizontal support bar connecting a front leg to a back leg on the right side.
  • P9: BACK STRETCHER (Quantity: 1) - A horizontal support bar connecting the back legs.

Hardware List:

  • H1: Bolts 5/16"x 1" (Quantity: 12) - Used for attaching the legs to the chair body.
  • H2: Lock Washers 5/16" (Quantity: 12) - Used with bolts to prevent loosening.
  • H3: Flat Washers 5/16" (Quantity: 12) - Used with bolts to distribute pressure and protect surfaces.
  • H4: Allen Wrench (Quantity: 1) - The tool required for tightening the bolts.
  • H5: SCREW Ø4 x 1 1/2" (Quantity: 8) - Used for attaching the stretchers to the legs.

Usage Features:

  • Assembly Recommendation: It is recommended that assembly be performed by two or more adults for safety and ease.
  • Assembly Surface: The chair should be assembled on a flat and soft surface, such as a carpet or cloth, to prevent scratching the finish.
  • Adjustable Levelers: The front legs of the stool are equipped with adjustable levelers, allowing for stability on uneven surfaces. This feature helps to prevent wobbling and ensures a steady seating experience.
  • Pre-assembly Instructions: Users are advised not to discard any packaging content until assembly is complete to avoid accidentally discarding small parts or hardware. All parts and hardware should be taken out of the box before starting assembly.

Maintenance Features:

  • Periodic Inspection: Bolts may loosen during normal everyday use. Therefore, they should be periodically inspected and re-tightened to prevent damage or injury.
  • Hardware Check: Users should always check to ensure that all hardware is kept tightened. This proactive maintenance helps to maintain the structural integrity and safety of the stool over time.
  • Safety Disclaimer: The manufacturer states that when properly assembled, this item is safe for intended use. The seller is not liable for any damages resulting from the item being improperly assembled after purchase. This emphasizes the importance of following the assembly instructions carefully and performing regular maintenance checks.

Assembly Steps Overview:

  1. Preparation: Unpack all legs (P2, P3, P4, P5) and stretchers (P6, P7, P8, P9) from the leg box.
  2. Attach Legs to Chair Body: Attach the front legs (P2, P3) and back legs (P4, P5) to the chair body (P1) using bolts (H1), lock washers (H2), and flat washers (H3). An Allen wrench (H4) is used for this step. Crucially, the bolts should not be tightened at this stage to allow for proper alignment in subsequent steps.
  3. Attach Front Stretcher: Attach the front stretcher (P6) to the front legs (P2, P3) using screws (H5).
  4. Attach Side and Back Stretchers: Attach the side left stretcher (P7), side right stretcher (P8), and back stretcher (P9) to the front legs (P2, P3) and back legs (P4, P5) using screws (H5). After all stretchers are in place, all previously loosened bolts (H1) should be tightened.
  5. Finalization: Turn the assembled chair to an upright position. The assembly is complete.

The document stresses the importance of reading all instructions carefully before assembly and keeping the instructions for future reference, particularly for maintenance purposes.

Martha Stewart Delaney Specifications

General IconGeneral
BrandMartha Stewart
ModelDelaney
CategoryIndoor Furnishing
LanguageEnglish

Related product manuals