17
CHIMNEY OFFSET INSTALLATION
E
LBOW INSTALLATION
The following are important points that should be observed when installing elbows on the fireplace:
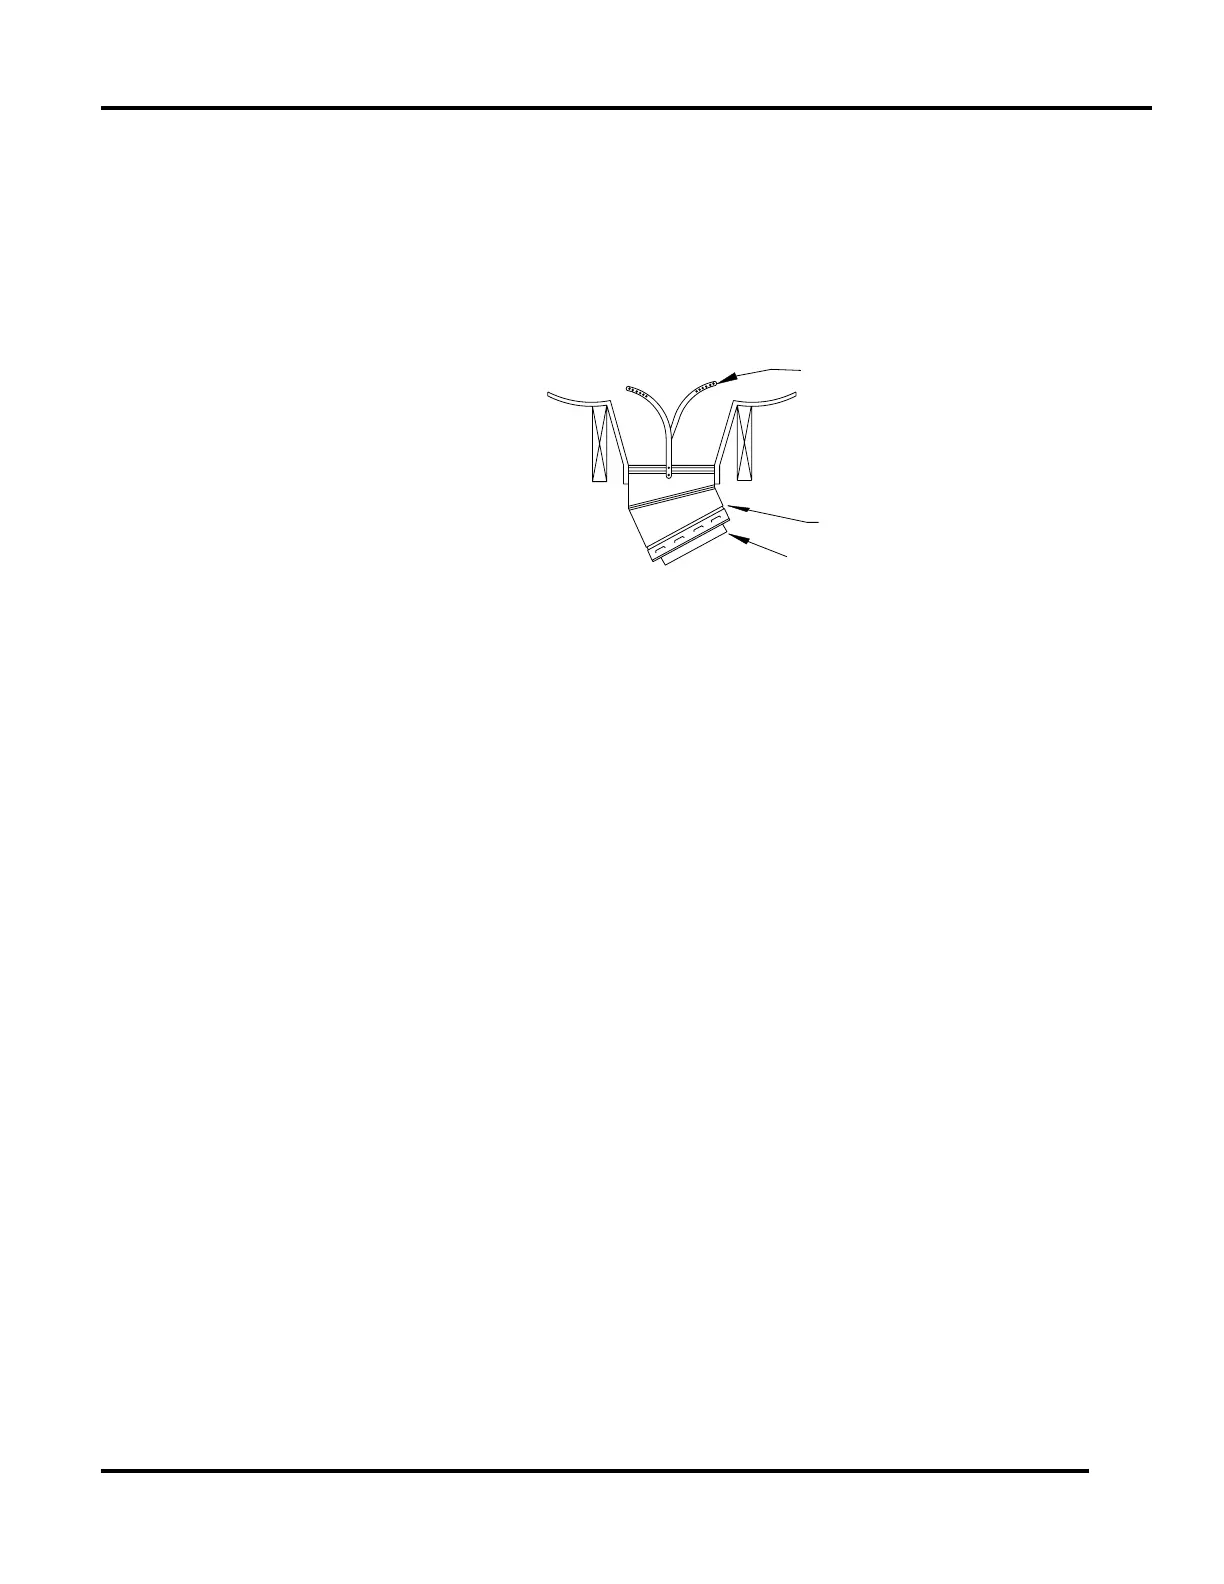
1. The support straps of all elbows not installed directly on top of the fireplace should be nailed securely to the
surrounding structure. This allows the support strap to carry the weight of the chimney above the elbow
and prevents this weight from breaking the elbow or chimney sections apart. Figure 18.
2. Elbows should not be used in any combination that inclines the chimney more than 30 degrees from
vertical.
3. The limitations on the quantity of elbows per chimney are as follows: If the total height of the fireplace and
chimney is — 14' 0" or more — two elbows may be used in the chimney. 21' 0" or more — four elbows
may be used in the chimney.
4. The inclined portions of chimneys that pass through living spaces likely to be used for storage should be
enclosed to avoid contact with and possible damage to the chimney. The minimum air space of two inches
between the chimney and enclosing materials must be maintained. Figures 20 and 21 illustrates elbow
installations.
5. The length of the inclined portion of chimney between elbows must not exceed 6 feet when unsupported or
20 feet if the chimney is supported at six-foot intervals with support such as metal support straps.
6. When enclosing the elbows and inclined portions of the chimney, enclosing materials must be installed
vertically to maintain the required two-inch minimum air space clearance to the chimney at the extremities
of the offset. It is recommended that enclosing material not follow the inclined portions of the chimney.
O
FFSET INSTALLATION SEQUENCE
1. Determine the location and amount of offset required, then select the combinations of chimney sections
and elbows required from the offset chart. Refer to Table 2.
2. Install the first SE30 elbow by placing the extended flue into the mating part of the fireplace or chimney
section. Push down until the outside or inlet air duct of the elbow overlaps and the snaps lock the elbow
into the fireplace or chimney section.
3. Nail the support straps to the framing member with a minimum of two 8-penny nails per strap.
4. Install the sections of pipe between elbows until the proper number of chimney sections have been installed.
5. Install the second elbow to return the run of the chimney to vertical.
6. Nail the support straps of the second elbow to a building frame member.
7. Continue installing the vertical portion of the chimney.
NOTE: If the inclined portion of the chimney passes through a floor or ceiling, an SF firestop spacer should be
installed to provide the firestop and support required. Be sure proper spacing in maintained between the
chimney and combustibles. Figure 19.
FIGURE 18
FLUE PIPE
INLET AIR PIPE
30˚ ELBOW
ALL FOUR SUPPORT
STRAPS MUST BE NAILED
ON TO FRAMING MEMBER
AROUND THE ELBOW WITH
A MINIMUM OF TWO (2)
8-PENNY NAILS PER STRAP
NOTE:
ALTHOUGH BOTH HALVES OF
THE ELBOW SET MAY HAVE
TIE STRAPS, ONLY THE TOP
HALF MUST BE SECURED. THE
BOTTOM ELBOW HALF IS NOT
REQUIRED TO BE SECURED FOR
ADDED STABILIZATION OF PIPE
53D9022. Rev 1 03/03
 Loading...