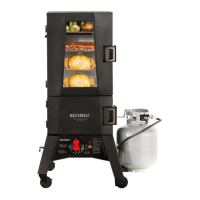
EasyManua.ls Logo

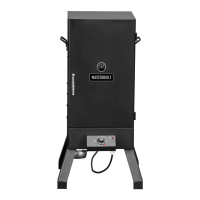
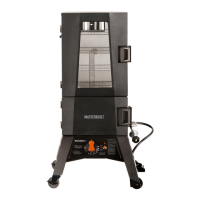
Masterbuilt MPS 340 G - User Manual

Masterbuilt MPS 340 G
20 pages
Print Icon
To Next Page IconTo Next Page
Loading...
Master it. Masterbuilt.
MPS 330G, MPS 340G
Welcome to the family. Let’s get started.
Manual Code: 9805180020 180830-GSB
PROPANE SMOKER
Manual applies to the following model number(s)
These numbers are located on the rating label of the unit.
Mfg. Date - Serial Number
Your model number
MB20053718, MB20053818, MB20053918, MB20054018,
MB20054118, MB20054218
Please record this information immediately and keep in a safe place for future use.
IMPORTANT
AGA certificate No. 8687 G

Questions and Answers

  • B
    browncurtisAug 19, 2025
    What to do if I have a grease fire or excessive flame in Masterbuilt MPS 340 G Smokers?
    • R
      Robert LittleAug 19, 2025
      If you experience a grease fire or excessive/continuous flame in your Masterbuilt Smoker, it's likely due to grease build-up on or around the burner area. Immediately turn off both the smoker control knob and the gas cylinder valve. Allow the flames to extinguish and give the unit time to cool down. Then, clean grease and food particles from around the burner or burner area and surrounding surfaces.
  • J
    Jorge SullivanAug 21, 2025
    Why are the flames blowing out on my Masterbuilt Smoker?
    • R
      Ryan YangAug 21, 2025
      If the flames are blowing out on your Masterbuilt Smoker, it is likely because the LP gas is low. Refill the LP cylinder.
  • P
    pchaneyAug 23, 2025
    What causes low flame output in Masterbuilt MPS 340 G?
    • J
      Joshua SuttonAug 23, 2025
      Low flame output in your Masterbuilt Smoker is often caused by being out of fuel. Refill or replace with a full LP cylinder.
  • W
    Wesley ThompsonAug 26, 2025
    What to do if there is a flare-up in Masterbuilt MPS 340 G Smokers?
    • J
      Julie ClarkAug 26, 2025
      A flare-up can occur in Masterbuilt Smokers due to several reasons. It could be caused by excessive grease buildup, in which case you should clean the burner and the inside of the unit. Another cause might be excessive fat on the meat being cooked, so trim the fat off the meat. Finally, the cooking temperature may be too high, so adjust or lower the temperature accordingly.
  • G
    Gregory WardAug 28, 2025
    Why is my Masterbuilt Smoker flame not staying lit?
    • J
      Jill DennisAug 28, 2025
      If the flame does not remain lit after igniting on your Masterbuilt Smoker, it may be because the flame sensor wire is loose. To fix this, turn off the gas, disconnect the LP cylinder, and tighten the flame sensor wire to the valve.
  • E
    Emily DanielAug 30, 2025
    What to do if my Masterbuilt Smoker has a fire under the control panel?
    • J
      Jennifer ChapmanAug 30, 2025
      If there is a fire under the control panel of your Masterbuilt Smoker, it is likely due to a fire in the burner tube caused by a burner blockage. Turn off both the smoker control knob and the gas cylinder valve. Once the fire is out and the burner has cooled, remove and inspect the burner for spiders, nests, rust, or other debris.
  • Z
    Zachary MullinsSep 1, 2025
    What to do for persistent grease fire in Masterbuilt MPS 340 G?
    • K
      Kenneth OwensSep 2, 2025
      If you have a persistent grease fire in your Masterbuilt Smoker, it's likely because grease is trapped by food buildup around the burner system. Turn the smoker control knob and gas cylinder valve off. Allow the fire to extinguish and the unit to cool down. Once cool, remove and clean the affected parts.
  • X
    xfrySep 4, 2025
    What to do if my Masterbuilt Smoker has a flashback (fire in burner tube)?
    • M
      mark49Sep 4, 2025
      If you experience a flashback (fire in the burner tube) in your Masterbuilt Smoker, it indicates that the burner and/or burner tube has a blockage. Turn the smoker control knob and gas cylinder valve off. Then, clean the burner and/or burner tube.
  • A
    Amy MartinSep 6, 2025
    Why is gas leaking between LP cylinder and regulator connection on Masterbuilt Smokers?
    • J
      jenkinsrandySep 6, 2025
      Gas leaking between the LP cylinder and regulator connection on your Masterbuilt Smoker can occur due to improper installation, a connection that is not tight enough, damaged threads, or a bad rubber seal. First, turn off the gas cylinder valve, then re-attach the regulator to the cylinder. Also, visually inspect the rubber seal for damage. If the issue persists, turn off the gas cylinder valve and return the cylinder to your gas provider/supplier.
  • W
    Wyatt CarrollSep 8, 2025
    Why is gas leaking from a cracked, cut, or burned hose on Masterbuilt MPS 340 G Smokers?
    • B
      Brian BennettSep 8, 2025
      If gas is leaking from a cracked, cut, or burned hose on your Masterbuilt Smoker, it's due to a damaged hose. Immediately turn off the gas at the LP cylinder and replace the hose. You can also contact Masterbuilt at 1.800.489.1581.

Summary

Masterbuilt Smoker Model and Introduction

Model Identification and Information Recording

Lists applicable model numbers and prompts user to record serial and date information.

Critical Safety Warnings

Carbon Monoxide Hazard

Highlights the danger of carbon monoxide and advises outdoor, ventilated use.

General Danger and Warning Statements

Covers critical safety warnings, including gas leaks, fire hazards, and unattended operation.

Structural Proximity and Safety Usage

Provides recommendations for safe placement and clearance around the smoker.

General Safety Information

Read All Instructions and Guidelines

Emphasizes reading all instructions, following fire codes, and maintaining safe clearances.

Continued Safety Information

Important Safeguards and Handling

Continues safety instructions, focusing on gas cylinder handling, ignition, and operational restrictions.

Smoker Operation and Maintenance

Getting Started and Pre-Seasoning

Guides users through initial setup, including pre-seasoning the smoker before first use.

Operating Instructions

Details how to operate the smoker, including adding wood, placing food, and adjusting settings.

Cleaning and Storing Instructions

Provides procedures for cleaning and storing the smoker after use to ensure longevity.

Soapy Water Test Procedures

Warnings and Preparation

Lists warnings, preparation steps, and the soapy water solution for leak testing.

Testing Gas Cylinder and Connections

Details the process for testing the gas cylinder valve and regulator/hose connections for leaks.

Ignition and Gas Connection

Regulator, Burner, and Gas Valve Connection

Guides on connecting the regulator, burner, and gas valve, including inspection and alignment.

Ignition Instructions

Provides step-by-step instructions for lighting the smoker burner safely and effectively.

Troubleshooting and Match Lighting

Match Light Instructions

Provides alternative lighting instructions using a match stick if the ignitor fails.

Troubleshooting Guide

Lists common symptoms, causes, and possible solutions for smoker operational issues.

Troubleshooting Solutions and FAQ

Low Flow, Vapor Lock, and Excess Flow Issues

Addresses causes and solutions for common gas flow problems like vapor lock and low output.

Frequently Asked Questions (FAQ)

Answers common user questions regarding temperature settings, ventilation, and external factors.

Parts List Overview

Component Identification

Visual guide to identify various parts of the smoker for assembly and replacement.

Parts and Hardware Identification

Hardware List

Lists all hardware components with their specifications and quantities required for assembly.

Detailed Parts List

Provides a comprehensive list of all smoker parts with corresponding numbers and descriptions.

Assembly Preparation and Tools

Pre-Assembly Instructions and Warnings

Contains essential warnings, instructions, and required tools before starting the assembly process.

Tools and Estimated Assembly Time

Lists necessary tools and provides an estimated assembly time for the unit.

Assembly - Part 1

Step 1-4: Initial Cabinet Assembly

Guides assembly of the main cabinet structure and base components using specific hardware.

Assembly - Part 2

Step 5-6: Attaching Legs and Braces

Details the attachment of legs, braces, and swivel casters to the smoker base.

Assembly - Part 3

Step 7-9: Installing Gas and Sensor Components

Focuses on installing the valve assembly, ignitor, and temperature sensors.

Assembly - Part 4

Step 10-13: Routing Wires and Sensors

Covers routing the cabinet temperature sensor wire and installing sensor covers.

Assembly - Part 5

Step 14-17: Attaching Burner Box and Heat Shield

Details the installation of the burner box, heat shield, and other base components.

Assembly - Part 6

Step 18-21: Installing Racks and Doors

Guides on attaching final components like racks, doors, and the water bowl.

Assembly - Part 7

Step 22-24: Final Component Attachment

Covers installing wood chip trays, grease trays, and support brackets.

Warranty and Product Information

SITRO GROUP AUSTRALIA (S.G.A.) Warranty Terms

Outlines warranty periods, conditions, exclusions, and claims process for domestic and commercial use.

Australian Consumer Law and Approvals

Explains consumer rights under Australian law and confirms gas products are for outdoor use only.

Contact Details and Warranty Registration

Provides contact information for service and warranty claims, and how to register the product.

Customer Support and Warranty Information

Masterbuilt Customer Service Contact

Provides contact details and operating hours for customer service assistance in Australia.

Purchase Receipt Requirement

Stresses the need to keep the purchase receipt for making warranty claims.

Masterbuilt MPS 340 G Specifications

General IconGeneral
BrandMasterbuilt
ModelMPS 340 G
CategorySmokers
TypePropane
Cooking Area340 square inches
Number of Racks/Cooking Grates2
Fuel TypePropane
MaterialSteel
ColorBlack
Burner1
Temperature Range100°F to 400°F

Related product manuals