24
MIG 140 INVERTER WELDER 058-9305-6
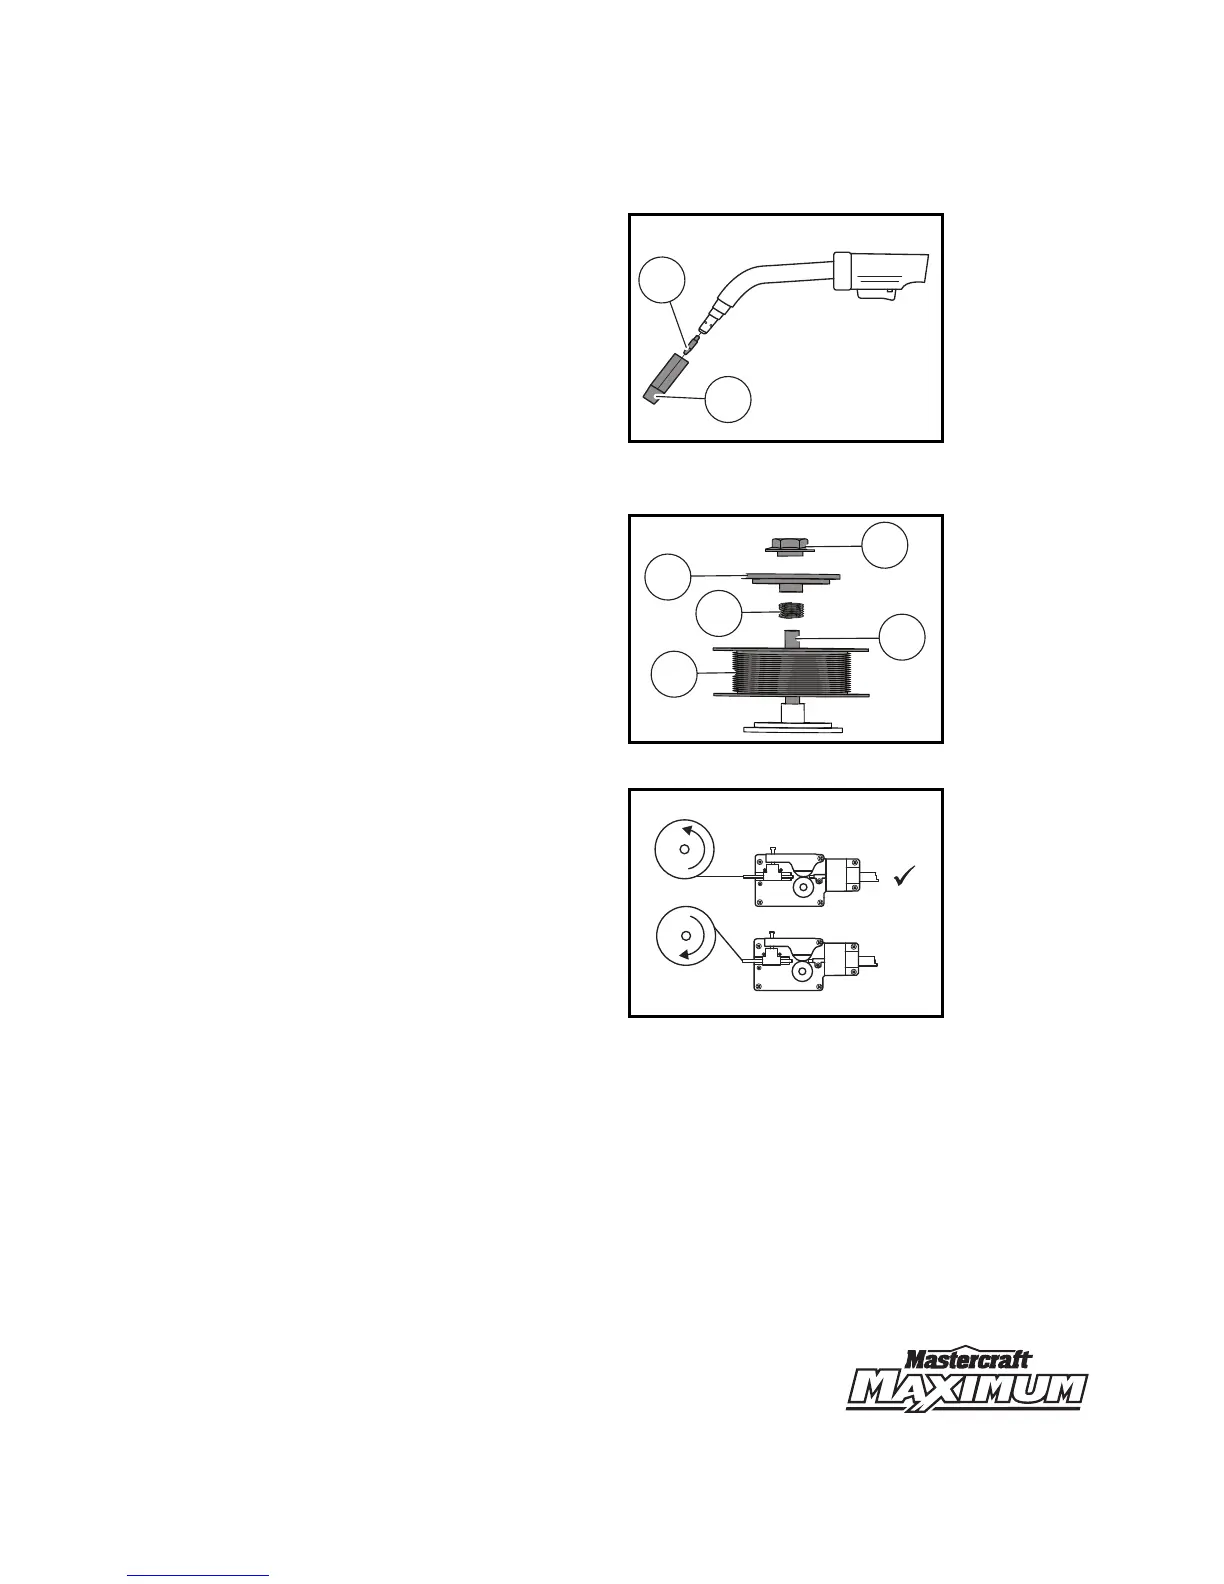
1. Remove the nozzle (1) and contact tip (2)
from the end of the MIG gun assembly
(fig L)
.
Note: Ensure that the groove on the drive roll
matches with the size of the wire being
installed.
2. Unwrap the wire spool from its
packaging. Do not unhook the wire at
this time.
3. Remove the adjustment knob (1), roll
plate (2), and spring (3) from the hub (4)
in the wire compartment. Slide the wire
spool (5) over the hub and secure the
spring, roll plate and knob sequentially
(fig M)
.
Note: The welder can use both 4" spool and 8"
spool. The adjustment knob is designed to
adjust the pressure tension of the wire spool.
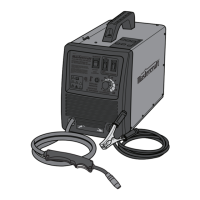
4. Place the spool on the hub with the wire
passing from the bottom of spool into
the drive mechanism
(fig N)
.