INSTALLATION
16 Copyright © 2009 Mastervolt / May 2009 / Whisper 6/8/12/16 Ultra for mobile applications / EN
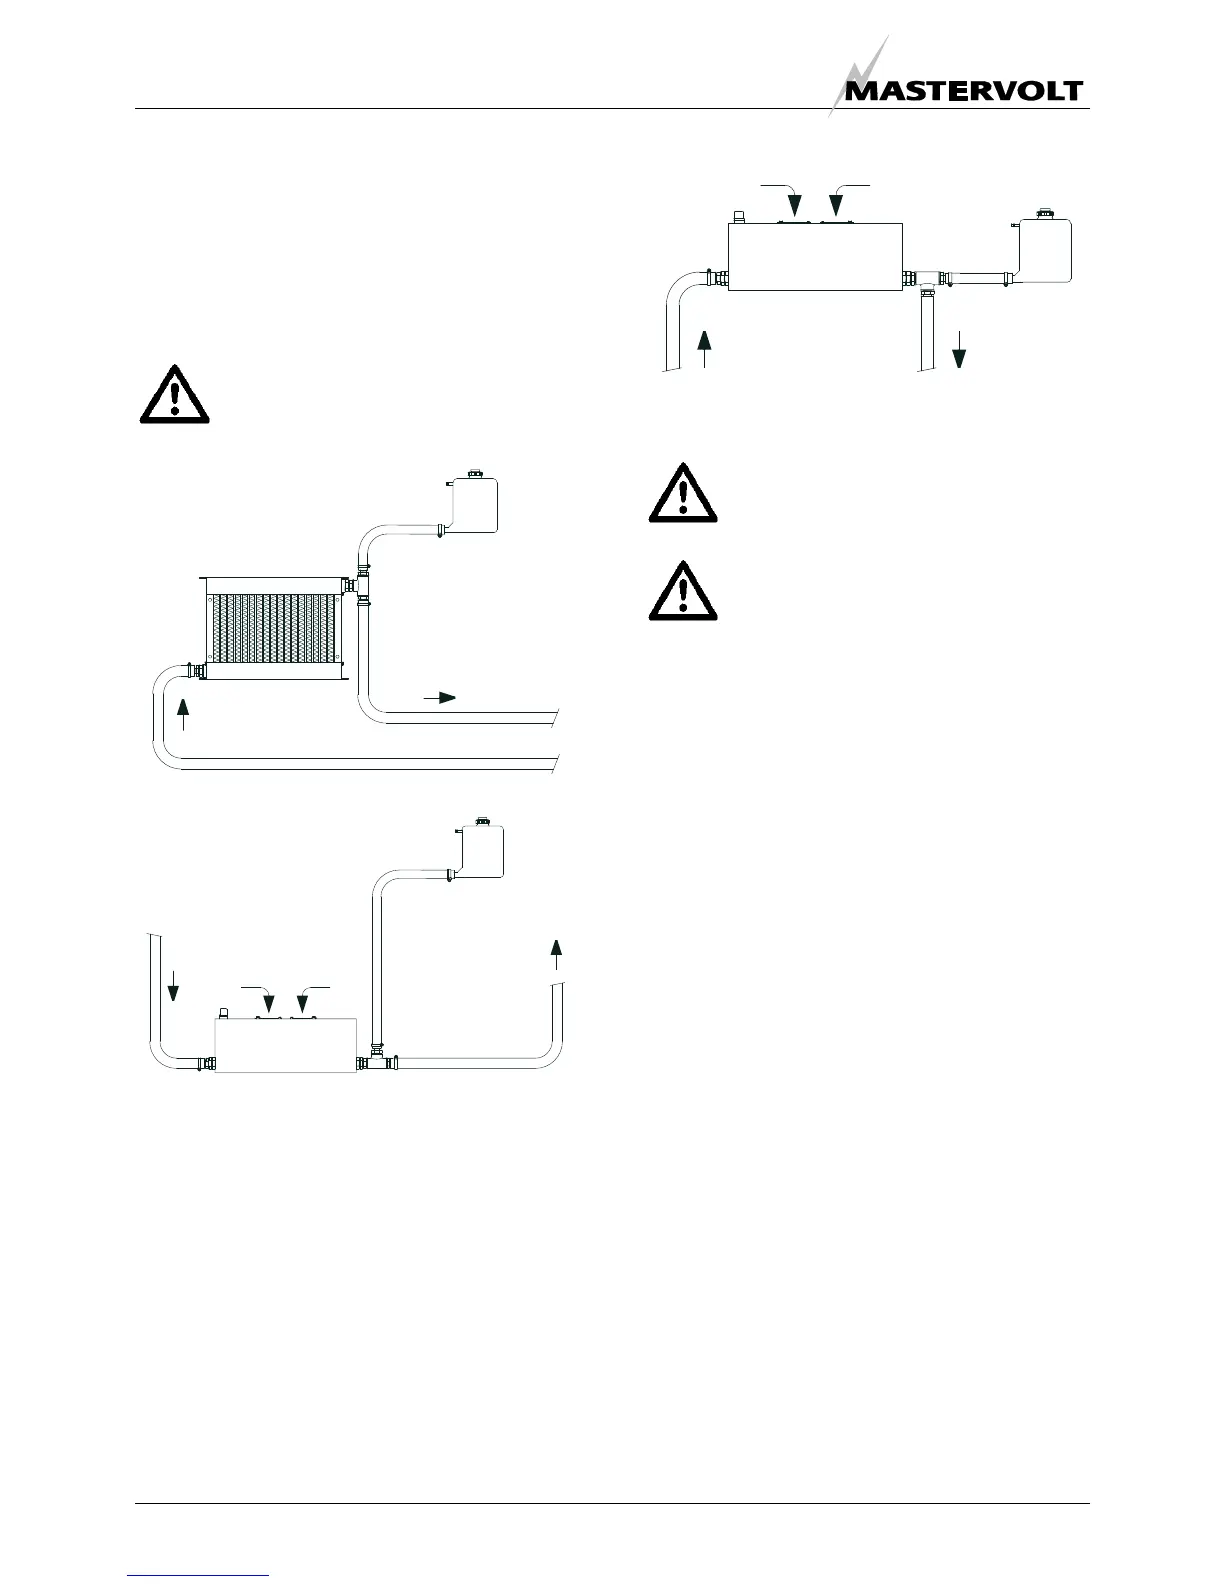
When mounting the radiators it is important to take care
that the outgoing connection, which is the connection to
the engine inlet, is on the top position (refer to figure 18
detail A) and is connected to the expansion tank. Also
when the radiator is mounted flat at the bottom of the
vehicle the outgoing connection is connected to the
expansion tank This is the best way to have the system
release air and to add liquid when necessary.
The expansion tank must be fitted in the outlet
of the radiator = the inlet pipe of the engine
Figure 18.
Outgoing connection connected to the expansion tank
When both radiators are flat mounted on the roof, the
expansion tanks should be mounted a little higher. (refer to
figure 19 detail B).
Figure 19:
Low profile radiator assembly on the roof
Most cooling problems originate from air traps
blocking the circulation of the engine coolant.
It is very important to use good quality heat
resistant hose and fittings. Therefore it is
strongly advised to use Mastervolt installation
kits
A
side mount
bottom mount
B
top mount
 Loading...