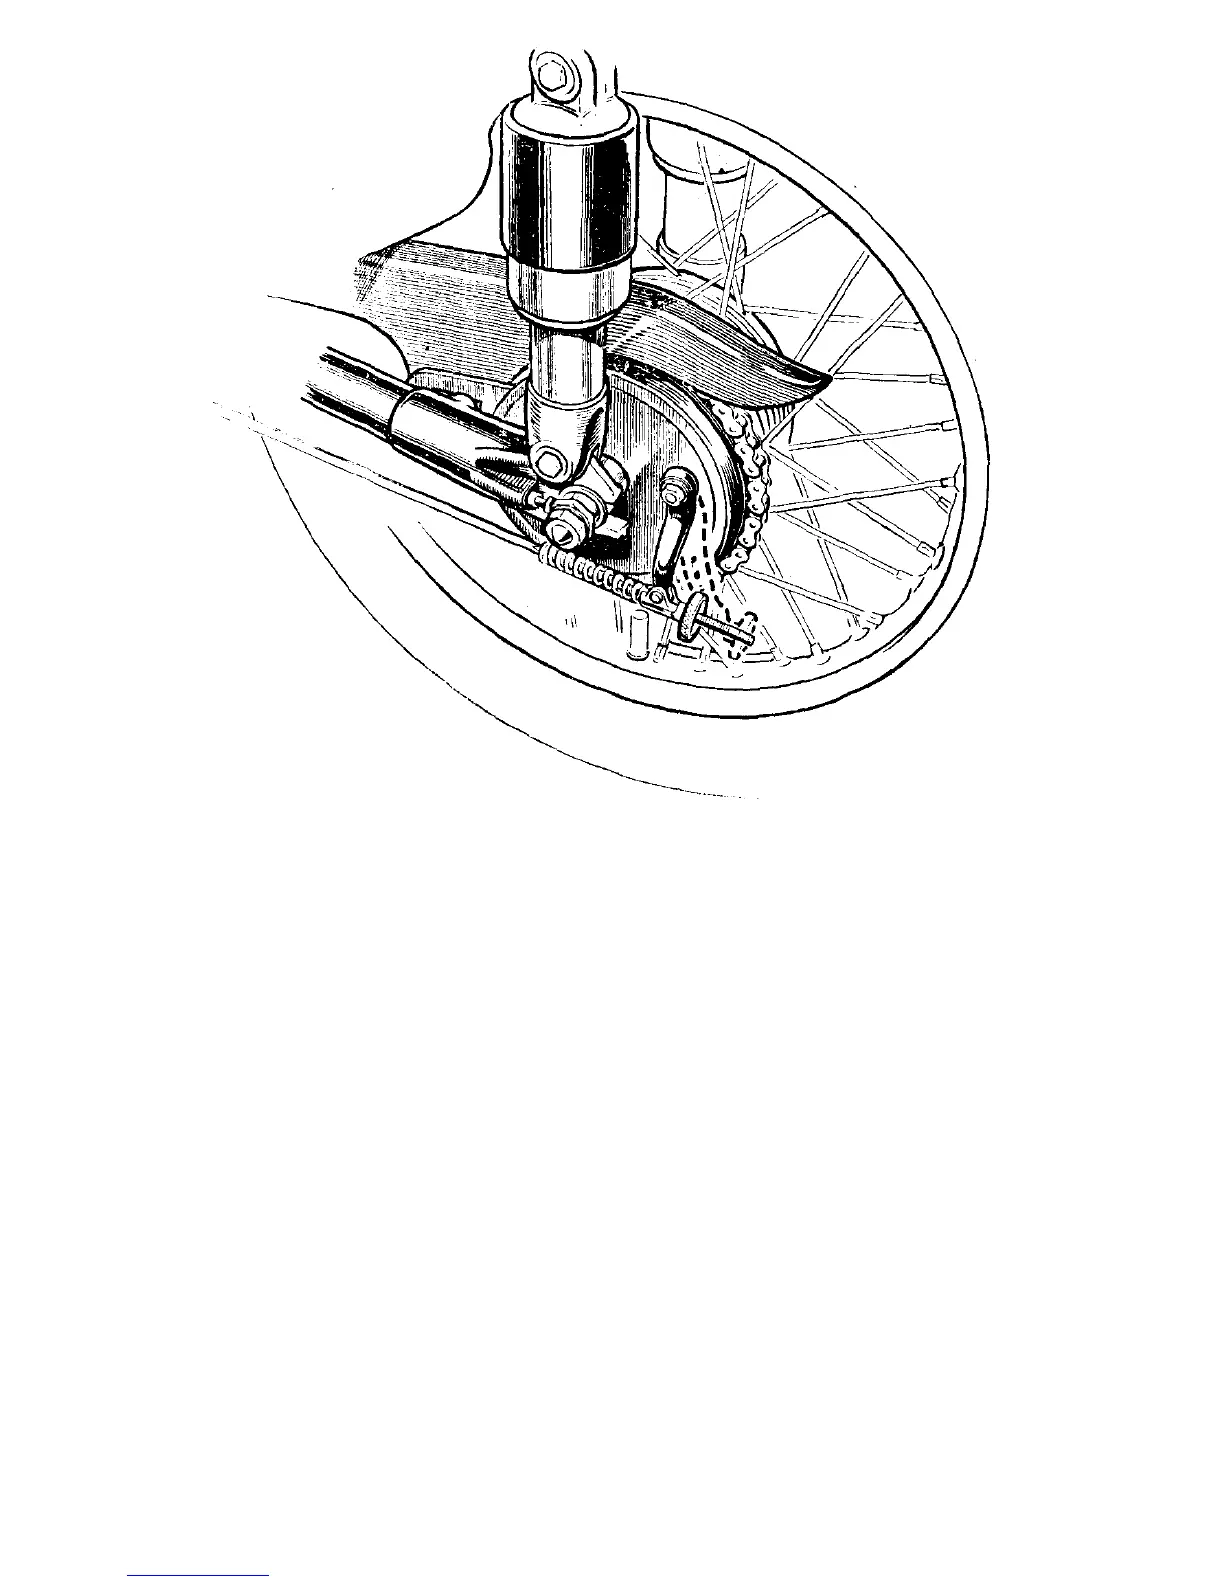
Illustration 28
Showing brake rod ad-
justment exhausted, in-
dicating the need for
brake thrust pin adjust-
ment.
TYRES
AND
SERVICE
(SPRING FRAME MODELS)
Obtaining satisfactory life and service from the tyres is largely a matter within the user's
control because the first essential is correct inflation. Check tyre pressures with a low
pressure gauge at least once a week. Inflate as may be necessary.
Avoid unnecessary, or " stunt," acceleration and fierce braking, which wear out tyres
by causing wheel spin and skid.
Do not drive in tram lines. It is dangerous, especially when wet, and the uprising edges
of worn rails will damage the tyres.
Remove flints, etc., that become embedded in the tread and. if any oil gets on the tyres
or spokes, clean it off with petrol.
Make sure the front and rear wheels are in track. When the wheel alignment is correct,
a piece of thin string stretched taut across both wheels, about four inches from, and
parallel to. the ground, should just touch each tyre at both sides of the wheel centres.
Alternatively, a straight wooden batten, about five feet long, is handy to use for checking
wheel alignment. This should be applied, as in the case of string, parallel to and about
four inches from the ground.
Always check the rear chain adjustment, and the rear brake adjustment, after making an
alteration to the rear wheel position.
NOTE—Above remarks on wheel alignment applies only to Models with similar width
tyres back and front.
On Models with larger rear tyre than front observe equal gap each side of latter when
checking.
TYRE REMOVAL
It is not essential to remove a wheel from the machine to repair a puncture but it will
usually be found desirable and more convenient to do so.
Take off outer cover and remove inner tube by :
Remove cap from tyre valve.
Remove nut from tyre valve.
Remove the " inside " from tyre valve. This allows inner tube to deflate. Most valve
caps have a reduced and slotted top to engage with the valve " inside " in order to
unscrew it.