Installation
Before you start
Step 1: Select a Location
Select a suitable location for your camera to enable coverage of the
intended surveillance area. The location should preferably be a flat
surface, such as a wall or a Ceiling.
You can insert SD card in camera to store recordings during network
failover and to upload image or clip as a result of event trigger.
See page 15 to know how to open the camera and insert the SD
card.
Step 2: Prepare for Installation
• The camera can be powered-up by an adaptor or PoE switch. In
case, the camera is to be powered up by adaptor, a 5A plug is
needed nearby.
• Provide proper connectivity between camera and recording
location through LAN cable.
• It is advisable to make concealed wiring. However, wiring can
also be done externally.
• Stick the Mounting Template at the exact location of camera
installation. The location can be ceiling or wall.
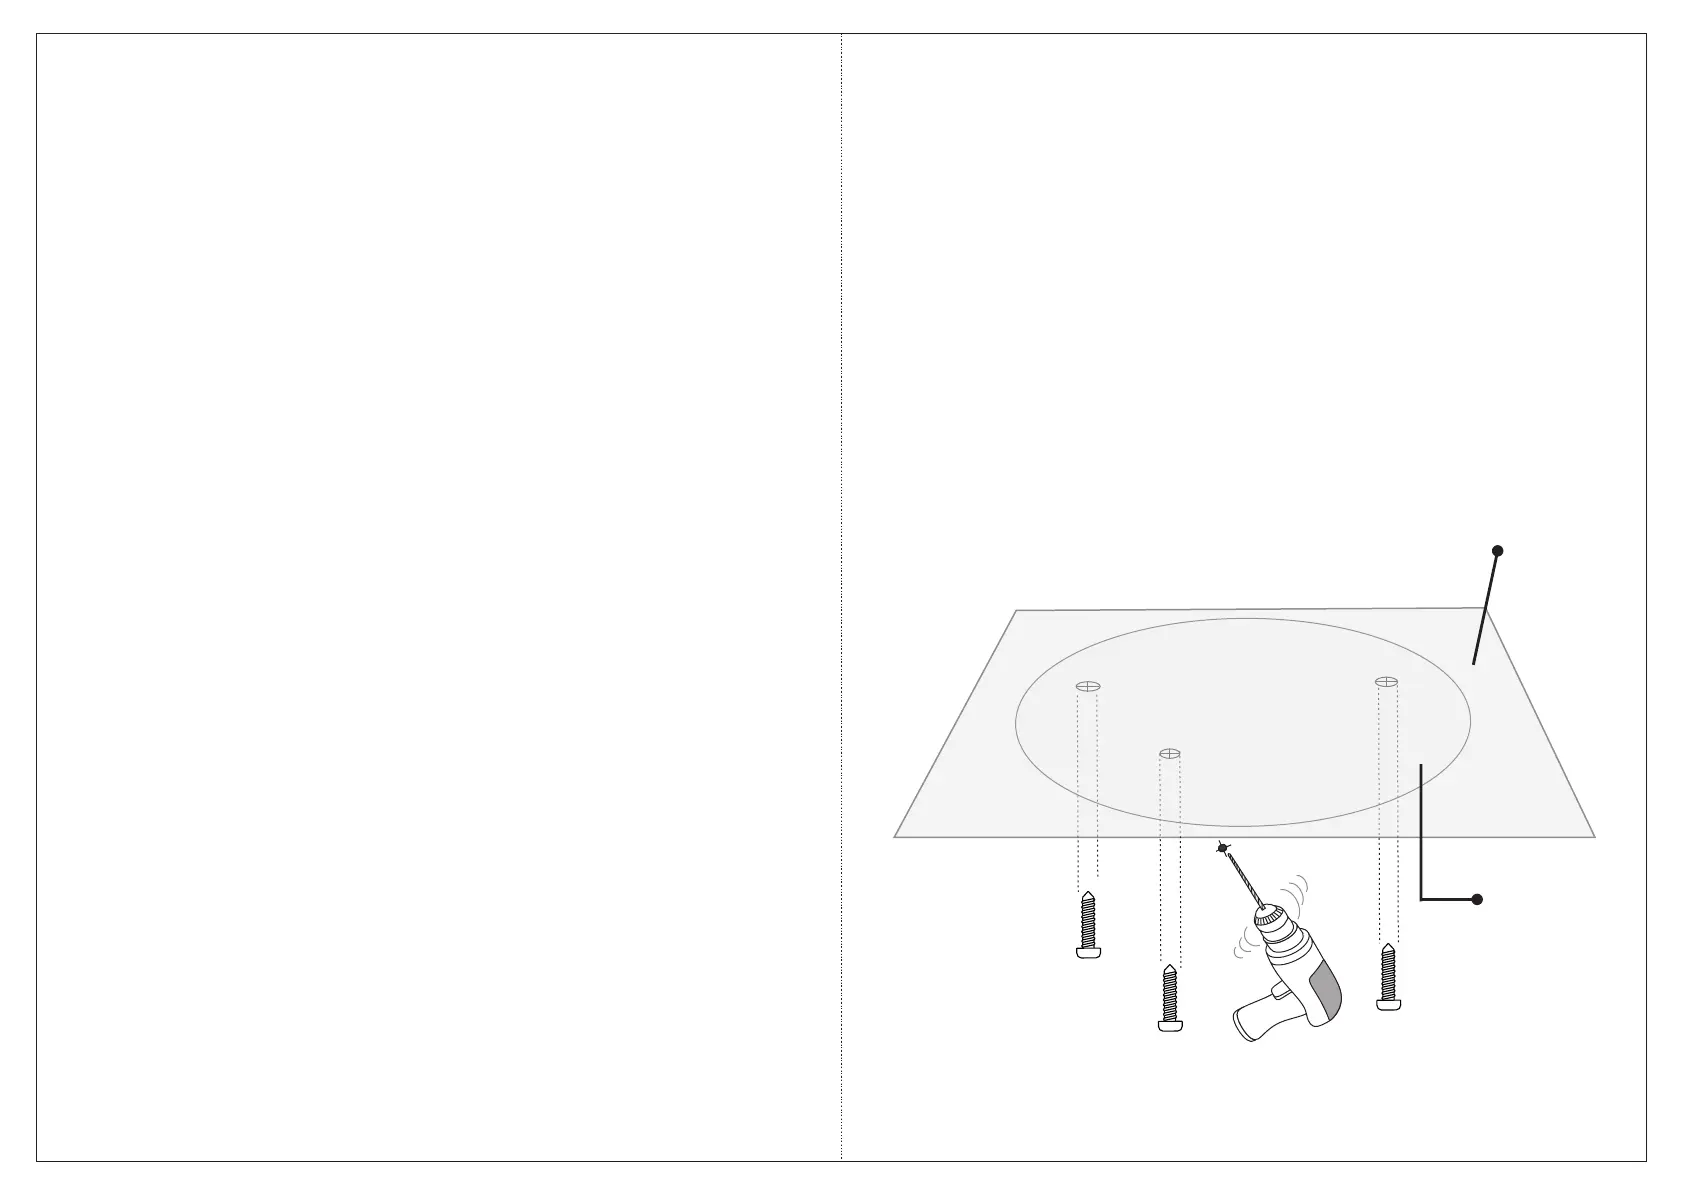
• Drill three holes through the markings provided on the Mounting
Template on Wall or Ceiling.
• Insert the screw grips in the holes you drilled, see Figure 2.
• In case of concealed wiring, a separate hole has to be drilled in the
center for cable outlet.
Step 3: Installing Mounting Template
7
8
Please make sure,
• The device in the package is in good condition and all the
assembly parts are included.
• All the related equipments are powered-off before installation.
• The wall or Ceiling is strong enough to support the weight of
camera.
Figure 2
Mounting
Template
Wall/Ceiling
 Loading...