21
STARTING THE CUT
Much of routing is a trial-and-error
process of making various adjustments,
followed by test cuts as you become
familiar with all of your router’s
operational abilities. To avoid ruining
good material, make your test cuts on
scrap materials.
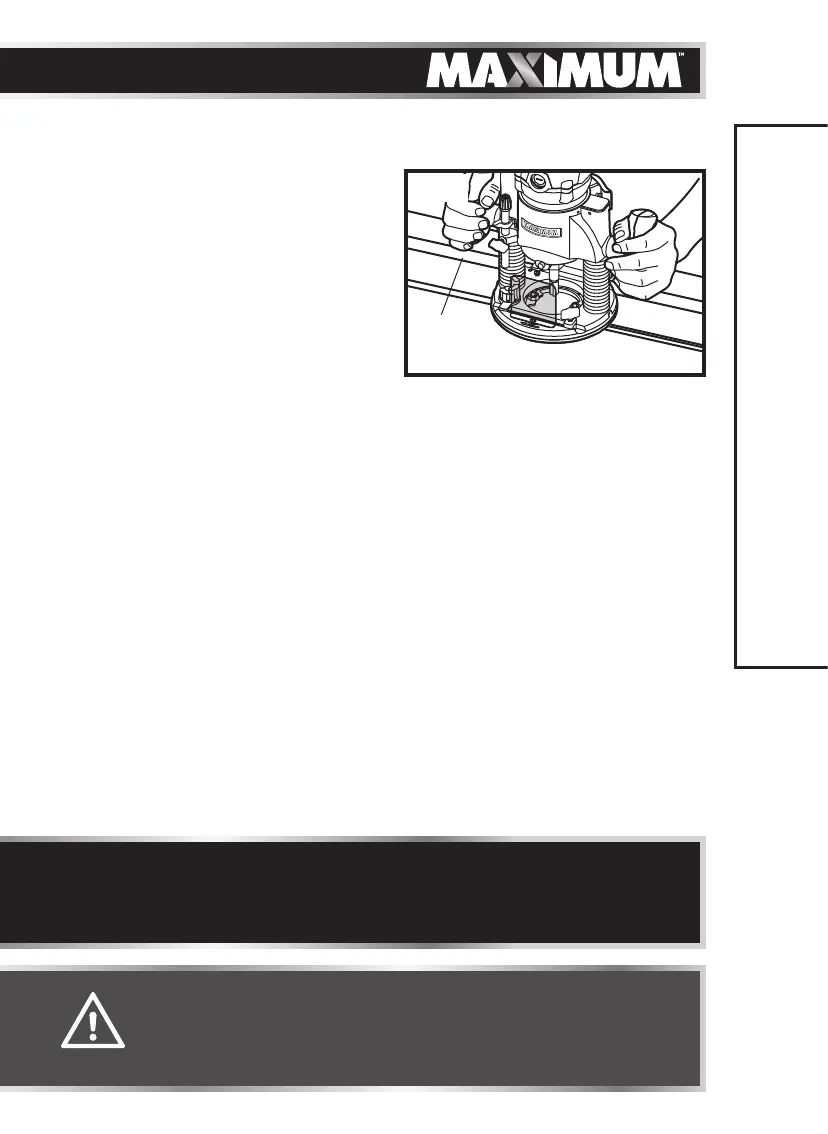
For ease of operation and to maintain
proper control, your router has two
handles, one on each side of the router
base. When operating the router, always
hold it firmly with both hands (Fig. 14).
DEEP CUTS
The proper cutting depth for each pass is always determined by the material, the
cutter bit size and type, and the power of the motor.
Always make several progressively deeper cuts: start at one depth and then
make several passes, each time increasing the cutting depth, until the desired
depth is reached.
Making a cut that is too deep will stress the router motor and the cutter bit, and
it may burn the workpiece and dull the cutter bit. It could also “grab” too much
of the workpiece, causing you to lose of control of the router, which may result in
a serious accident.
To be certain that your depth settings are correct, always make test cuts in scrap
material similar to your workpiece before beginning the final cutting operation.
Remember, knowing the right depth for each cut comes with routing experience.
OPERATING INSTRUCTIONS
WARNING!
• Before operating the router, follow all safety instructions in this
manual. Failure to do so could result in serious personal injury.
• Always be alert and watch what you are doing. Never operate the
router when you are fatigued or otherwise impaired.
NOTICE: Making test cuts is essential with most routing applications. Even
with careful set-ups, you won’t know exactly how the cut will go until you try
it out. A test cut will give a feel for the set-up, the router’s speed, the depth
of cut, and how the cutter bit reacts to the workpiece.
Edge
Guide
Edge with plunge base
g 14