51
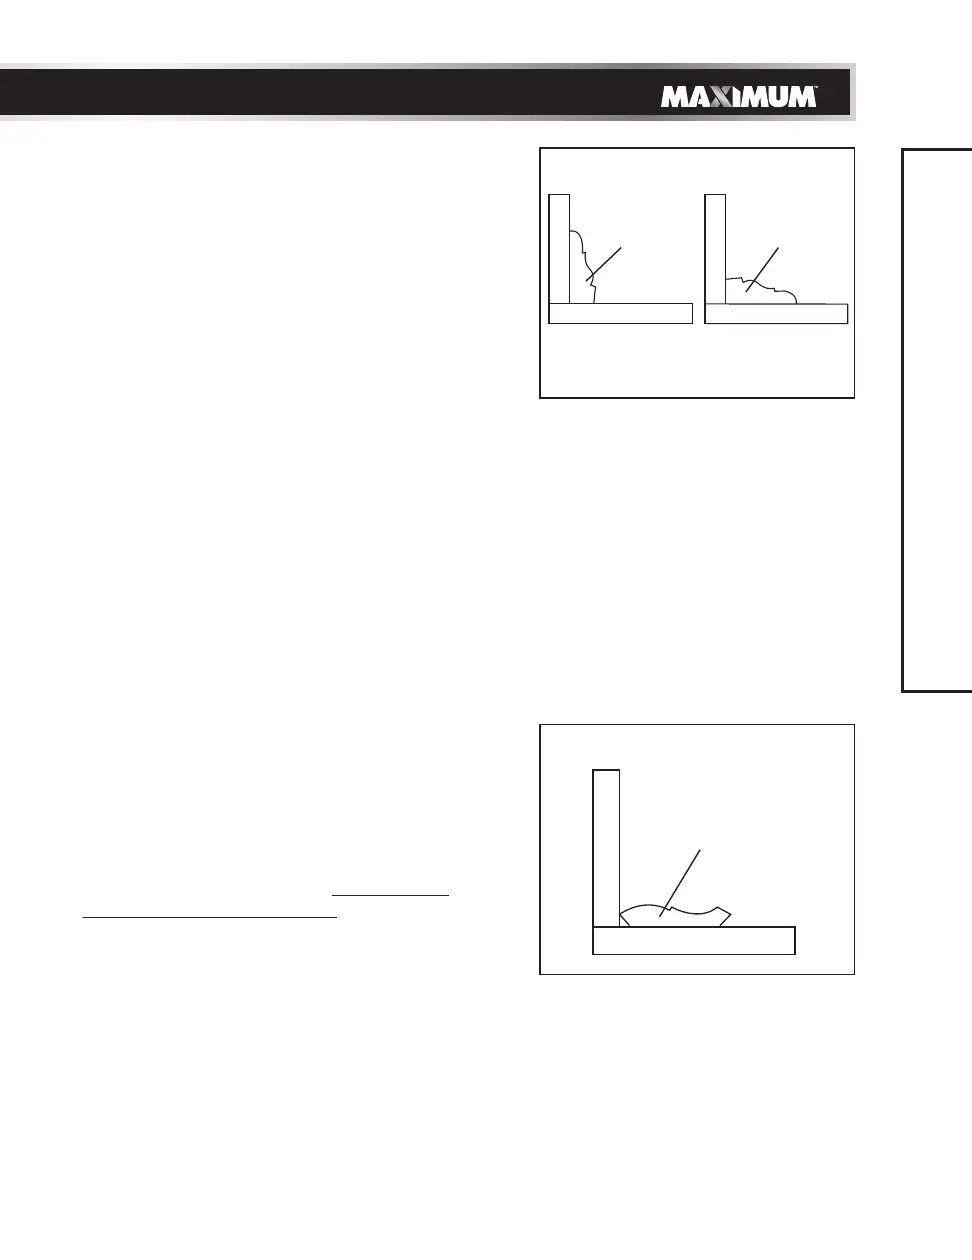
CUTTING BASE MOULDING (Fig. 48)
Base mouldings and many other mouldings
can be cut on a compound mitre saw. The
setup of the saw depends on moulding
characteristics and application, as shown.
Perform practice cuts on scrap material to
achieve best results:
• Always make sure mouldings rest firmly
against fence and table. Use hold-down,
crown moulding vice or C-clamps,
whenever possible, and place tape on the
area being clamped to avoid marks.
• Reduce splintering by taping the cut area
prior to making the cut. Mark the cut line
directly on the tape.
• Splintering typically happens due to an
incorrect blade application and thinness of
the material.
NOTE: Always perform a dry run cut so
you can determine if the operation being
attempted is possible before power is applied
to the saw.
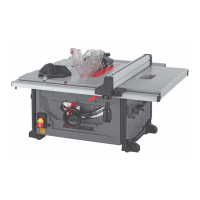
CUTTING CROWN MOULDING (Fig. 49, 50)
• Your compound mitre saw is suited for the
difficult task of cutting crown moulding.
To fit properly, crown moulding must be
compound-mitred with extreme accuracy.
The two surfaces on a piece of crown
moulding that fit flat against the ceiling
and wall are at angles that, when added
together, equal exactly 90°.
• Most crown moulding has a top rear angle
(the section that fits flat against the ceiling)
of 52° and a bottom rear angle (the section
that fits flat against the wall) of 38°.
Fig. 48
F
e
n
c
e
Mitre saw table
Mitre at 45°,
bevel at 0°
Mitre at 0°,
bevel at 45°
F
e
n
c
e
Mitre saw table
Workpiece
Workpiece
Fig. 49
F
e
n
c
e
Mitre saw table
Workpiece
OPERATION