20
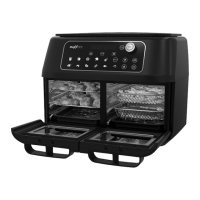
When you open the door(s) (3), the light in
the respective cooking zone (4,8) is auto-
matically switched on. After 2 minutes, the
light switches off again automatically.
To switch the light on / off manually, press
the button(18).
Stand-By Mode
If the device is not operating and no
button is pressed for 10 minutes, the
device switches to stand-by mode. When
the button(17) is pressed, the control
panel(2) is activated.
TIPS
• Generally no oil or only a small amount
of oil (2 to 3 teaspoons) is required for
preparing food.
• Very light pieces of food could be
swirled around by the circulating air.
If necessary, we recommend sticking
them together with toothpicks or a
similar object.
• The cooking time is dependent on the
size and quantity of the food and on
the temperature. However, in general
the cooking time is shorter than in a
conventional oven. Start with a shorter
cooking time and gradually increase it
if required.
• Mix the food around from time to
time or turn it with tongs to obtain an
even cooking result.
• Check the condition of the food in
between times and, if it is cooked,
switch off the device, even if the pro-
gramme has not yet finished.
SET-UP AND CONNECTION
Please Note!
■ Check the device and the connecting
cable for damage each time before
putting it into operation. Use the
device only if it is undamaged and in
working order.
■ Never place the device on a soft
surface. The ventilation openings on
the bottom of the device must not be
covered.
■ Ensure there is sufficient clear space
on all sides. Do not place the device
below kitchen wall units or similar
cupboards. The rising steam could
cause damage to them!
■ Only connect the device to a plug
socket that is properly installed and
matches the technical data of the
device. The plug socket must also be
readily accessible after connection so
that the connection to the mains can
quickly be isolated.
■ Do not use any extension cables.
■ Do not connect the device along with
other consumers (with a high wattage)
to a multiple socket in order to prevent
overloading and a possible short
circuit (fire).
■ Make sure that the connecting cable
does not present a trip hazard. It may
not hang down from the surface on
which the device is placed in order to
prevent the device from being pulled
down.
■ Make sure that the connecting cable is
not squashed, bent or laid over sharp
edges and does not come into contact
with hot surfaces (e.g. of the device).
1. Place the device on the kitchen unit or
another dry, clean, flat and heat-resist-
ant work surface. Ensure there is suffi-
cient clear space on all sides (at least
20 cm to the sides and 50 cm above).
2. Fully unwind the connecting cable and
plug the mains plug into a plug socket.
The button (17) is lit constantly.
The device is now in stand-by mode.
05535_05539_Inlay_DE-EN-FR-NL_A5_V1.1.indb 2005535_05539_Inlay_DE-EN-FR-NL_A5_V1.1.indb 20 24.05.2022 08:47:0424.05.2022 08:47:04
 Loading...