CARE&CLEANING,CONT.
:_ Rackswillpermanentlydiscolorand may
notslideout smoothlyifleft in theoven
duringa self-cleanoperation.If this oc-
curs,wipethe rackand embossedrack
supportswithasmallamountofvegetable
oiltorestoreeaseofmovehlent,thenwipe
oftexcessoil.
PLASTIC FINISHES
CONTROLPANELTRIM& END CAPS
MAINTENANCE
OVENDOORS
>- Whencool, clean withsoap and water,
rinseanddry. _-
:_ Usea glasscleanerand asoftcloth.
NOTE:Neveruseovencleaners,abrasiveor
causticliquidorpowderedcleansersonplastic ).
finishes.Thesecleaningagentswillscratchor
marfinish.
NOTE:To preventstainingor discoloration,
wipeup fat,greaseor acid (tomato,lemon,
vinegar,milk, fruitjuice, marinade)immedi-
atelywitha drypapertowelor cloth.
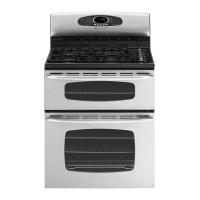
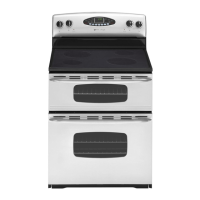
STAINLESS STEEL
(SELECTMODELS)
>"DO NOT USE ANY CLEANINGPROD-
UCTCONTAININGCHLORINEBLEACH.
>"ALWAYSWIPEWITHTHEGRAINWHEN
CLEANING.
>-DailyCleaning/LightSoil -- Wipe with
oneofthe following- soapy water,white
vinegar/watersolution,Formula409 Glass
andSurfaceCleaner*or a similarglass
cleaner- usingaspongeorsoftcloth.Rinse
anddry.Topolishandhelppreventfinger-
prints,follow withStainlessSteel Magic
Spray(PartNo.20000008)**.
>-Moderate/HeavySoil-- Wipewithoneof
thefollowing-BonAmi,SmartCleanser,or
SoftScrub*- usinga dampspongeor soft
cloth.Rinseanddry.Stubbornsoilsmaybe
removedwith a dampScotch-Brite*pad;
rubevenlywiththegrain.Rinseanddry.To
restorelusterand removestreaks,follow
withStainlessSteelMagicSpray*.
_-Discoloration-- Usinga dampspongeor
softcloth,wipewithCameoStainlessSteal
Cleaner*.Rinse immediatelyand dry. To
removestreaksand restore luster,follow
withStainlessSteelMagicSpray*.
Do not placeexcessiveweighton or
standonanopenovendoor.Thiscould
causetherangetotipover,breakthe
door,orinjurethe user.
Donotattempttoopenorclosedooror
operateovenuntildoorisproperlyre-
placed.
Neverplacefingersbetweenhingeand
frontovenframe.Hingearmsarespring
mounted.Ifaccidentallyhit, thehinge
willslam shutagainstovenframeand
couldinjureyourfingers.
Both the upper and lower oven doors are
removable.
TO REMOVE:
1. Whencool,opentheovendoortothe broil
stopposition(openedaboutfourinches).
2. Graspdoor at eachside. Do not use the
doorhandle to lift door.
3. Liftupevenlyuntildoorclearshingearms.
TOREPLACE:
1. Graspdoorat eachside.
2. Alignslotsin thedoorwifhthehingearms
on the range.
3. Slidethe doordownontothe hinge arms
untilthedooris completelyseatedon the
hinges.Pushdownon thetop comers of
thedoortocompletelyseatdooronhinges.
Doorshouldnot appearcrooked.
NOTE:The oven door on a newrange may
feel=spongy"whenitisclosed.This is normal
andwill decreasewith use.
OVENWINDOWS
TO PROTECTTHE OVEN DOOR WIN-
DOW:
1. Do not use abrasive cleaningagents
suchas steel woolscouringpads or
powderedcleanersastheymayscratch
theglass.
2. Do not hit the glass with pots, pans,
furniture,toys,orotherobjects.
3. Donotclosetheovendooruntiltheoven
racksareinplace.
Scratching,hitting,jarring or stressingthe
glass mayweakenitsstructurecausingan
increasedriskof breakageat a laterdate.
REMOVAL OF GAS
APPLIANCE
Gasapplianceconnectorsusedto connect
this applianceto the gas supplyare not
designedfor continuousmovement.Once
installed,DONOTrepeatedlymovethisgas
applianceforcleaningor to relocate.If this
appliancehasto bemovedand/orremoved ,
forservicing,followthe proceduredescribed
in the installation instructions.For infor-
mation,contact MaytagCustomerService
at 1-888-462-9824.
Topreventrangefrom accidentallytipping,
rangemustbesecuredtothefloorbysliding
rearlevelinglegintotheanti-tipbracket.
LEVELINGLEGS
>- Be sure the anti-tipbracketsecures
oneoftherearlevelinglegstothefloor.
Thisbracketpreventsthe rangefrom
accidentallytipping.
Therangeshouldbeleveledwhen
installed,if the rangeis notlevel,
turn the plasticlevelinglegs, lo-
catedat each comer of the
range, until range is
level.
ANTI-TIP
BRACKET
1}

 Loading...
