EasyManuals Logo

Maytag MDB4949SDM Installation Instructions

Maytag MDB4949SDM
48 pages
To Next Page IconTo Next Page
To Previous Page IconTo Previous Page
Page #21 background imageLoading...
Page #21 background image
21
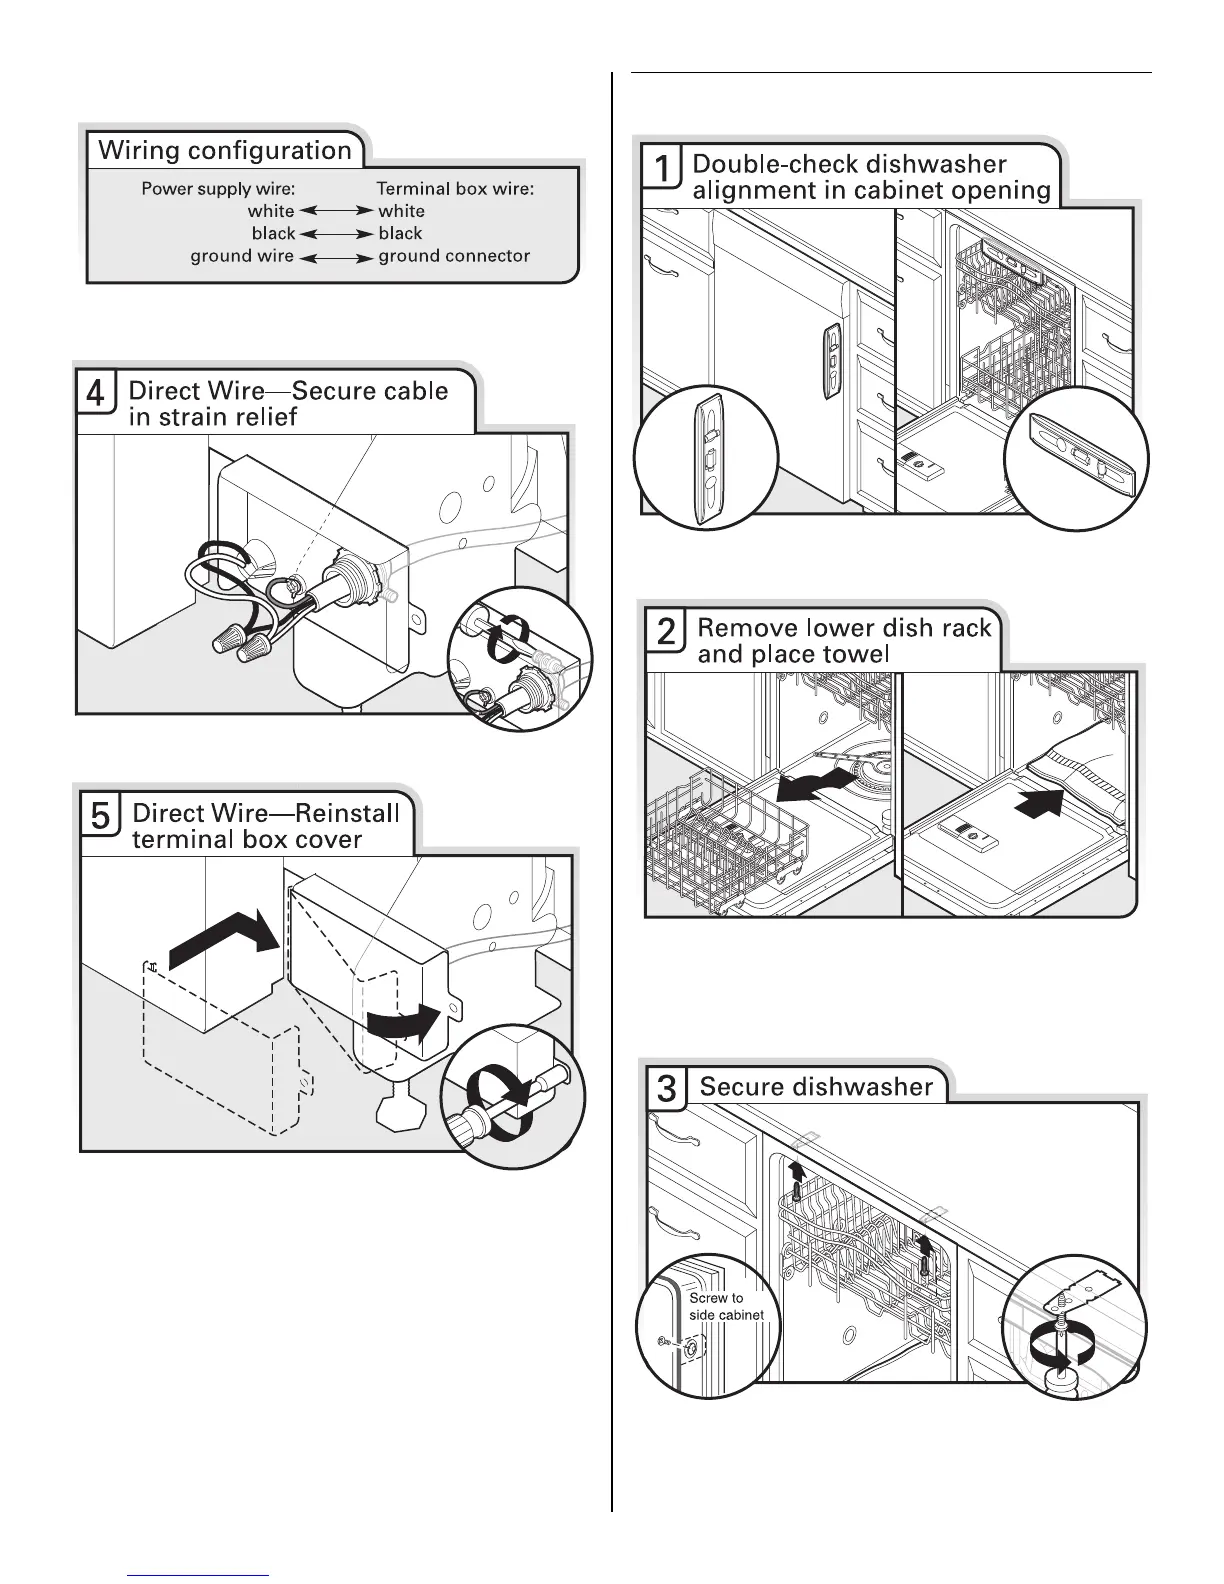
Connect wires black to black and white to white, using UL
Listed/CSA Approved twist-on wire connectors (not included).
If needed, see website for animated representation of this step.
Visit www.maytag.com/electrical under FAQ tab.
Tighten strain relief screws to secure cable.
Place wires inside terminal box. Insert tabs on left side of cover.
Make sure wires are tucked inside box. Close cover ensuring
wires are not pinched. Use ¹⁄₄" nut driver or Torx
®
T20
®
screwdriver
and previously removed screw to secure cover.
Secure Dishwasher in Cabinet Opening
Check that dishwasher is still level front-to-back and side-to-side
in cabinet opening.
Open dishwasher door, remove lower dish rack, and place towel
over pump assembly and lower spray arm of dishwasher. This will
keep screws from falling into pump area when you are securing
the dishwasher.
NOTE: Do not drop screws into bottom of dishwasher.

Other manuals for Maytag MDB4949SDM

Questions and Answers:

Question and Answer IconNeed help?

Do you have a question about the Maytag MDB4949SDM and is the answer not in the manual?

Maytag MDB4949SDM Specifications

General IconGeneral
Stylebuilt-in dishwashers
Colormonochromatic stainless steel, stainless steel
Cycle Selectionspowerblast, auto, normal, quick, rinse
Options/Settingsheated dry, hi temp wash, sani rinse®, control lock, 1-24 hour delay
Delay Startyes
Number of Racks2
Cycle Signalyes
Water Filteryes
Food Disposeryes
Sanitize Settingsno
Annual Energy Consumption270 kilowatt hours
Voltage120 volts
Current15 amperes
Weight and Dimensions IconWeight and Dimensions
Depth25.2 inches

Related product manuals