Disassembly Procedures
WARNING
To avoid risk of electrical shock, personal injury, or death, disconnect electrical power source to unit, unless test
procedures require power to be connected. Discharge capacitor through a resistor before attempting to service.
Ensure all ground wires are connected before certifying unit as repaired and/or operational.
©2005 Maytag Services 16025628 33
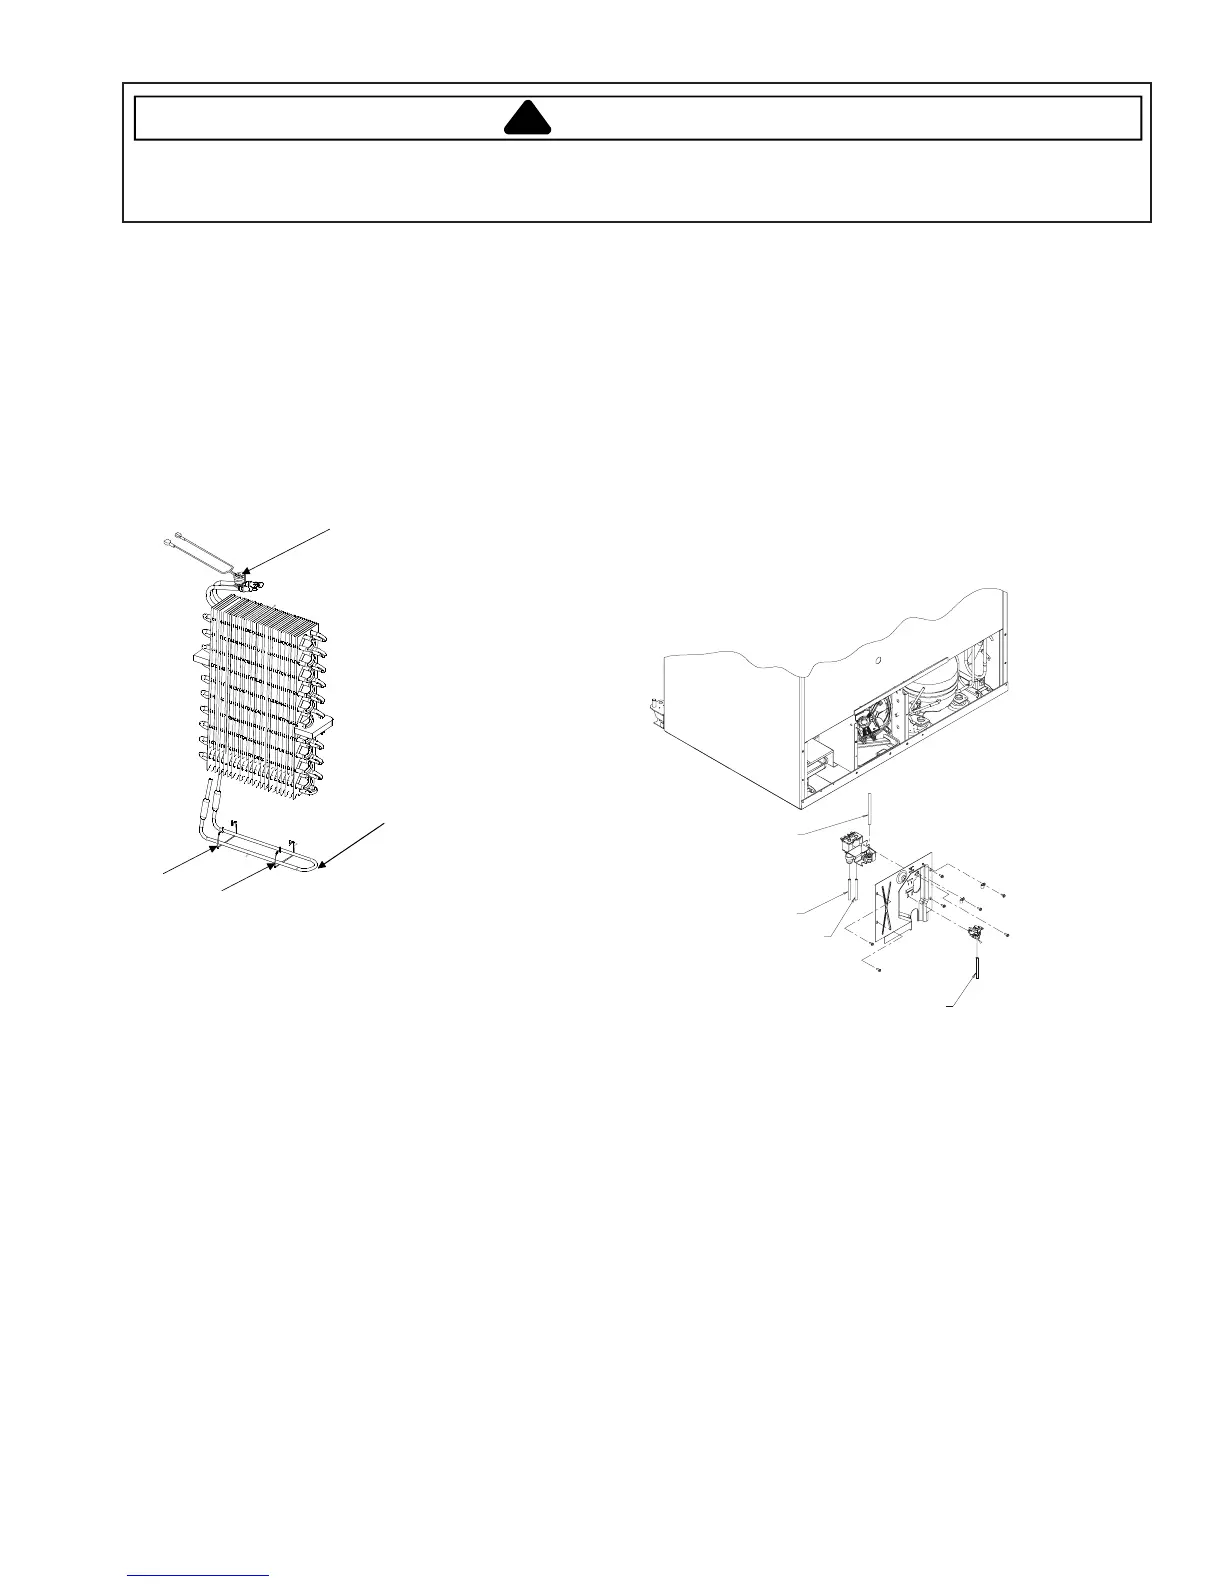
Defrost Terminator (Thermostat)
1. Remove all freezer shelving.
2. Remove lower evaporator cover hex head screws.
3. Remove evaporator cover.
4. Disconnect orange lead from defrost heater.
5. Cut Brown lead close to defrost terminator.
6. Unclip defrost terminator from evaporator coil.
7. Replace terminator and use wire nut(s) included in
defrost terminator kit.
8. Reverse procedure to reassemble.
DEFROST THERMOSTAT
DEFROST HEATE
EATER CLIPS
Defrost Heater
1. Remove all freezer shelving..
2. Remove lower evaporator cover hex head screws..
3. Remove evaporator cover.
4. Grasp evaporator by left side to release coil from
retainer clips.
5. Turn Evaporator slightly to expose heater leads.
6. Disconnect heater leads from harness.
7. Release heater clips holding heater to evaporator coil.
8. Remove heater.
9. Reverse procedure to reassemble.
Ice Maker Removal (some models)
1. Remove auger ice bucket.
2. Disconnect ice maker harness from rear bulkhead.
3. Remove front two screws from left ice bucket rail.
4. Remove screws supporting ice maker from side
bulkhead.
5. Remove ice maker.
6. Reverse procedure to reassemble.
NOTE: Make sure to get fill tube inserted in to fill cup
fully when reassembling
Machine Compartment
Water Valve (some models)
1. Remove water valve cover plate on left side of
machine compartment.
2. Disconnect wiring from water valve, reference color of
connector to correct solenoid.
3. Disconnect water tubing from water valve, reference or
mark tubing to ensure correct hookup upon
reassemble.
4. Remove hex screw attaching valve to water valve cover
plate.
5. Reverse procedure to reassemble.
(BLUE LINE)
TO WATER TANK
TO ICE MAKER
TO WATER FILTER
(YELLOW LINE)
Condenser Fan Motor and Blade
1. Remove machine compartment hex screws.
2. Remove cover
3. Disconnect wiring harness connector from condenser
motor.
4. Remove hex screws from mounting brackets
attached to motor.
5. Remove motor and fan blade out the rear of shroud.
6. Remove the retainer nut to remove fan blade.
7. Reverse procedure to reassemble.
Compressor
1. Remove machine compartment hex screws.
2. Remove cover.
3. Remove bale strap which retains overload/relay/
capacitor.
4. Pull overload/relay/capacitor assembly off of
compressor terminals.
5. Disconnect ground wires attached to compressor.
 Loading...