Installation instructions Set up panels
HeatMiser II Installation guide. © 2014, all rights reserved P a g e | 10
SET UP P ANELS
1. Position both panels next to one another.
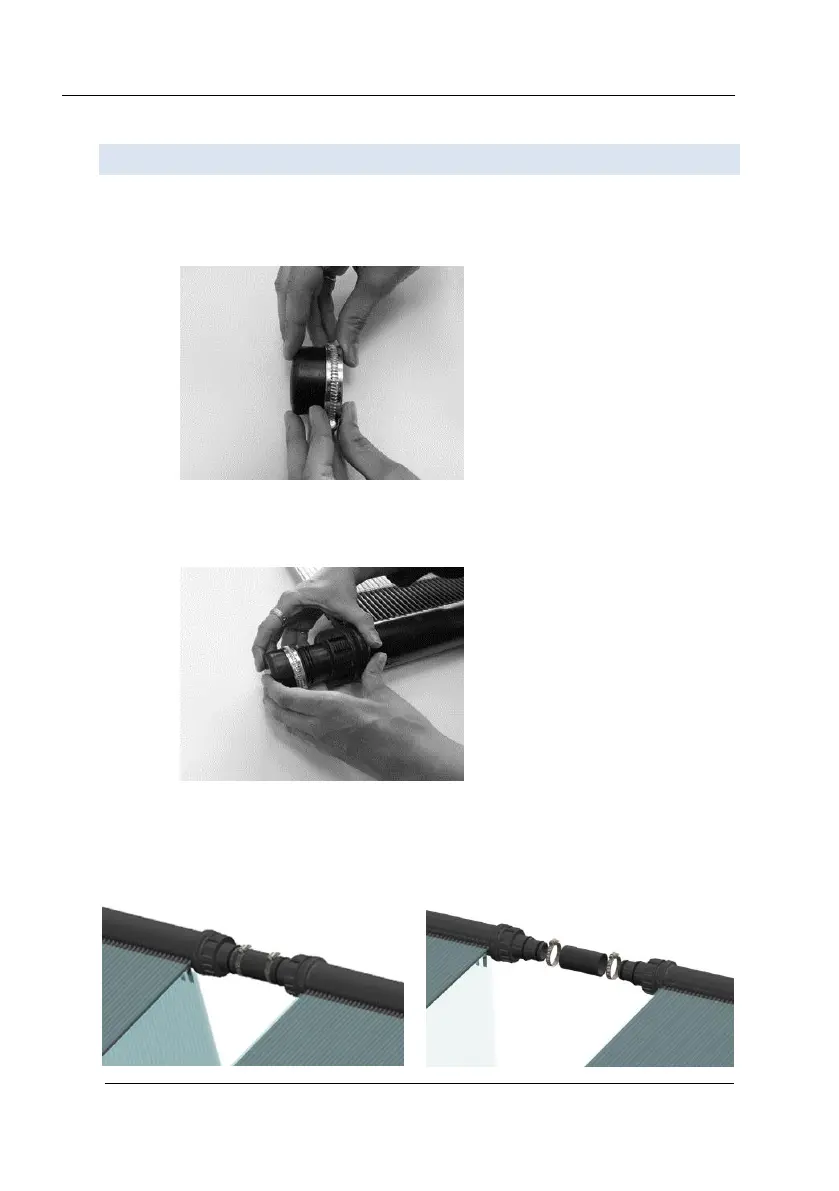
2. Grab a rubber end cap and a Metal hose clamp. Slide the Metal hose clamp over the
rubber end cap to it is as close to the edge as possible.
3. Push the rubber end cap firmly over the collector outlet and tighten the metal hose
clamp with a screwdriver. You will require four (4) rubber end caps to block four
outlets (see illustration on page 11).
4. Grab one of the rubber connectors and two metal hose clamps. Slide the two metal
hose clamps over the connector. Push both ends of the connector over the top
outlets of each panel. Slide the metal hose clamps over the outlet and tighten firmly
with a screwdriver.