14
121101
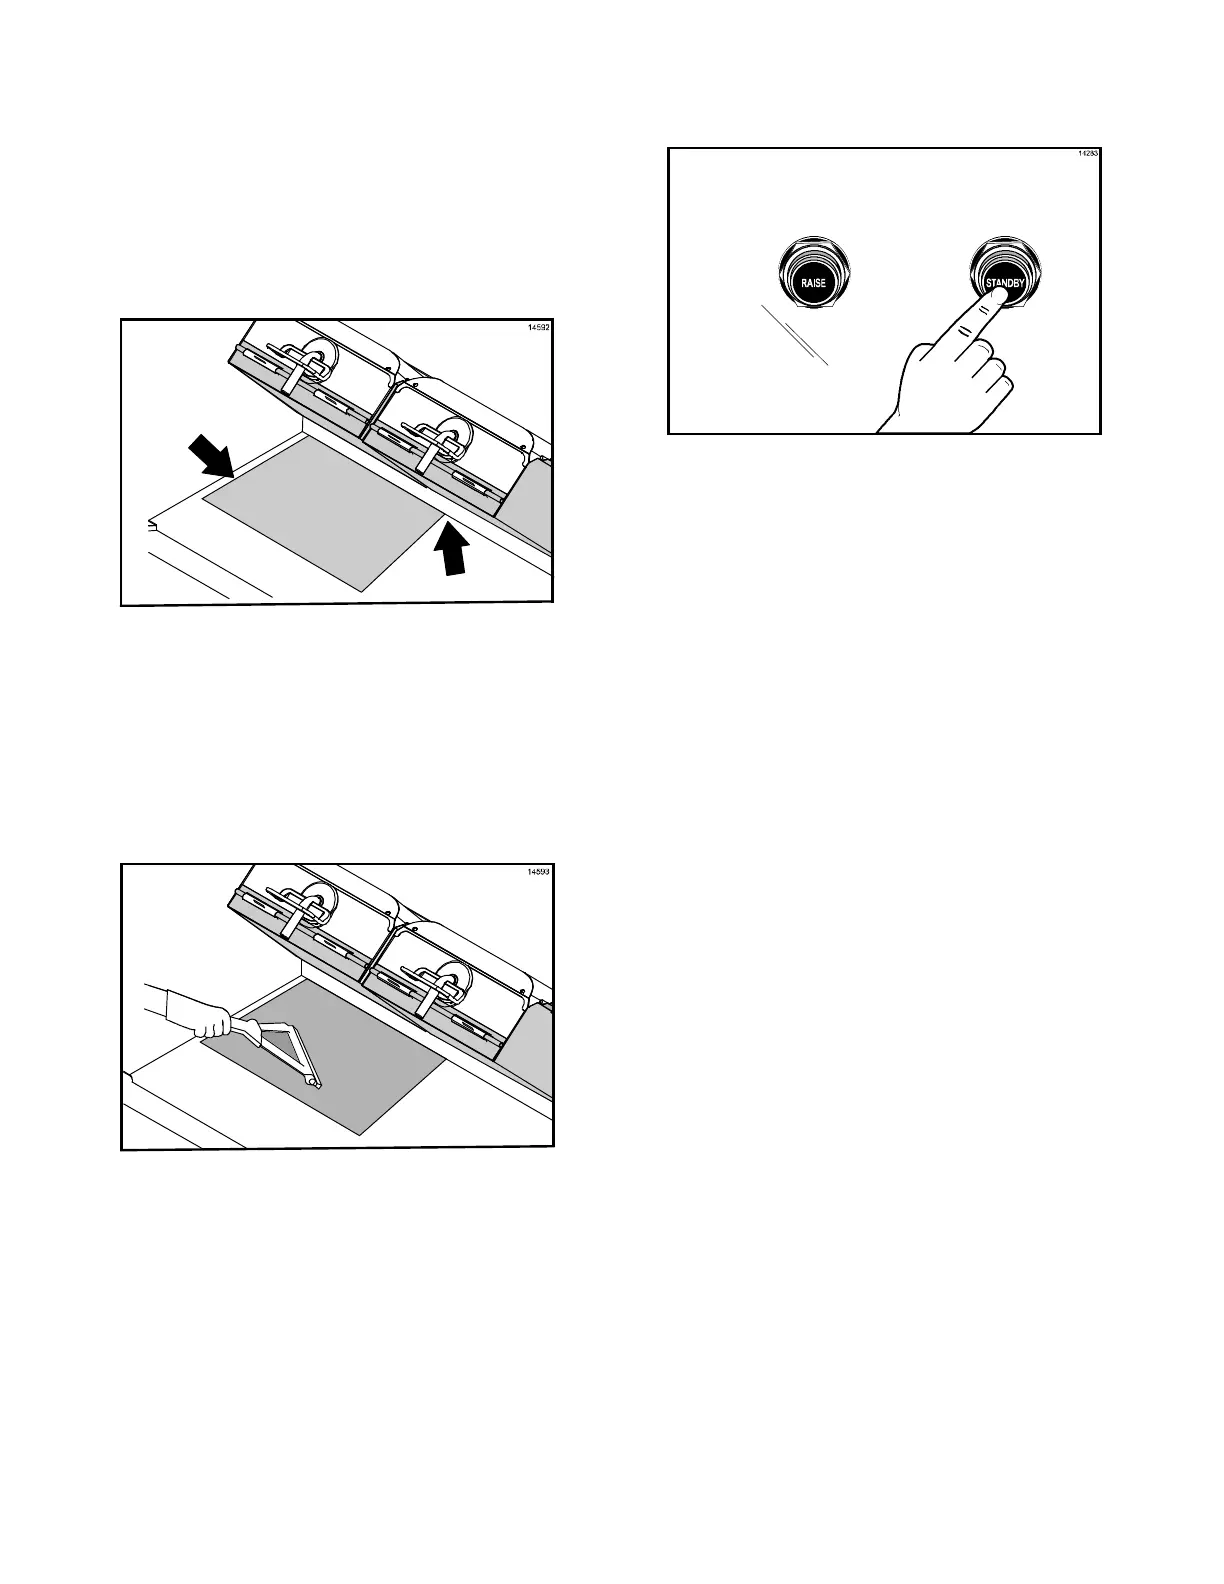
8. With the longest side of the lower release
sheet facing the back of the grill, hold the
release sheet about one inch from the
end of each side. Align the back edge of
the release sheet with the back splash
and the side edge of the grill.
(See Figure 16.)
Figure 16
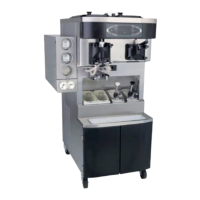
9. Using the grill squeegee, gently squeegee
out air bubbles, making sure not to crease
or fold the release sheet. (See Figure 17.)
Figure 17
10. Repeat the last 2 steps for the other
half of the grill surface. The release
sheets will overlap about 1” (25 mm) in
the middle.
Note: When properly applied, the release
sheet will lay flat, with only a few small air
bubbles.
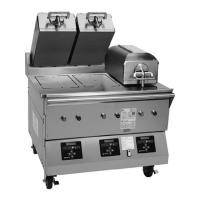
11. Press the Standby button to close the
platen. (See Figure 18.)
Figure 18
12. After the platen has closed, the grill will
start heating up to the proper
temperature. The control will display the
following message until the grill has
reached the proper temperature, ”TOO
COOL FOR AUTO L EVELING”.
13. When the grill has reached the proper
temperature, the screen will display,
“PLEASE WAIT FOR AUTO LEVELING”.
14. When the Auto Leveling is complete, the
upper platen will raise. The screen will
display the product that had been
selected.
The release sheet must be changed when:
S Product sticks to the release sheet.
S Carbon builds up, causing problems in
taste or appearance.
S There is a tear in the release sheet in
the cooking area.
S The release material substance is worn
from the release sheet.
Note: Reverse the cooking side of the release
sheets on a daily basis.
Care of Release Sheets
S DO NOT fold or crease.
S DO NOT touch with any sharp object or
abrasive.
S DO NOT hose with hot water or soak in
water.
S DO NOT place under other objects.