12
Trackability Adjustments
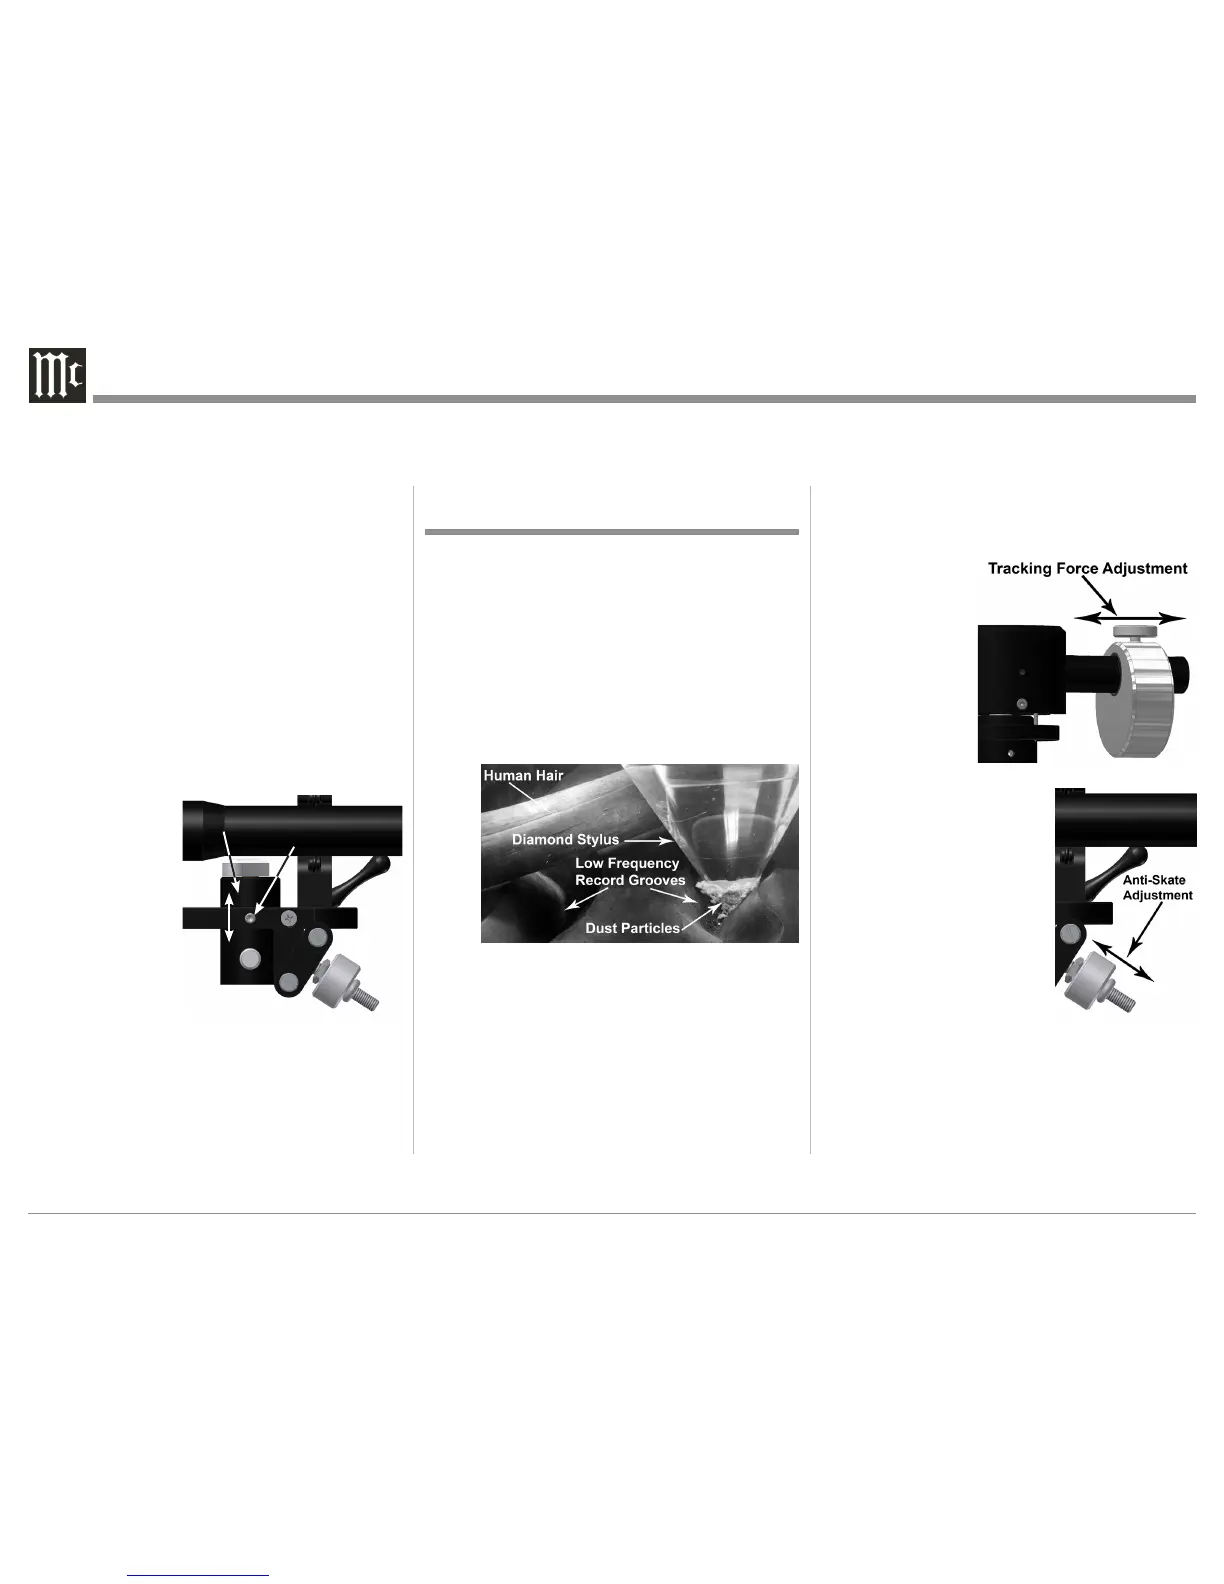
During playback of Phonograph Recordings, the
Diamond tip of the stylus assembly is subjected to all
kinds of extreme operating conditions. One of those
conditions is the forces constantly trying to push the
stylus up and out of the grooved wall of the recording.
The Tracking Force Pressure is applied in a downward
direction to keep the stylus in contact with the groove
wall. Another condition is the uneven side to side pres-
sure applied to the stylus as it tries to stay in contact
with both sides of the groove wall of the recording.
Refer to figure 33.
This is a function of all pivoting Tone Arms where
the headshell is usually angled inwards to minimize
the playback arc. The Anti-Skating Adjustment of the
MT10 Tone Arm permits equalizing for even side to
side pressure.
The correct amount of Tracking Force Pressure and
Anti-Skate Pressure varies with the exact shape of the
Diamond Stylus Tip, Tone Arm Characteristics and fi-
nally the audio signal (both frequency and amplitude)
contained in the groove wall of the record playing.
The way to achieve the best performance and the
least amount of Diamond Stylus Tip/Record Groove
wear is to use special test recordings, such as the
Shure Trackablity Test Record (TTR101). Both Track-
ing Force and Anti-
Skate Adjustments
are made as a result
of listening to the
specially recorded
tracks and following
the instructions to re-
duce different forms
of audible distortions.
Refer to figures 34
and 35.
While making these
adjustments, do not exceed
the manufacturers recommend
Maximum Tracking Force Pres-
sure Setting.
Your McIntosh Dealer, using
Test Measurement Equipment
and Professional Test Record-
ings, can achieve via adjust-
ments, the best possible sound
quality from your record col-
lection and ensure the greatest
longevity.
Figure 34
Figure 35
Figure 33
Tone Arm Lift Height
The MT10 Tone Arm Lift is pre-adjusted to accommo-
date the combined thickness of the supplied Turntable
Record Mat and Phonograph Records. If a different
Record Mat and/or thicker Phonograph Record are
used, there may not be sufficient clearance between
the Phono Cartridge Stylus and the Phonograph
Record surface with the Tone Arm Lift in the cue up
position. Perform the following steps to readjust the
Tone Arm Lift:
1. Secure the Tone Arm in the Tone Arm Rest.
Note: Before making any adjustments to the Tone
Arm Lift check to see if the Tone Arm is paral-
lel to the record surface when playing a record
first. See “Tone Arm Height” section on page
11.
2. Using the appropriate tool, carefully loosen the
Set Screw while
supporting the
bottom the Tone
Arm Lift. Refer to
figure 32.
3. Re-position the
Tone Arm Lift
Mechanism up-
wards slightly and
then tighten the
Set Screw.
4. Check the clear-
ance between the
Phono Cartridge Stylus and the Phonograph Record
surface with the Tone Arm Lift in the cue up posi-
tion. If necessary, readjust the position of the Tone
Arm Lift and re-check.
5. With the Turntable stopped and no Phonograph
record on the record mat, make sure the Phono Car-
Figure 32
Set Screw
Tone Arm Lift
tridge Stylus comes in contact with the record mat
with the Tone Arm Lift in the down position.