9
10. Locate the Tone Arm Height Gauge (used for the McIn-
tosh MCC10 Cartridge) from inside the accessory box.
11. The gauge should just fit between the Tone Arm Hous-
ing and the Mounting Plate of the Tone Arm. This will
verify the preset Tone Arm Height has not changed
during shipping. Refer to figure 14. If the space has
changed, refer to
page 11 for ad-
ditional informa-
tion on setting
the Tone Arm
Height.
12. Place the
McIntosh MT10
Turntable in its
operation loca-
tion.
Notes: 1. To
re-
duce
the chance of acoustic feedback, locate the
turntable the greatest possible distance
from the system loudspeakers.
2. To minimize the possibility of the cartridge
stylus jumping record grooves, place the
turntable on a mechanically stable surface
such as wall shelving anchored to wall
studs.
belt into the
recessed groove
on the platter.
19. Locate the
Turntable Plat-
ter Mat and
place it on top
of the platter.
20. Locate the
McIntosh Bub-
ble Level and
place it on the
Turntable Plat-
ter Mat. If the
Bubble is not in
the center circle
of the Bubble
Level, adjust
the height
of the Turn-
table Feet (by
rotating them
clockwise or
counter clock-
wise) until it is
level. Refer to
figure 21.
21. Carefully slide
off the clear
protective cov-
er from the
cartridge
by pulling
the cover
straight to-
ward you.
22. Proceed
to “Rear
Panel Con-
nections and Adjustments” on page 13.
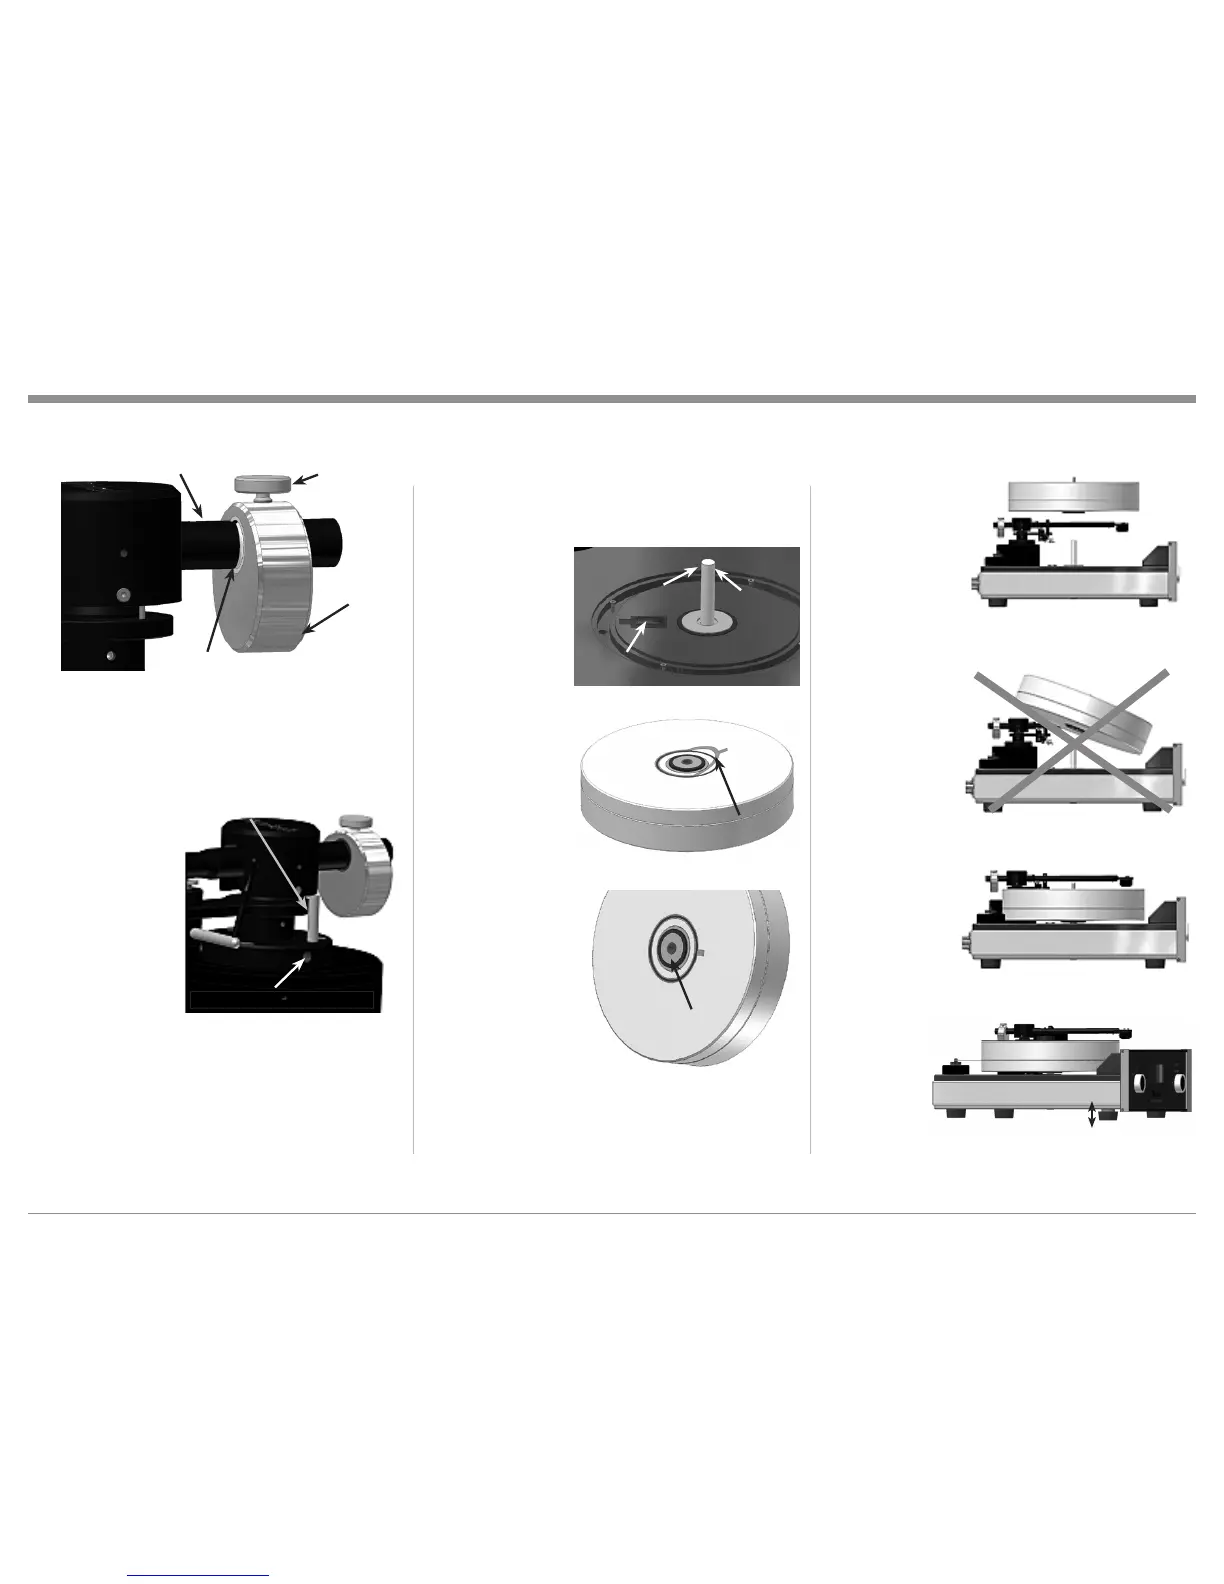
13. Remove the protective film from the Optical Sensor
located on the Turntable Top Surface. Refer to figure 15.
14. Remove the protective film from the bottom of the
Turntable Platter covering the Optical Ring. Refer to
figure 16.
15. Remove the pro-
tective film from
the bottom of the
Turntable Vertical
Bearing opening.
Refer to figure 17.
16. Locate the sup-
plied Turntable
Bearing Oil and
place two small
drops of Oil on
the top sides of the
Vertical Bearing
Ceramic Shaft.
Refer to figure 15.
17. Very carefully
center the Vertical
Bearing Ceramic
Shaft with the Ver-
tical Bearing open-
ing on the bottom
of the Turntable
Platter. Lower the
Platter onto the Ce-
ramic Shaft while
keeping the platter
parallel with the
top surface of the
Turntable. Refer
to figures 18, 19
and 20.
18. Using the supplied cloth gloves, place the belt onto the
circumference of the platter and then onto the pulley of
the motor. Rotate the platter by hand while seating the
Assembling the Turntable
Figure 13
Counter-
weight
knurled
knob
Rear of Tone Arm
McIntosh MCC10 Position Marking
Figure 14
Tone Arm Height Set Screw
MCC10 Height Gauge
Figure 18
Figure 19
Figure 16
Remove Film
Figure 17
Remove Film
Figure 15
Remove Film
Two small
drops of
the oil
Two small
drops of
the oil
Figure 21
Figure 20