Assembly Instructions & User’s Manual
Step 6
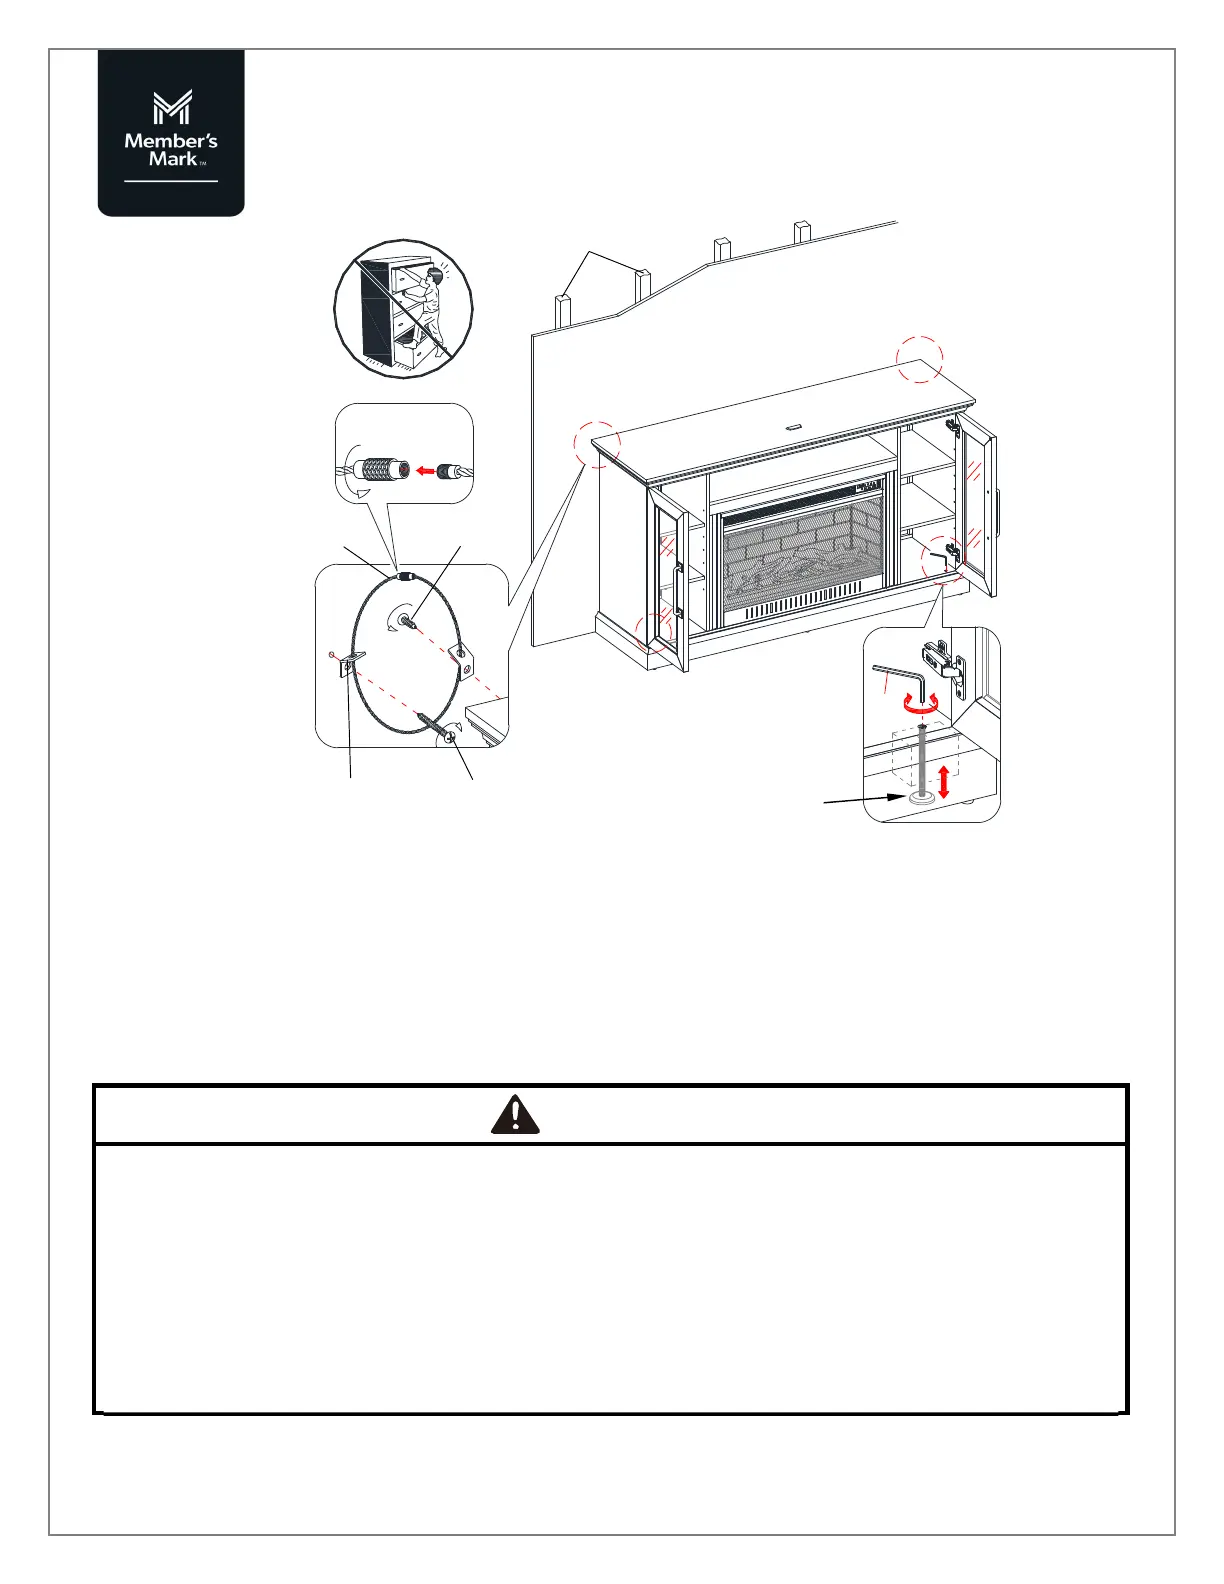
a) Ask for assistance to position the assembled unit at the desired location against a wall. Open the door and
you will see a hole at each front corner of the base, use the enclosed Hex Wrench (H4) to turn the leveler
and adjust the height of the unit, until the unit is level.
b) Now, follow the instructions printed on the plastic bag containing the Tipping Restraint Hardware (H6) to
attach the tip-over restraints to the unit and the wall.
c) Connect the fireplace to the power transformer. Follow the operating manual for the electric fireplace insert
to control your fireplace.
Need Assistance? Visit us at: samsclub.com/membersmarkhelp
H4
Wall
Wooden stud
Short screw
Long screw
Metal bracket
Floor leveler
Steel cable
Connector
H6
WARNING
Unit must be placed on a level surface or leveled with included hardware (when applicable).
Do not sit or stand on or allow children to climb, sit or stand on the assembled product.
For safety reasons, it is imperative that this unit be mounted to the wall.
Do not use without installing the tip restraint.
Unit can tip over causing severe injury or death.
Do not exceed the recommended weight limits.
Evenly distribute the weight on each level and always keep the heavier loads on the bottom.
Before cutting, drilling or hammering into any wall or floor surface, verify the location of
electrical, plumbing and gas lines. Cutting may cause serious injury.
 Loading...