33
Meritor Differential Carrier 18X
2 Maintenance
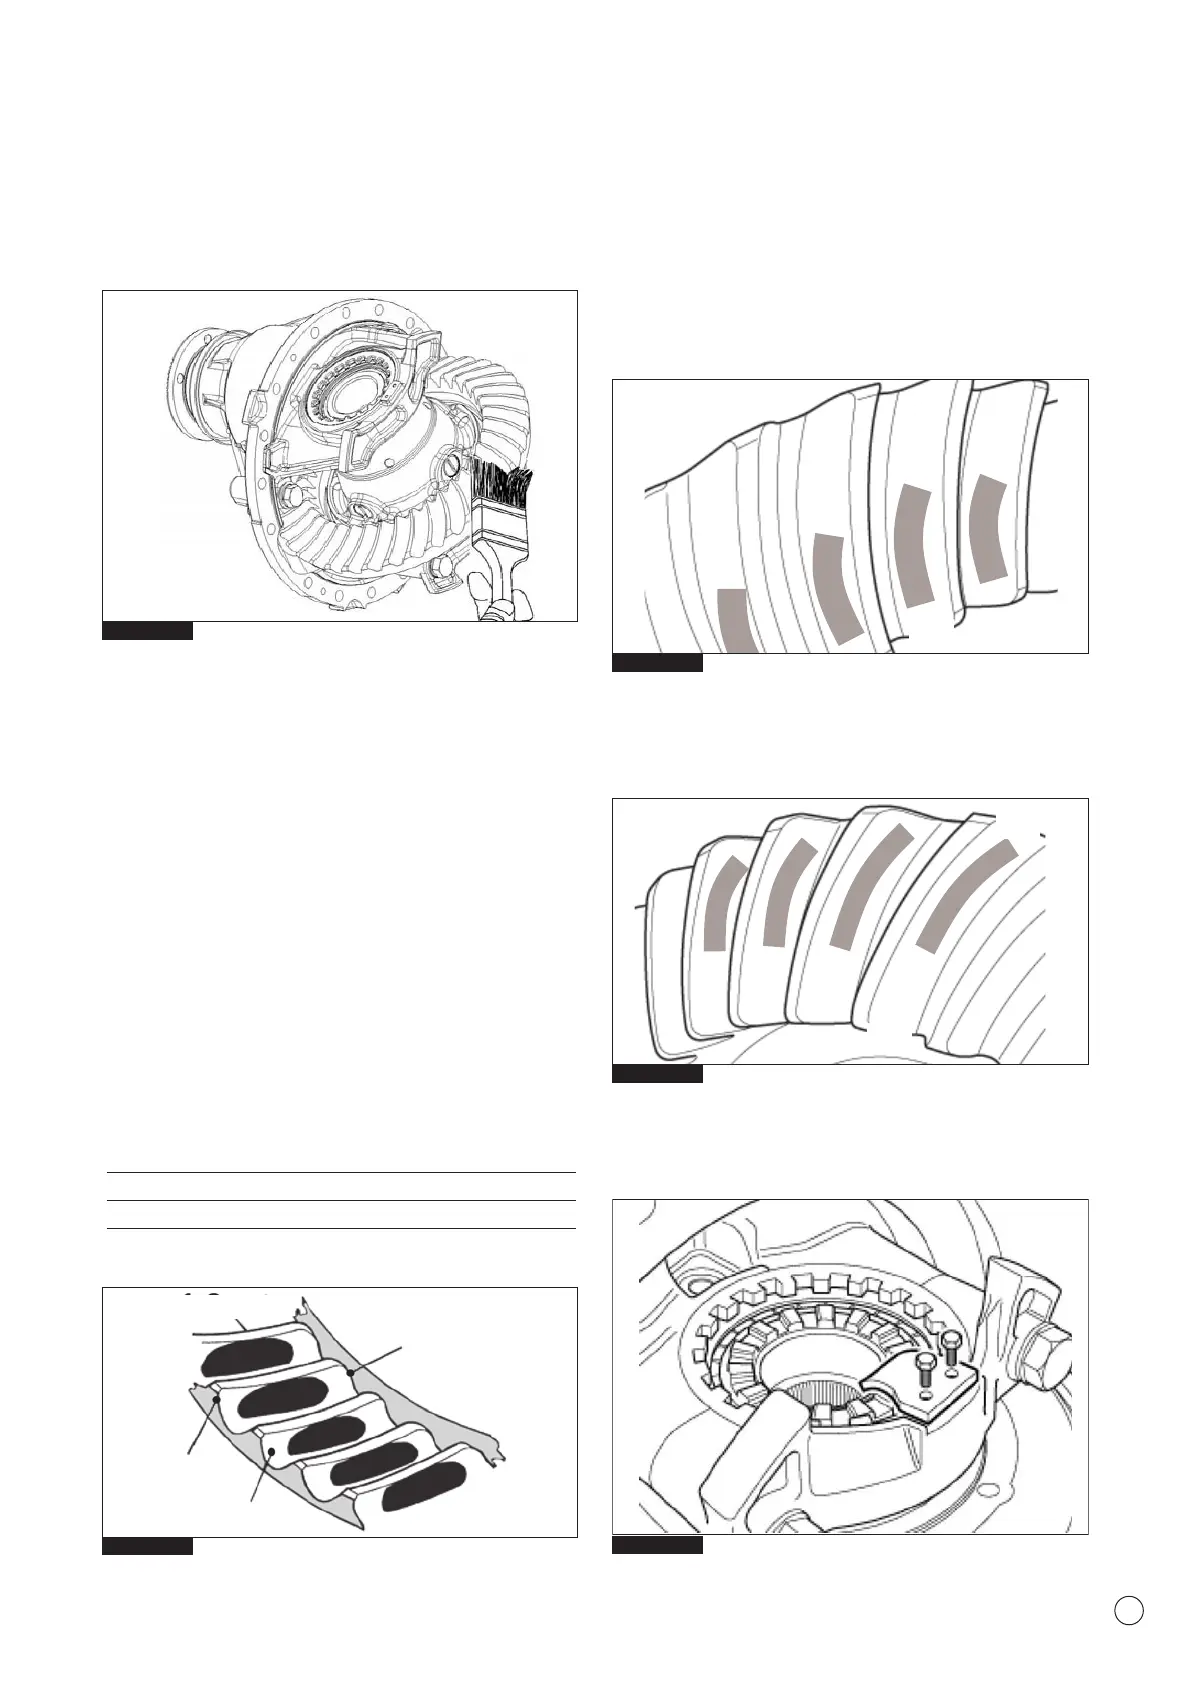
Tooth contact patterns of hypoid gear set.
With a brush, apply a thin coat of Prussian blue marking
compound to the drive gear teeth (Fig 2.55). Rotate the pinion
companion flange by hand (once in the normal direction and then
once in the reverse direction) while applying a load to the drive
gear, so that the revolution torque is applied to the drive pinion
and examine the contact marks left by the pinion teeth on the
drive gear teeth. The information provided for Drive Side & Coast
Side below indicates correct tooth contact patterns. For detailed
information regarding tooth contact pattern problems, causes and
rectification advice, refer to Section 3 Hypoid Gearing Contact.
WARNING
Contact pattern can vary in length and shape but should not
run off the tooth at any point. Adjust used gear sets to display
the same contact pattern observed before disassembly.
Tooth contact pattern of the gear set
1. Coast (concave side)
2. Toe
3. Drive (convex side)
4. Heel
Drive side (Fig 2.57) (Convex Side)
Central toward the toe over the face of the gear tooth and in the
centre on the tooth profile.
Coast side (Fig 2.58) (Concave Side)
Central toward the heel over the face of the gear tooth and in the
centre along the tooth profile.
1. After the correct tooth contact patterns have been established,
fit the adjusting ring locks and new screws (Fig.2.59).
Tighten the screws to the correct torque value 10-12 Nm.
Fig. 2.57
Fig. 2.58
Fig. 2.55
Fig. 2.59
HEEL
TOE
HEEL
TOE
Drive side
Convex
Fig. 2.56
Coast side
Concave
1 - Coast
2 - Toe
4 - Heel
3 - Drive