23
4.6 Replacement of gas springs
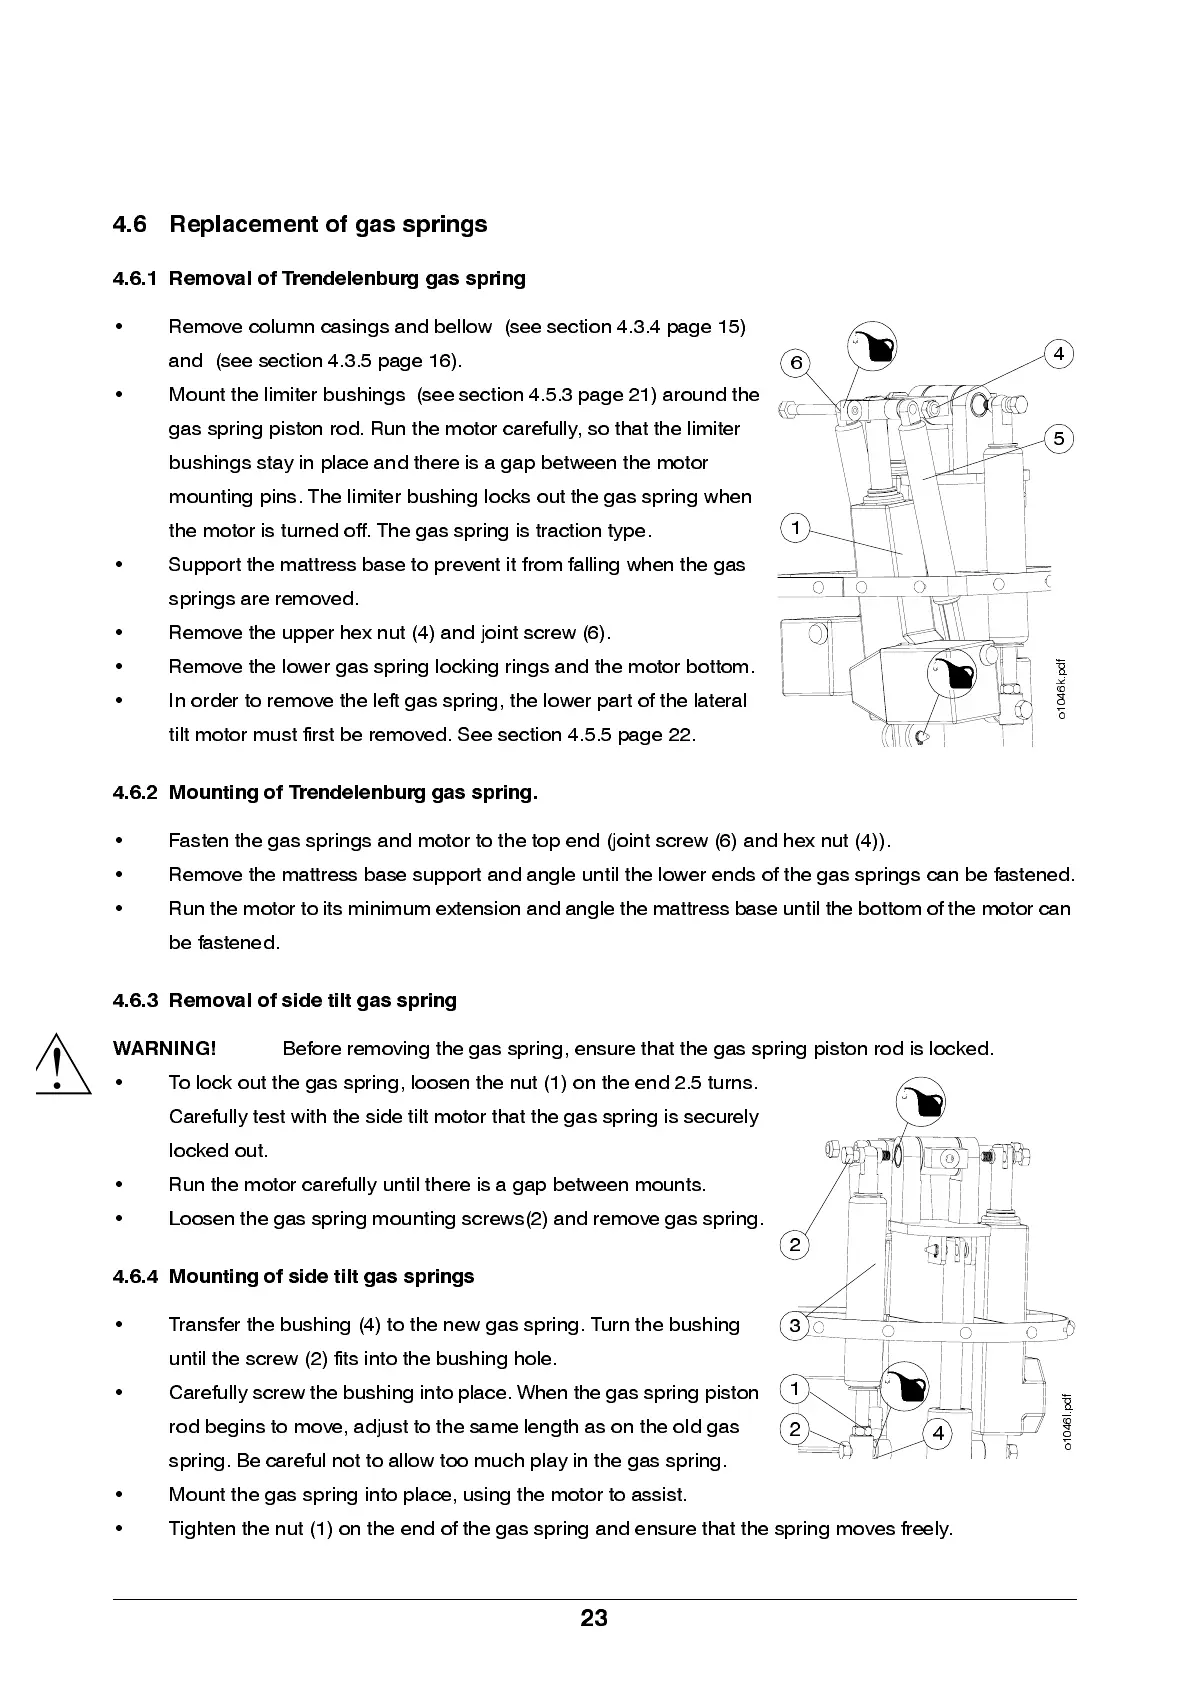
4.6.1 Removal of Trendelenburg gas spring
• Remove column casings and bellow (see section 4.3.4 page 15)
and (see section 4.3.5 page 16).
• Mount the limiter bushings (see section 4.5.3 page 21) around the
gas sp rin g p is ton rod. Run the m otor carefu ll y, so that the limite r
bushings stay in place and there is a gap between the motor
mounting pins. The limiter bushing locks out the gas spring when
the mo tor is turn e d off. Th e g as sp ring is trac tion typ e .
• Support the mattress base to prevent it from falling when the gas
springs are removed.
• Remove the upper hex nut (4) and joint screw (6).
• Remove the lower gas spring locking rings and the motor bottom.
• In order to remo ve the le ft gas spri ng , the lowe r pa rt of th e la tera l
tilt motor mus t first be rem ove d . Se e se ction 4.5.5 pag e 22.
4.6.2 Mounting of Trendelenburg gas spring.
• Fas ten the ga s spring s and motor to the top end (joint screw (6) and hex nut (4)).
• Remove the mattress base support and angle until the lower ends of the gas springs can be fastened.
• Run the motor to its minimum extension and angle the matt ress base until t he bottom of the motor can
be fastened.
4.6.3 Removal of side tilt gas spring
WARNING!
Before removi ng the g as spring, ens ure th at the gas spring piston rod is locked.
• To lock out the gas sprin g, loosen th e nut (1) on the e nd 2.5 turns.
C arefu lly test with th e s ide tilt motor that the gas spring is securely
locked out.
• Run the motor carefully until th ere is a gap between m ounts.
• Loosen t he ga s spr i ng moun t i ng sc r e ws ( 2 ) and r em ov e gas spr ing .
4.6.4 Mounting of side tilt gas sp rings
• Transfer the bushing (4) to the new gas spring. Turn the bushing
un til the screw (2) fits into th e bu shing hole.
• Ca ref ul ly s c r ew t he bush in g i nt o pl ac e. Wh en t h e gas spr ing pist o n
rod begins to move, adjust to the same length as on the old gas
spring. Be careful not to allow too much play in th e ga s spring .
• M ount th e g a s sprin g into pla ce, using the motor to assist.
• Tigh te n the nu t (1) on the en d of th e gas sp ring an d ens u re tha t the sp rin g m ove s free ly.
6
5
4
o
1
0
4
6
k
.
p
d
f
1
!
1
2
2
3
o
1
0
4
6
l
.
p
d
f
4