45
APPENDIX A: OPTIONAL RAIN HOOD
A weather-protected version of MINA is available with a rain
hood that safeguards the loudspeaker’s electronics from the
elements when used outdoors. The rain hood — which
latches to the user panel and is easily installed and removed
as necessary — is made of a durable, high-impact polycar-
bonate that is also transparent, allowing the loudspeaker's
connections and LEDs to be visible. MINA’s heat sink does
not require a rain hood as it is water-sealed.
INSTALLING THE MINA RAIN HOOD
To install the MINA rain hood:
1. Attach any required cables to the loudspeaker.
2. If the rain hood’s gasket material is not attached, firmly
attach it to the rain hood’s inner edges. Do not attach the
gasket directly to the user panel.
3. Attach the rain hood by slipping it under the flange at the
top of the user panel, placing it flush against the user
panel, aligning the rain hood’s holes with those in the
panel.
4. Secure the rain hood to the user panel by inserting the
rain hood’s quick-clips in the two bottom holes. Insert
the clips all the way so they lock.
5. Secure the rain hood to the user panel by inserting the
rain hood’s wing-head studs in the two bottom holes.
Press firmly to compress the rain hood’s gasket and turn
clockwise one quarter turn. Make sure the studs are fully
inserted, rotated, and locked.
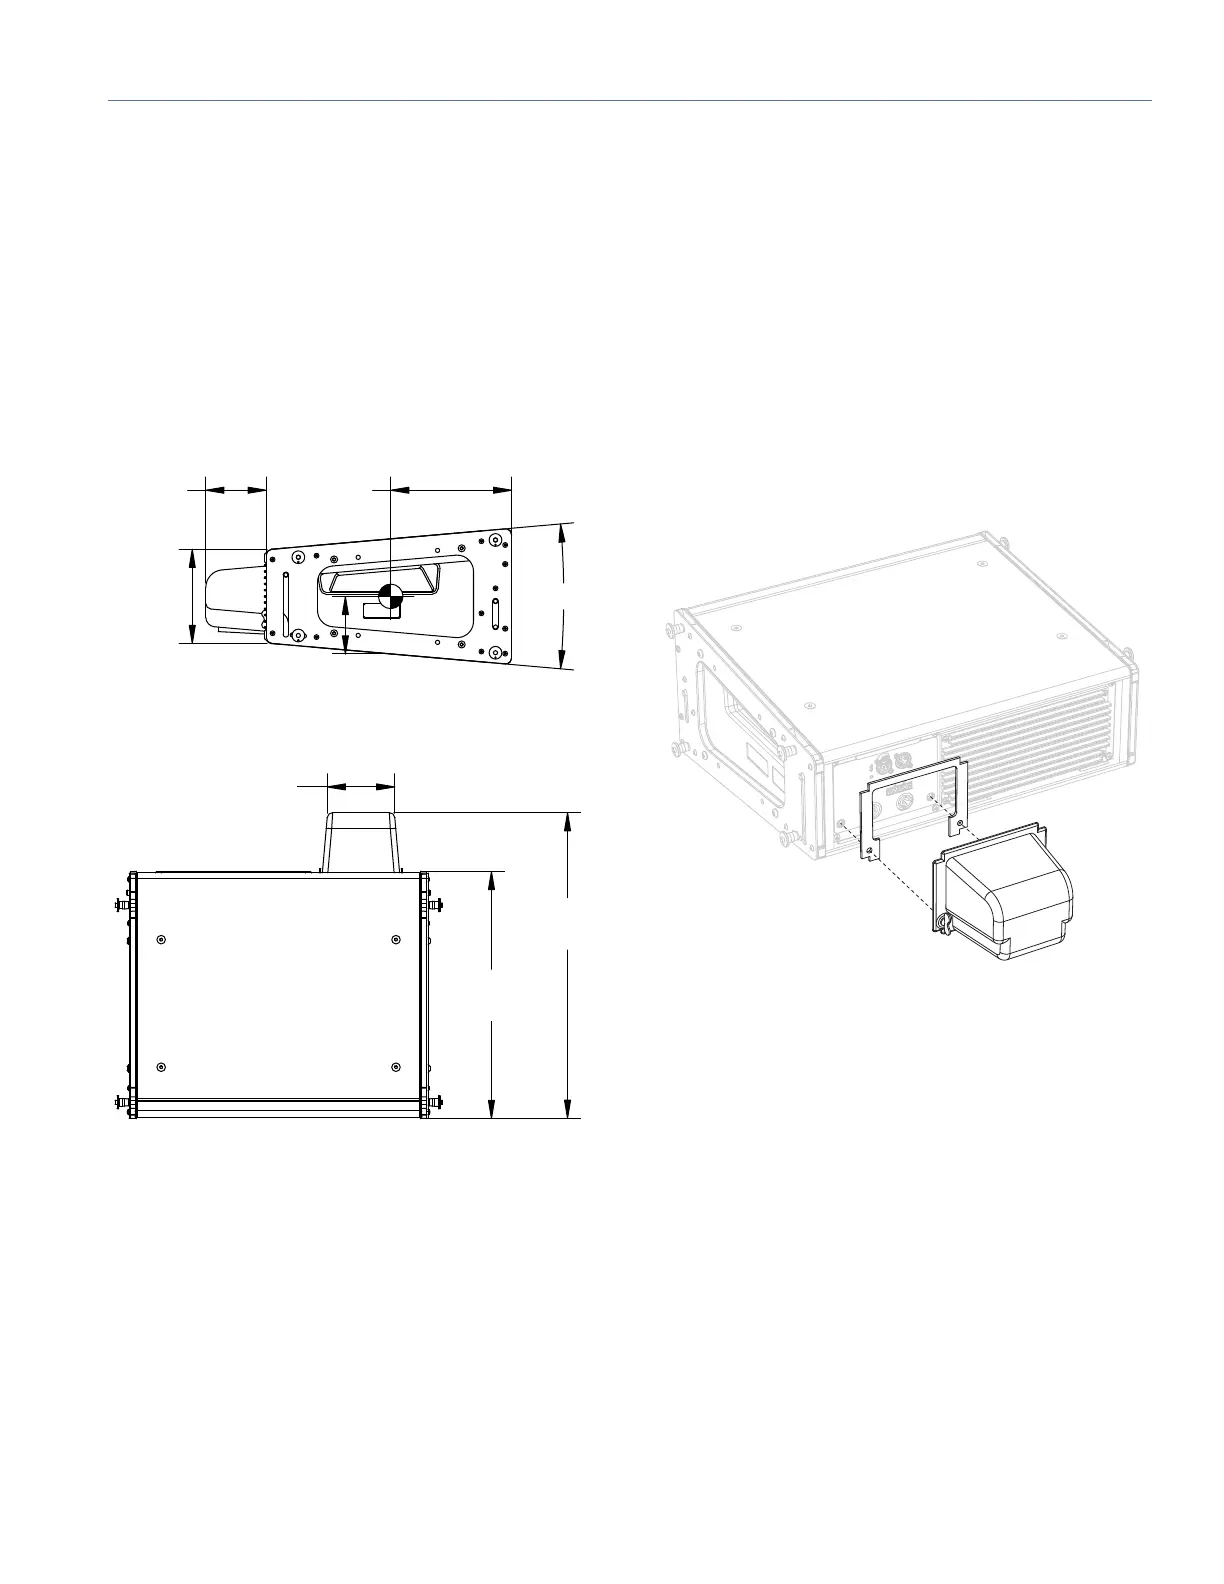
MINA Dimensions with Rain Hood
3.75
[95 mm]
10°
5.85
[149 mm]
7.60
[193 mm]
3.56
[90 mm]
18.95
[481 mm]
4.19
[106 mm]
15.32
[389 mm]
[