Locks,
Fittings
and
Body
(5) Collapse the frame into its stowage position in
the
rear
compa
rtment
an d
lay
the
hood
mate
rial on
the
luggage
compartment
lid.
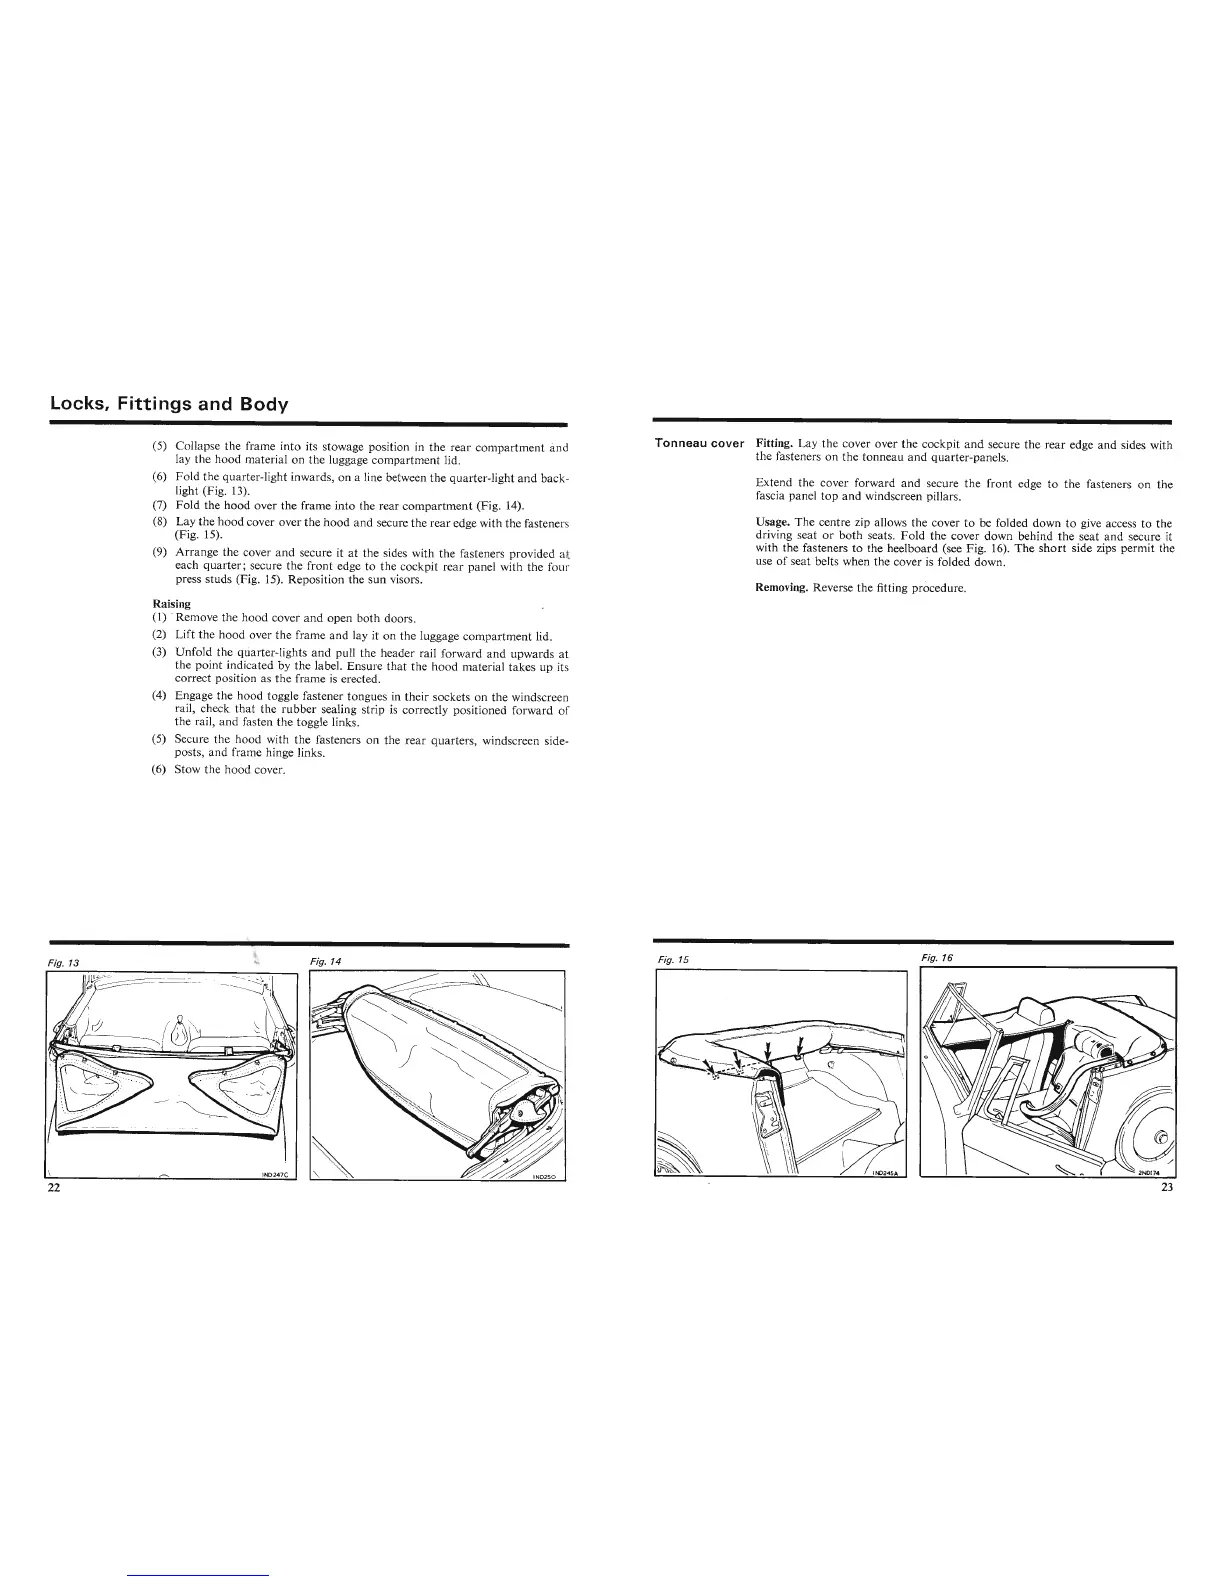
(6)
Fold
the
quarte
r-light inwards, on a line between
the
qua
rter-light
and
back-
light (Fig. 13).
(7)
Fold
the
hood
over the frame into the rear
compartment
(Fig. 14).
(8)
Lay the
hood
cover over the
hood
and
secure the
rear
edge with the fasteners
(Fig. 15).
(9)
Arrange
the cover
and
secure it at the sides with
the
fasteners provided at
each
quarter;
secure
the
front
edge to the cockpit rea r panel with the four
press
studs (Fig. 15). Reposition the
sun
visors.
Raising
(1) . Remove the
hood
cover
and
open
both
doors.
(2)
Lift
the
hood
over
the
f
rame
and
lay it on the luggage
compartment
lid.
(3)
Unfold
the qua rte r-lights
and
pull the header rail forward
and
upwards at
the
point
indicated by the label. Ensure
that
the
hood
material
takes
up its
correct position as
the
frame is erected.
(4) Engage the
hood
toggle fastener tongues in their sockets on the windscreen
rail, check
that
the
rubber
sealing strip is correctly positioned forward of
the rail, and fasten the toggle links.
(5) Secure the hood with the fasteners on the
rear
quarte
rs, windsc reen side-
posts, and frame hinge links.
(6) Stow the
hood
cover.
Tonneau
cover
Fitting. Lay the cover over the cockpit
and
secure the
rear
edge
and
sides with
the fasteners on the
tonneau
and
quarter-panels.
Extend the cover forward
and
secure
the
front edge to the fasteners on the
fascia panel
top
and
windscreen pillars.
Usage. The centre zip allows the cover to be folded down to give access to the
driving seat or
both
seats.
Fold
the
cover down behind
the
seat
and
secure it
with the fasteners to the heel
board
(see Fig. 16).
The
short
side zips permit th
use of seat belts when the cover is folded down.
Removing. Reverse the fitting procedure.
Fig. 13
Fig.
14
Fig. 15
Fig. 16
Fig. 16