22 Instructions GD1-GD10
The radio transmitter can be used to adjust certain control unit operation
parameters: there are four parameters and each of them can have four
different values:
1) Pause time: time during which the door remains open (in the automatic
closing mode).
2) Partial opening: partial door opening mode.
3) Motor force: maximum force beyond which the control unit recognizes
an obstacle and reverses the movement.
4) “OPEN” function: sequence of movements associated to each
“OPEN” command.
The following chapters describe different ways of customizing GD to
make it suitable for specific application requirements.
5 Additional Information
5.1 Advanced Adjustments
5.1.1 Adjusting the Parameters with the Radio Transmitter
Table 9
Parameter N° Setting
Action: operation to be performed at point 3 in the adjustment phase
Pause time
1
st
10s Press button T1 once
2
nd
20s (*) Press button T1 twice
3
rd
40s Press button T1 three times
4
th
80s Press button T1 four times
Partial opening
1
st
Opening the door 1/4 of the way Press button T2 once
2
nd
Opening the door half way (*) Press button T2 twice
3
rd
Opening the door 3/4 of the way Press button T2 three times
4
th
Opening the door all the way Press button T2 four times
Motor force
1
st
Low Press button T3 once
2
nd
Medium-low (*) Press button T3 twice
3
rd
Medium-high Press button T3 three times
4
th
High Press button T3 four times
“OPEN” function
1
st
“Open”-“Stop”-“Close”-“Stop” Press button T4 once
2
nd
“Open”-“Stop”-“Close”-“Open” (*) Press button T4 twice
3
rd
“Open”-“Close”-“Open”-“close” Press button T4 three times
4
th
“Open”-“Open”-“Open” (opening only) Press button T4 four times
(*) Original factory setting
The parameter adjustment operation can be performed using a radio
transmitter, provided it is memorized in mode 1 like the one supplied.
If no transmitter memorized in Mode 1 is available, you can memorize
one just for this phase and delete it immediately afterwards (see para-
graph 5.4.1 “Mode 1 memorization” and paragraph 5.4.4 “Deleting a
radio transmitter”).
WARNING: when using the transmitter to make adjustments you need
to give the control unit time to recognize the radio command; this means
that the buttons must be pressed and released slowly, held down for at
least one second, then released for one second and so on.
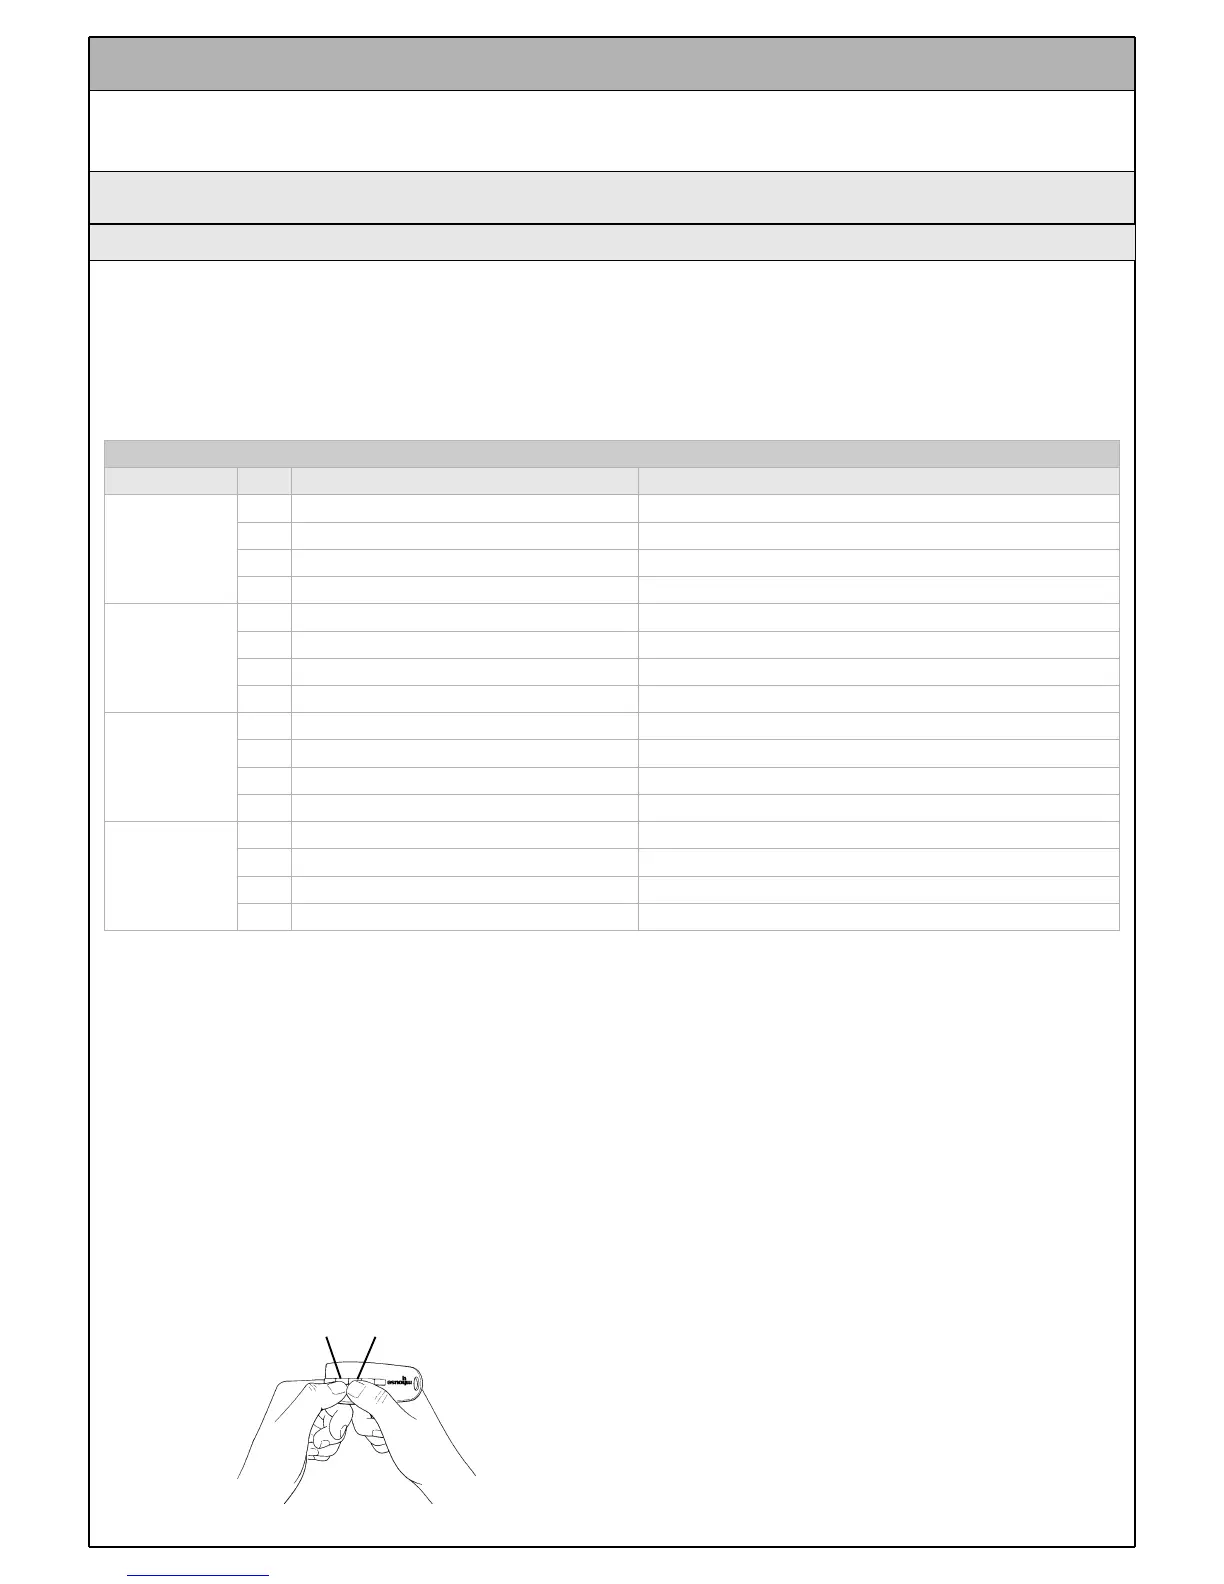
1 Press buttons T1 and T2 on the radio transmitter simultaneously for at
least 5s.
2 Release the two buttons.
3 Within 3 seconds, perform the action described in Table 9 based on
the parameter to be modified
Example: to set the pause time at 40 s.
1
st
Press buttons T1 and T2 and hold them down for at least 5s
2
nd
Release T1 and T2
3
th
Press button T1 three times
All the parameters can be adjusted as required without any contraindi-
cation; only the adjustment of the “motor force” requires special care:
• Do not use high force values to compensate for points of abnormal fric-
tion on the door. Excessive force can compromise the operation of the
safety system or damage the door.
• If the “motor force” control is used to assist the impact force reduction
system, measure the force again after each adjustment in compliance
with EN standard 12445.
• The weather conditions may affect the movement of the door, therefore
periodic re-adjustments may be necessary.
Figure 81
T1 T2
 Loading...