Do you have a question about the Mhouse WG10SK and is the answer not in the manual?
General safety instructions and warnings for personal safety during installation and operation.
Specific warnings and precautions to be followed before and during the installation process.
Warnings and guidelines related to the safe operation of the automated gate system.
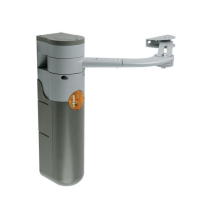
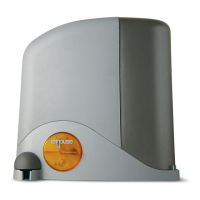
Details the WG20S automation system and its designated residential swing gate application.
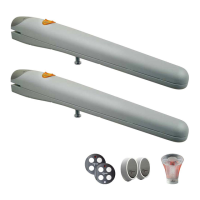
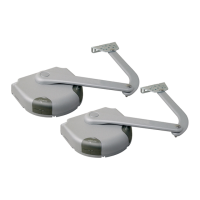
Lists all components required to set up a complete automation system, including optional items.
Verifies gate mechanical suitability, environment, and space requirements for automation.
Specifies the limits for gate dimensions (length, weight) and opening angle for the WG20S system.
Explains how to estimate the product's lifespan based on manoeuvre cycles and severity factors.
Establishes the position of system devices and connection cables, and ensures availability of materials.
Details the procedure for preparing electric cables, including checking connections and cable specifications.
Step-by-step guide for securely installing the WG10SK gearmotor onto the gate leaf and support.
Instructions for mounting and connecting the CL20S control unit, ensuring proper cable routing.
Guidance on positioning and connecting the PH100 photocells for safety and operation.
Steps for installing and connecting the FL100 flashing light to indicate gate movement.
Details on making electrical connections for various devices to the CL20S control unit.
Instructions on how to safely connect the automation system to the power supply.
Performs essential checks after powering up the control unit to ensure correct operation.
Procedure for the control unit to recognise connected devices on the ECSBus and STOP terminals.
Teaches the control unit the leaf's opening and closing limits for proper automation.
Verifies the functionality of radio transmitters and their associated commands.
Allows adjustment of key operating parameters such as leaf speed and operating cycle modes.
Verifies system safety devices and overall gate movement to ensure compliance and safety.
Final setup phase including documentation, affixing data plates, and informing the owner.
Explains how to configure system parameters like pause time, motor force, and opening functions via radio transmitter.
Introduces optional accessories that can integrate with the automation system, like buffer batteries and solar panels.
Describes how to add or remove devices like photocells and safety sensors from the system.
Details procedures for memorizing, deleting, and remotely adding radio transmitters to the control unit.
Provides a guide to diagnose and resolve common malfunctions encountered during installation or operation.
Explains diagnostic signals from devices like photocells, flashing lights, and control unit LEDs.
Safety guidelines for users of the automation system, including safe distance and child supervision.
Explains how to control the gate using the radio transmitter or an optional selector.
Instructions on how to manually operate the gate in case of power failure or system malfunction.
Lists basic maintenance tasks that the end-user can perform safely on the system.
Guide on how to replace the battery in the remote control transmitter when it is low.
Instructions for installing a support to hold the remote control.
| Max. gate leaf weight | 200 kg |
|---|---|
| Power supply | 230V AC |
| Motor voltage | 24V DC |
| Operating temperature | -20°C to +50°C |
| Protection level | IP44 |
| Motor Type | Electromechanical |
| Maximum Gate Weight | 200 kg |
| Protection Class | IP44 |
| Max. gate leaf length | 1.8 m |
| Maximum Gate Length | 1.8 m |
| Control Options | Remote control |
| Safety Features | Obstacle detection |